Are you unable to run QuickBooks due to QuickBooks server busy error? Don’t fret—follow this troubleshooting guide to fix this error effortlessly.
QuickBooks is a famous accounting application that is used to track and perform several business operations. Despite being an excellent application, it is prone to errors and issues that may impact user experience. The server busy error in QuickBooks is one such error that may occur while launching it. In another case, you may encounter the same error while opening the company file in QuickBooks. The inability to open QB or the company file is a matter of great concern for your business. Hence, users need to address this error as a priority to ensure that they are able to undertake different actions in QB successfully. To help you navigate through this error, we have provided all the reasons and their effective solutions below. So, let’s explore further and tackle the server issues easily.
This detailed guide will help you easily tackle server issues in QuickBooks. However, if you are facing time constraints or are unwilling to undertake the troubleshooting process on your own, you can reach out to our Proadvisor solutions’ support team at 1.855.888.3080 to get direct guidance with the error.
Table of Contents
What is QuickBooks Desktop Server Busy Error?
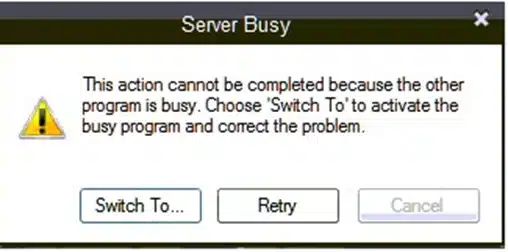
QuickBooks server busy error is a common error that occurs when the application is unable to complete a specific action due to too many programs running in the background. This error is accompanied by an error message stating, “Error: Server Busy. This action cannot be completed because the other program is busy.” When it comes to the triggers behind the occurrence of this error, interference from multiple background programs or a damaged QB program is mainly responsible. Thus, it is crucial to understand why this error occurs and how to resolve it by exploring this blog further.
Primary Reasons for QuickBooks Error Server Busy
Before learning how to fix QuickBooks error server busy, it is essential to learn why it arises. Understanding the reasons behind the error can help you navigate through the resolution process with better clarity. Below, we have mentioned the main triggers for the server busy error in QB –
- Multiple programs run in the background while running QuickBooks, which can prompt the server busy error.
- Your QuickBooks program might be damaged, and the software might not be correctly installed.
- A Windows update might be running while QuickBooks tries to access a Windows file.
- The Windows firewall or your antivirus software might create obstructions and blockages while running QuickBooks.
- QuickBooks’ company file might be set as read-only, and the inadequate permissions can lead to the server busy message.
- The internet settings in Windows might be misconfigured when opening the QuickBooks company file.
- Windows permissions are incorrectly set for QuickBooks Desktop to function.
- Your QuickBooks Desktop might be outdated, which can lead to the server busy error while running the company file.
- The user account control setup might be misconfigured, which can be another reason for the server busy error.
Now that we have learned about all the reasons behind the QB server busy error, let’s move to the next section to perform the resolution process.
Also Read : I am getting QuickBooks Error 7300
General Troubleshooting Solutions to Resolve the Server Busy Error When Closing QuickBooks 2023
Until the server busy error is resolved, users won’t be able to run QB and its features properly. Thus, it is essential to perform the following effective solutions to get rid of the error as quickly as possible.
Pre-considerations to be Considered
Before undertaking these solutions below, make sure that:
- All background programs are closed.
- There aren’t any dialog boxes open in other programs, like Microsoft Word.
- Google Desktop, Vista Security, Windows Defender, and Pivot Software Control are closed.
- The Spy Sweeper is turned off, or it is running in Gamer mode while QuickBooks Desktop is open.
Solution 1 – Repair QuickBooks
Sometimes, the server busy error in QuickBooks can arise when the QB program is damaged or incorrectly installed. To repair QuickBooks Desktop, utilize the QuickBooks Tool Hub utilities in the following manner:
Step 1 – Download QB Tool Hub
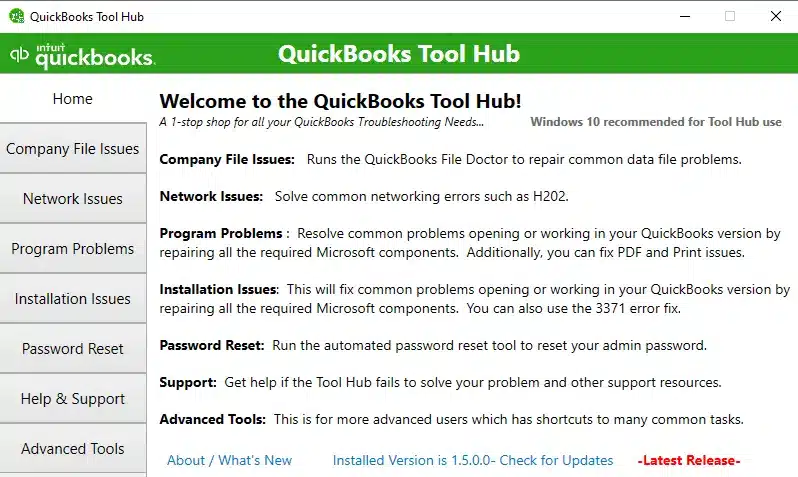
QuickBooks Tool Hub is a collection of tools that help diagnose and resolve common errors in the software. To successfully download the QB Tool Hub, follow the steps given below:
- Firstly, close QuickBooks and download the most recent QuickBooks Tool Hub version from Intuit’s official website. Then, save the file at an accessible location on your PC.
Note: If you have installed the QB Tool Hub utility before, you can go to the bottom of the Home tab to find out the current QuickBooks Tool Hub version you are using.
- Further, open the QuickBooksToolHub.exe setup file you have just downloaded, then go through the on-screen prompts to install and agree to the terms and conditions.
- When the installation process ends, double-click the QB Tool Hub icon on your Windows desktop to access the program. However, if you are unable to locate the icon, you can manually search for “QuickBooks Tool Hub” in your Windows search bar and open it manually.
Once the QB Tool Hub is installed, move to the next step and run the Quick Fix My Program tool.
Step 2 – Run the Quick Fix My Program Tool
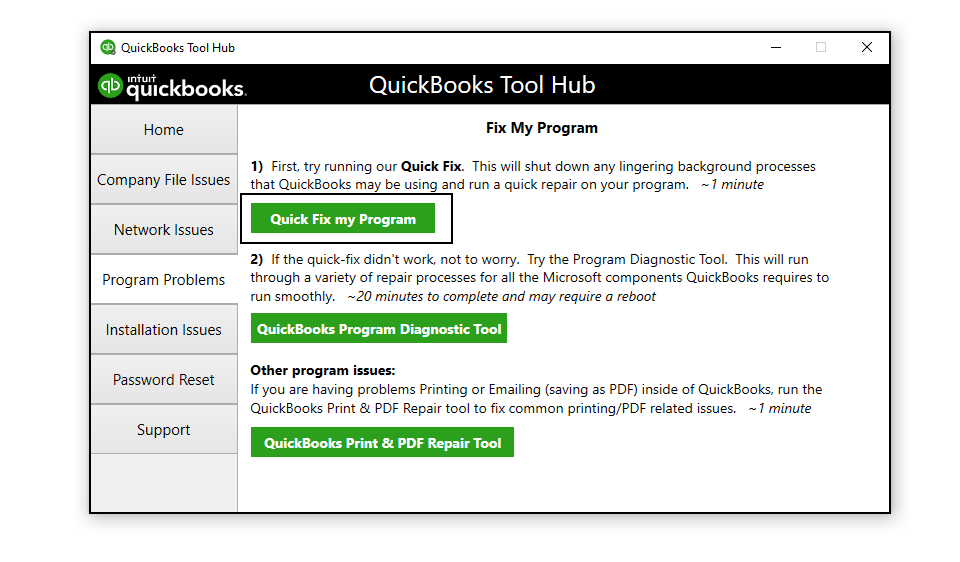
This tool helps shut down any background processes QuickBooks uses and runs a quick repair process to fix general program problems. You can follow the steps mentioned below to successfully run the Quick Fix My Program tool –
- First, open the QuickBooks Tool Hub utility, then go to the Program Problems menu, and select the Quick Fix My Program tool.
- Once the tool stops running, rerun QuickBooks Desktop and access your data file to check if the issues are fixed.
If you are still experiencing the server busy error opening QuickBooks, move to the next step and run the QuickBooks Install Diagnostic Tool.
Step 3 – Use QuickBooks Install Diagnostic Tool
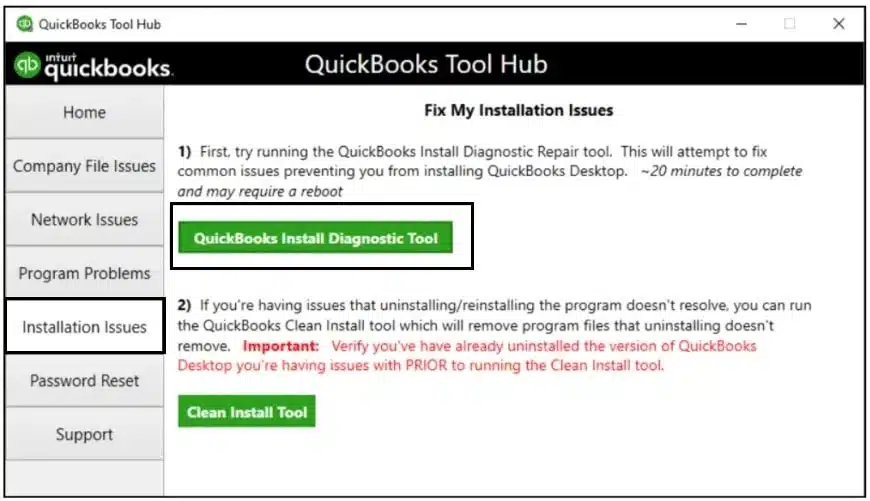
If the Quick Fix My Program tool is unable to address the issues and repair the QB program, try fixing the installation problems using the QuickBooks Install Diagnostic Tool. Problems with the QuickBooks installation files can be rectified by running the QuickBooks Install Diagnostic Tool by implementing these steps –
- Open the QuickBooks Tool Hub, select the Installation Issues tab from the left pane, and then select the QuickBooks Install Diagnostic Tool.
- Let the tool run; it may take up to 20 minutes to finish. Once the tool stops running, restart your PC and open QuickBooks.
Now, check the status of the server busy error in QB. If the error message keeps appearing, move to the next solution and reinstall the software.
Recommended to read : How to fix QuickBooks Error 15204
Solution 2 – Reinstall QuickBooks
If repairing QuickBooks doesn’t help fix the issues, you can try reinstalling the app to remove the issues with the current QB version. For this, you need to remove and reinstall QB by following the steps below –
Prerequisites –
- Before reinstalling QB, make sure to download the installer as per your QB Desktop version.
- Also, ensure that you have your license number and product details handy to complete the installation process seamlessly.
Once done, follow the steps below to remove and reinstall QuickBooks successfully –
Step 1 – Remove QuickBooks
The first step is to remove QuickBooks Desktop from your system by following the steps given below –
- First, open the Windows Start menu and search for “Control Panel” in the Windows search bar.
- Access the Control Panel, select the Programs and Features, or Uninstall a Program option.
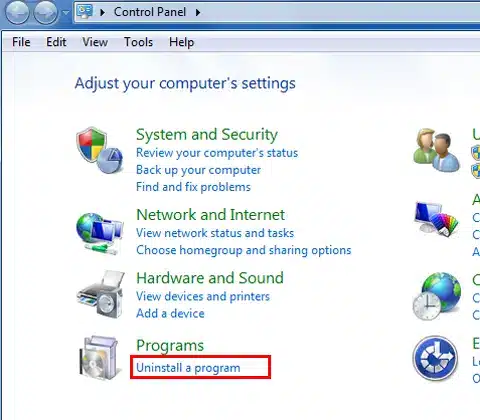
- From the list of programs, select the QB Desktop version you want to remove, then select Uninstall/Change, Remove, and hit Next to conclude the uninstallation procedure.
Note: If you don’t see the “uninstall/change, remove” option, sign out and then sign back into Windows as an admin, and then undertake the QB uninstallation process again.
Once QuickBooks Desktop is successfully removed, reinstall the software in the next section.
Step 2 – Reinstall QuickBooks
You need to install QuickBooks again after removing the current version. Remember, QB will automatically install new folders and rename the old folders during the installation. To reinstall QB, first ensure that the QB system requirements are met, and then perform these steps –
- QuickBooks Downloads, save the file at an accessible location on your PC, and then open the downloaded QuickBooks.exe setup file.
- Follow the on-screen prompts and accept the software license agreement, then hit Next to continue.
- Enter your product and license numbers, select Next again, and then proceed with the installation.
Note: Ensure you have an active and reliable internet connection to install QuickBooks.
- Next, select Express as the Installation type, then click Next, and select Install.
- Wait for the installation process to end, and once done, select Open QuickBooks.
After the installation is successful, QuickBooks will ask you to activate it. You can activate the software by performing the detailed steps given in the next section.
Step 3 – Activate QB Desktop
Once QB is installed in the system, you can activate the software manually with the following steps –
- Open QuickBooks Desktop, access the Help menu, then select Activate QuickBooks Desktop.
- Follow the steps on the screen to verify your information. Once you’ve done so, run QuickBooks and check if the QuickBooks 10.0 server busy error is fixed.
If the error continues to exist, move to the next solution and update your Windows OS.
Solution 3 – Update Windows OS
If QuickBooks accesses a particular Windows file while the Windows is running an update, it may lead to the “QuickBooks error message server busy.”
You need to ensure that any pending or available updates are installed in Windows by following the steps below-
For Windows 10
If you are a Windows 10 user, follow these steps to update the Windows OS –
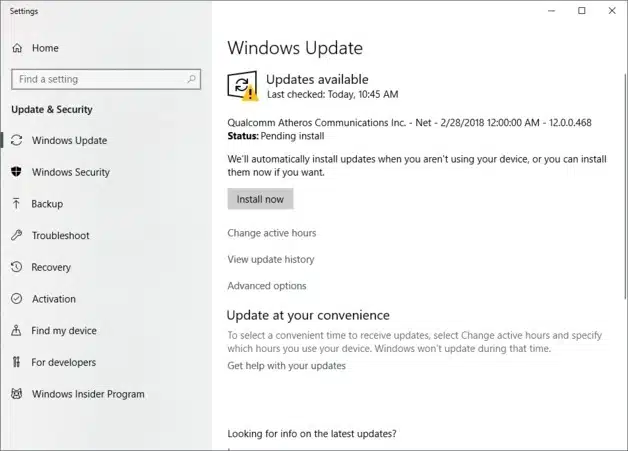
- Open the Windows Start menu and go to Settings, then choose Update and Security.
- Further, select Windows Update, then click the Check for Updates button, and check if any updates are available.
- If updates are available, install them, and once the install process ends, rerun QuickBooks Desktop.
For Windows 11
If you are a Windows 11 user, follow the steps below to install the Windows OS updates –
- Open the Windows Start menu, then move to Settings, and click the Windows Update option.
- Further, hit the Check for Updates button, and if updates are available, install them.
- Lastly, rerun QuickBooks on the system.
Once you have updated your Windows 10/11, check the status of the QuickBooks server busy error. If the error message persists, move to the next troubleshooting solution.
Solution 4 – Configure the Windows Firewall and Antivirus Program
Sometimes, misconfigured Windows firewall settings might restrict QuickBooks, resulting in “QuickBooks pro desktop server is busy error” message on the screen. As far as solutions are concerned, it can be fixed by reconfiguring the firewall and antivirus setup in the following manner –
Step 1 – Use the QuickBooks File Doctor Tool
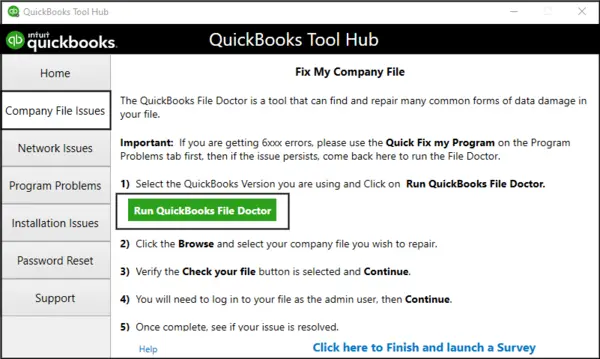
QuickBooks File Doctor Tool is an essential utility in the QB Tool Hub that is used to fix company file and network issues. You can run this tool to fix network issues automatically by configuring the Windows firewall in the following manner –
- Firstly, open the QuickBooks Tool Hub (see Step 1 – Download QB Tool Hub of Solution 1 – Repair QuickBooks from “General Troubleshooting Solutions to Resolve the Server Busy Error When Closing QuickBooks 2023” above to install the utility), then go to the Company File Issues tab in the left pane, and run the QuickBooks File Doctor tool.
Note: It may take up to a minute or two for the QB File Doctor to open; however, if the tool doesn’t open, you can manually open it by searching for “QuickBooks Desktop File Doc” in the Windows search bar.
- Choose the company file you wish to repair from the dropdown menu. But, if you can’t see the company file, select Browse and search to locate the QB company file.
- Select the Check your file and network option, then hit Continue and enter your admin password.
- Select Next, and then once the file scan process is complete, open QuickBooks Desktop and access the company file.
Note: The file scan time usually takes up to 5 minutes, depending on the file size. It must be remembered that sometimes the scan may say it was unsuccessful, even if it fixes your issues.
Once done, check if the QB server busy issues are removed. Unfortunately, if you still get the same error message, move to the next step to manually configure the Windows firewall.
Step 2 – Configure Windows Firewall Manually
If running the QB File Doctor tool doesn’t fix the network issues, follow the steps below to manually configure the Windows firewall and create exceptions for QB –
Add Firewall Port Exceptions for QB
You need to allow QuickBooks access the internet without firewall restrictions and blockages. For this, you can create firewall port exceptions for QB in the following manner –
Note: In case you are using multiple QBDT versions on the same computer, perform these steps to configure the Windows firewall for each version. In addition, you need to add each year’s (version’s) ports in the Specific Ports list in step 4 below.
- Go to the Windows Start menu and type “Windows Firewall” in the bar, then access the utility.
- Now, move to the Advanced Settings menu, then right-click the Inbound Rules option.
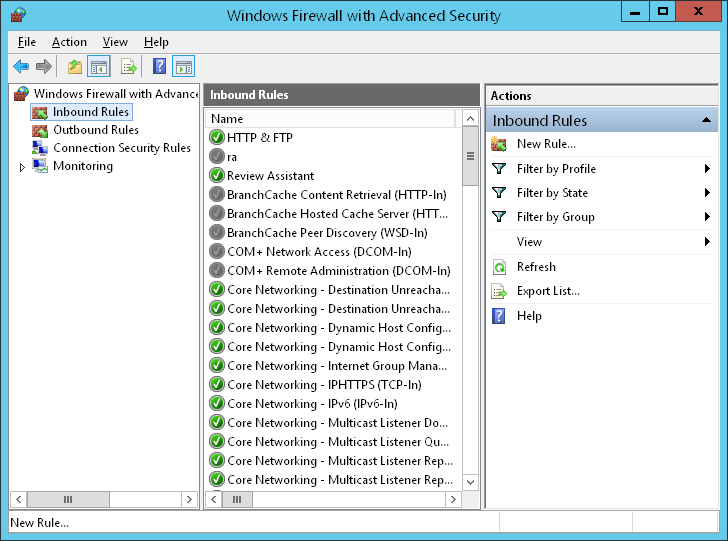
- Choose the New Rule option, select Port, then click Next.
- Make sure that the TCP option is selected, then refer to the list below to enter the specific ports (as per your QB version) in the Specific Local Ports field –
- QuickBooks Desktop 2020 and later: 8019, XXXXX.
- QuickBooks Desktop 2019: 8019, XXXXX.
- QuickBooks Desktop 2018: 8019, 56728, 55378-55382.
- QuickBooks Desktop 2017: 8019, 56727, 55373-55377.
Important: QuickBooks Desktop 2019 and later versions, you dynamic ports, which are specific firewall ports assigned during installation, to make sure that QuickBooks gets exclusive use of a particular port. Thus, if you use any of these versions, you need to add the dynamic port number in the following way –
- To get the Dynamic Port Number according to your QB Desktop version, perform these steps –
- Enter “QuickBooks Database Server Manager” in the Windows search panel of the Start tab, and access the QB Database Server Manager.
- Now, go to the Port Monitor menu, then find your QuickBooks Desktop version, and make a note of the Port Number, which will be included in the port exceptions list.
Note: You can change the assigned port number in QB Desktop 2019 and later versions by selecting the Renew option. If you choose to renew the port number, you can select Scan Now from the Scan Folders tab to reset firewall permissions.
- Further, enter the port number in the port exceptions list, then select Next and click Allow the Connection.
- Hit Next and make sure all profiles are checkmarked (if prompted), then select Next again.
- Create a new rule named “QBPorts(year),” and once done, hit Finish.
- Repeat the same steps above (see steps 1 to 8) to create Outbound Rules, but make sure to select Outbound Rules instead of Inbound Rules in step 2.
Once the QB exception rules are successfully created, access QuickBooks in a multi-user mode or over the network from the host computer. If you still experience the server busy error, create firewall exceptions for QB executable (.exe) files in the next section.
Add Firewall Exceptions for QB Executable Files
QuickBooks uses executable files (.exe) to perform various tasks and functions. Therefore, you need to create exceptions for these files to remove firewall blockages in the following manner –
- First, access the Windows Start menu, search for “Windows Firewall” in the search bar, then open it.
- Move to the Advanced Settings menu, right-click Inbound Rules, then click the New Rule option.
- Next, click Program, hit Next, and select This Program Path.
- Click Browse, then select an executable file from the list given below, and hit Next.
- AutoBackupExe.exe
- Dbmlsync.exe
- DBManagerExe.exe
- FileManagement.exe
- FileMovementExe.exe
- IntuitSyncManager.exe
- QBCFMonitorService.exe
- QBDBMgr.exe
- QBDBMgrN.exe
- QBGDSPlugin.exe
- QBLaunch.exe
- QBServerUtilityMgr.exe
- QBW32.exe
- QuickBooksMessaging.exe
- Select Allow the Connection, click Next, and ensure that all the profiles are marked (if required).
- Select Next, then create an exception rule and name it “QBFirewallException(name.exe)”.
- The last step is to perform the same steps given above (see steps 1 to 6) to create Outbound Rules for QB. While creating outbound rules, remember to select Outbound Rules instead of Inbound Rules in step 2.
Once the Windows firewall exception rules are successfully created for QB, open QuickBooks Desktop in multi-user mode and check if the blockages are eliminated and QuickBooks Desktop server busy error is fixed. If the error message still appears, review the antivirus program settings in the next section to ensure that QB has general permissions.
Step 3 – Review the Antivirus Settings
If you configured your Windows firewall but still have issues while running QuickBooks, you need to review your antivirus settings. This will ensure that QuickBooks has general permissions and that the application is running without any obstructions from the antivirus program. The troubleshooting steps may vary depending on the antivirus software you use; hence, you need to perform the specific steps for your particular antivirus software by following their instructions.
Once the Windows firewall and antivirus app are configured, rerun QuickBooks to check the status of the error. If the server busy error still persists in the application, follow the next solution to fix the issues.
You may also read : Fix QuickBooks Sync Manager Error
Effective Solutions to Remove QuickBooks Server Busy Error Message When Opening Company Files
Sometimes, the server busy error might arise while opening the company file. If that happens, you won’t be able to access the company file or run any related functions. In order to resolve this error, try opening the company file again, as you may encounter this error only the first time you open the company file. It is possible that you may successfully open the company file the next time. However, in case the error still persists even after trying to open the company file again, follow the detailed solutions below to tackle the error –
Solution 1 – Run QuickBooks as an Admin and Update the Software
It might be possible that you are using an outdated QB version while trying to open the company file. This may lead to the QuickBooks server busy error message on your screen. In order to fix this company file error, consider running the QB updates as an admin in the following manner-
Step 1 – Access QuickBooks with Admin Rights
You can try accessing the company file in QuickBooks as an admin user in the following manner –
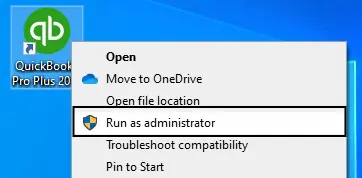
- Close QuickBooks, then right-click the QuickBooks icon and choose the Run As Administrator option.
Now, try to open the company file again to ensure that the server busy error is fixed. If the error message pops up, move to the next step to update QB.
Step 2 – Update QuickBooks Desktop to the Latest Release

Updating QuickBooks will ensure the application has the latest features, security enhancements, etc. To update QuickBooks effortlessly, follow the detailed steps given below.
- Move to the QuickBooks Help menu, select the Update QuickBooks Desktop option from the drop-down menu, and then select the Update Now tab.
- Check the Reset Updates checkbox and click Get Updates to download the updates.
- Close and reopen QuickBooks and then select Install Now to install the updates.
Once QuickBooks is updated, restart the system, open QuickBooks, and access the company file again to ensure that the server busy error has been eliminated. However, if the error still appears, move to the next solution to edit the UAC settings.
Solution 2 – Change the User Account Control Settings
The User Account Control settings might be incorrectly set while opening the QuickBooks company file, which can be another reason for the server busy error. To resolve this issue, toggle the UAC settings in the following manner –
- Close QuickBooks, then press the Windows logo on your keyboard and type User Account Control in the search bar.
- Further, click Change User Account Control settings to open it.
- Lastly, move the slider to the highest setting – Always notify and save the changes.
Now, try to open the company file in QuickBooks to check whether the QB server busy error is fixed. Unfortunately, if the error continues to bother you, move to the next troubleshooting solution.
Solution 3 – Ensure that the Company File is not Set to Read-Only
Since the server busy error message can pop up when the QuickBooks company file permissions are incorrect, you need to ensure that the file is not set to read-only by using the steps below –
- Open Windows Explorer, locate the QuickBooks company file, and then right-click the company(.QBW) file.
- Further, move to the General tab, then ensure that the Read Only option is not checkmarked.
- If the box is selected, clear the checkbox and hit OK to save the changes.
- Lastly, try opening the file again and check the status of the server busy error.
If changing the company file permissions doesn’t help resolve the error, you can move to the next solution to modify the Internet Explorer settings.
Solution 4 – Edit the Internet Explorer Settings
Incorrect Internet Explorer settings are one of the major reasons for getting the QuickBooks server busy error while accessing the company file. Thus, you need to modify these settings before opening the company file in the following manner –
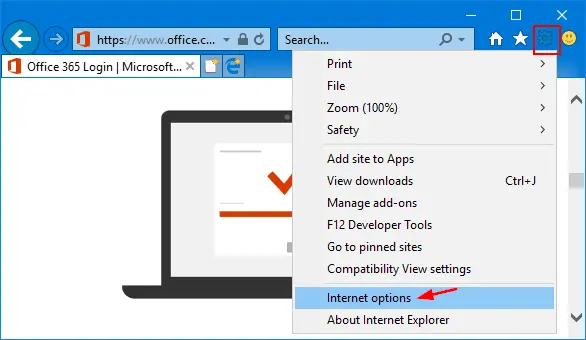
- Open Internet Explorer, then select the Gear icon located in the upper right corner and choose Internet Options.
- Move to the Advanced tab, then scroll down to the Security section and make sure that the Use SSL 2.0 and Use SSL 3.0 options are checked.
- Further, ensure that the Use TLS 1.0 option is checkmarked; otherwise, select it, then save the changes.
Now, open QuickBooks and then the company file to ensure that the error is removed. However, if the server busy error in QuickBooks persists, move to the next solution.
Solution 5 – Login as a Windows Admin User
You need to ensure that you are logged in to the Windows OS as an admin user. Lack of admin rights can cause issues while opening the QB company file, which can lead to the server busy error. Hence, follow the steps below to run the Windows with admin rights –
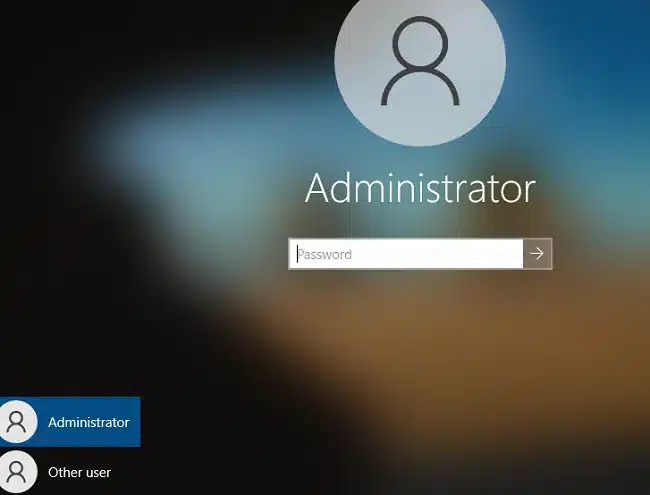
- Select the Start button or the Windows icon in the lower left corner, then click Log off.
- Choose the administrator account, enter the password (if there is one), and once logged in, try to open the company file.
If you are still unable to open the company file due to the server busy error, edit the Windows permissions for QB in the next solution.
Solution 6 – Configure Windows Permissions for QuickBooks
Sometimes, lack of proper permission can cause the server busy error in the app while opening the company file. If none of the above solutions work, configure the Windows permissions for QB in the following manner –
- Close QuickBooks Desktop, then navigate to C:\Program Files\ through Windows Explorer.
Note: If you have a 64-bit computer, you will see the C:\Program Files (x86)\ path instead. - Further, right-click the Intuit folder, then choose Properties, and go to the Security tab.
- Select the Advanced button, then ensure the Users group is selected in the Owner field at the top.
- If you see SYSTEM or something other than Users, you will need to take ownership of the Intuit folder in the following manner –
- In the Advanced Security Settings for Intuit permissions window, select Change for the owner field, then type USERS.
- Press Enter, then place a checkmark in the “Replace owner on sub containers and objects” box.
- Lastly, select Users (YOUR COMPUTER NAME\Users) Full Control and click OK.
- Open the Intuit folder properties window, move to the security tab, then click the Edit button.
- Select Users (YOUR COMPUTER NAME\Users), make sure the Full Control option is checkmarked, then select OK to exit the Intuit folder properties window.
- See if this resolves the issue and you are able to open the QB company file. If not, repeat the steps above to dit the Windows permissions for these additional Intuit folder locations:
- C:\Program Files\Common Files\Intuit (Note: if you are on a 64bit computer, you will need to use C:\Program Files (x86)\Common Files\Intuit)
- C:\ProgramData\Intuit
- C:\Users\Your User Name\AppData\Local\Intuit
Once the permissions are set, reopen QuickBooks and access the company file again. If you are still unable to open the company file due to the QuickBooks server busy error, move to the next solution.
Solution 7 – Configure Windows Firewall and Internet Security Settings for QuickBooks
Server issues while opening the company file can arise due to firewall restrictions and blockages. To counter this scenario, configure Windows firewall and internet security settings and allow proper internet access to QB. For this, follow solution 4 – Configure the Windows Firewall and Antivirus Program of the “General Troubleshooting Solutions to Resolve the Server Busy Error When Closing QuickBooks 2023” above.
Once you’ve done this, try opening the company file and checking the status of the server busy error in QuickBooks Desktop.
Conclusion
The detailed solutions provided in this blog will help you resolve the QuickBooks server busy error with ease. However, if you are still unable to troubleshoot the error or are stuck in the resolution process, you can reach out to our Proadvisor solutions support team at 1.855.888.3080 to get direct assistance in fixing the server issues.
FAQs
What is the QuickBooks server busy error, and why does it arise?
QuickBooks server busy error is an error that arises when the application is unable to complete a particular action due to too many programs running in the background. This error can arise due to the multiple reasons given below –
1. Too many programs are open in the background while running QuickBooks.
2. The Windows firewall or an antivirus program might be incorrectly configured to block QuickBooks from accessing the internet.
3. Your QuickBooks Desktop program might be damaged or incorrectly installed.
4. The Internet Explorer setup might be incorrect while running QB and the company file.
5. The Windows OS might be updating while QuickBooks tries to access the Windows files.
6. There are inadequate file access permissions while accessing the company file in QB.
7. The UAC settings might be incorrectly set, leading to restrictions.
How do I fix the server busy error in QuickBooks?
The QuickBooks error server busy can be eliminated by using these solutions –
1. Close all the background programs, like Google Desktop and Windows Defender.
2. Repair the QuickBooks with the QuickBooks Tool Hub utilities.
3. Reinstall QuickBooks Desktop to fix installation problems.
4. Reconfigure Windows firewall and antivirus settings to remove QB blockages.
5. Download the latest Windows OS updates on the PC.
Can repairing QuickBooks resolve the server busy error?
Yes, repairing QuickBooks Desktop can help fix the QB server busy error. This is because the server busy message can arise when the program is damaged or incorrectly installed. Thus, repairing the app by using the QB Tool Hub utilities can help with the error.
How to resolve the server busy error while opening QuickBooks company file?
The server busy error while accessing QuickBooks company file can be addressed by –
1. Ensuring that QB is running with admin rights.
2. Updating the QB Desktop app to the latest release.
3. Toggling the user account control settings.
4. Editing the Internet Explorer setup.
5. Ensuring proper file permissions for the .QBW file.

Erica Watson is writing about accounting and bookkeeping for over 7+ years, making even the difficult technical topics easy to understand. She is skilled at creating content about popular accounting and tax softwares such as QuickBooks, Sage, Xero, Quicken, etc. Erica’s knowledge of such softwares allows her to create articles and guides that are both informative and easy to follow. Her writing builds trust with readers, thanks to her ability to explain things clearly while showing a real understanding of the industry.