Getting QuickBooks Error 1327 can be challenging to face when installing or updating QuickBooks. This error is not only limited to QuickBooks but can affect any program that you run on Windows. This error appears along with a message that reads, “Error 1327: Invalid drive X can occur when updating QuickBooks (X can be any letter.)” or “Error 1327: The Windows Installer cannot write to the specified drive can occur when installing QuickBooks.”
Troubleshooting such installation and update errors in QuickBooks requires performing Windows-specific troubleshooting solutions that can be tricky sometimes. Thus, we have curated this guide with the help of experts to walk you through the complex troubleshooting in a simple manner so that you can fix this without any hassle.
QuickBooks error 1327 can be challenging to resolve, but our team of specialists can fix it in no time. Call us and let our experts handle everything.
Table of Contents
What is QuickBooks Error 1327 Invalid Drive letter?
QuickBooks Error Code 1327 often occurs during the installation procedure when the installer can’t find a valid drive. Error 1327 mainly occurs due to an invalid drive letter, issues with Windows registry settings, corrupted Microsoft .NET Framework, or issues with storage devices. Error 1327 is accompanied by the message “Error 1327. Invalid Drive: [Drive Letter]” and prevents you from installing the QB Desktop. Using the QuickBooks Install Diagnostic Tool or running the installer as an administrator can help you fix this error.
Reasons That Cause QuickBooks Error 1327
Here are the reasons our experts have noted for QuickBooks error Code 1327:
- If the drive letter is unavailable or doesn’t exist on the system.
- Incorrectly configured system settings.
- Problems in your system’s registry, particularly outdated or inaccurate information about the system’s drives, can lead to this error.
- Additionally, if the installer attempts to reach a network drive that is missing or disconnected.
- Issues with user profiles, such as corrupted profiles, can also be a contributing factor.
- Incorrect or insufficient permissions to perform installation or update.
- Removal of a portable storage device like a USB stick can cause this error.
As you are now well aware of the reasons, you can avoid getting the same issue again in QuickBooks. Let’s now discuss the solutions that will help rectify error 1327 with the least effort possible.
Solutions to Fix QuickBooks Error Code 1327
When it comes to fixing error 1327 QuickBooks Desktop, you should try the following solutions:
Solution 1: Use the Command Prompt to Remove the Drive Letter
Under this solution, you can remove the drive letter you suspect causing the invalid drive letter error. You use a command that enables you to link and unlink the drive letter to a virtual location, potentially resolving installation issues:
- Launch the Run dialog by pressing Windows + R, input ‘cmd,’ and press Ctrl + Shift + Enter.

- In the Command Prompt, enter the line subst/ P and press Enter, replacing ‘P‘ with your drive letter.
- Exit Command Prompt and attempt to install the QB program.

If replacing the drive letter does not help resolve the error, follow the next troubleshooting step.
Solution 2: Clean Install QuickBooks
If you receive QuickBooks error 1327 while trying to install a previously deleted software, it’s possible you encounter conflicts from the program leftovers. Cleaning the system thoroughly from old or unused software thus becomes critical. Here’s how the Clean Install procedure works for QuickBooks:
Action 1: Prerequisites before Reinstalling QB
- Download the QuickBooks version installer you use.
- Keep your license number ready; it can be found on the original package or in the purchase confirmation email if you bought it online. Alternatively, you can retrieve this information from your account management portal.
Action 2: Remove QuickBooks
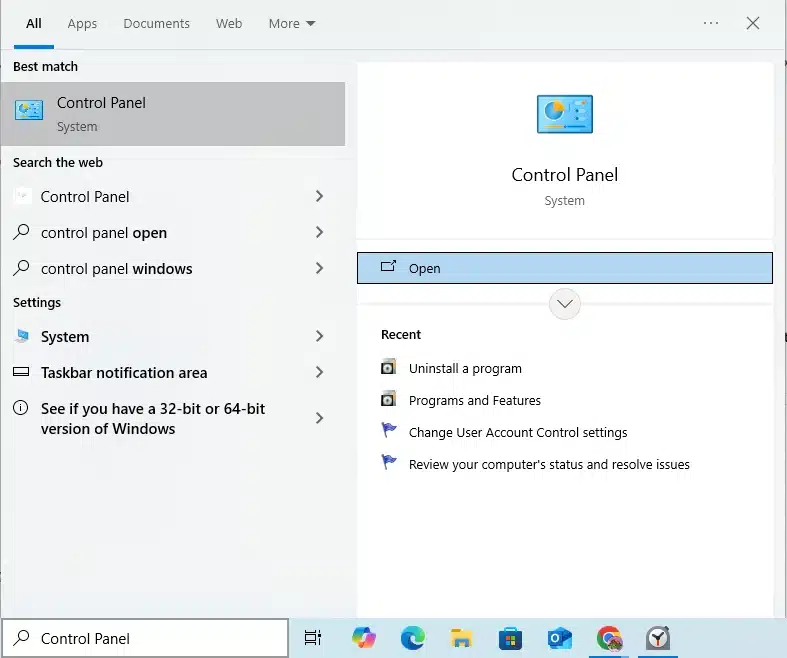
- Open the Start menu in Windows and search for “Control Panel” through the search box. Open the Control Panel from the results.

- When the Control Panel opens, find the Uninstall a Program option under the Programs and Features section, directing you to the programs list to locate QuickBooks.
- Locate the version of QuickBooks Desktop you want to remove from the list of programs.
- Tap Uninstall/Change, then select Remove and proceed with Next.
- If you can’t locate this option, sign out and sign back into Windows as an administrator or a user with admin privileges.
Action 3: Rename Installation Folders
- First, display any files you find hidden and can’t access normally.
- Then, access the Windows Start menu and look for ‘File Explorer‘ to open it.
- Locate and launch the folder keeping your QuickBooks company files, typically named the QuickBooks folder. Common directory locations include:
- C:\ProgramData\Intuit\QuickBooks (year)
- C:\Users(current user)\AppData\Local\Intuit\QuickBooks (year)
- C:\Program Files\Intuit\QuickBooks (year)
- 64-bit QB versions: C:\Program Files (x86)\Intuit\QuickBooks (year)
- Right-click the QB installation folder and choose ‘Rename.’
- Type ‘old‘ to add to the end of the folder name to prevent QuickBooks from accessing it during reinstallation.
If an error message comes up while renaming these installation folders, try this:
- Right-click the Windows Task Bar and tap Task Manager.
- Get into the Processes tab.
- Choose the Name column header for the list sorting.
- Locate the following processes and press End Task on each one: QBDBMgrN.exe, QBDBMgr.exe, QBCFMonitorService.exe, Qbw32.exe.
- Confirm this choice by selecting ‘Yes‘ if prompted with the message, ‘WARNING: Terminating a process can cause undesired results…’
Action 4: Reinstall QuickBooks
Finally, install QuickBooks Desktop again and check if this solution helps resolve the error. If you find the same error reappearing on the system, follow the next troubleshooting solution.
Solution 3: Disconnect the Network Drive
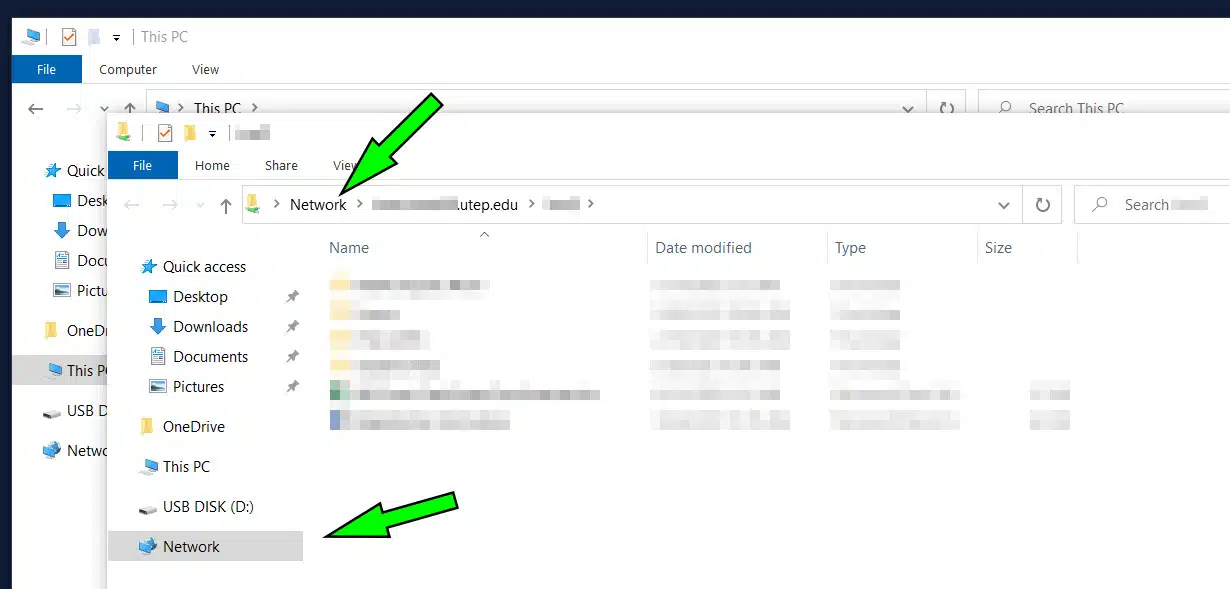
One solution to fix the invalid drive letter error 1327 is disconnecting the network drive you get in File Explorer. The steps involve:
- Press Windows + E and access File Explorer.
- Locate the Network drive.

- Right-click on it and choose Disconnect.
After completing these steps, attempt to reinstall your program. It’s important to note that this solution is effective only when a network drive is visible in File Explorer. If not, refer to the next solution.
Recommended to read : I am getting QuickBooks Error 15240
Solution 4: Associate the Drive Letter Again with a Temporary Location
This approach enables the linking of a drive letter to a virtual drive location, allowing the installer to identify and use the designated temporary path for the installation of the problematic software.
Note: If the specified temporary path is not present, it is essential to create it before proceeding with the steps outlined below.
- Open the Run dialog with Windows + R keys, then type cmd and press Ctrl + Shift + Enter.
- Enter the script provided below and press Enter, making sure to substitute [Drive Letter] with the actual drive letter: subst [Drive Letter]: C:\temp.
- Close the Command Prompt and proceed to reinstall the software.
- Once again, access the Run dialog through Windows + R, input cmd, and press Ctrl + Shift + Enter.
- Enter the following command and press Enter to disassociate the software from the temporary path: subst /D [Drive Letter].
Follow the next solution if you find the error striking QuickBooks Desktop even after this solution.
Solution 5: Remove and Reconnect a Portable Storage Device
If you’ve detached a portable storage device from your system, reattach it and attempt the QuickBooks installation once again.
Solution 6: Enter as the Built-in Administrator
To enable or disable the built-in Administrator, follow these steps:
- Open the command prompt.
- To activate, enter the command: net user administrator /active:yes.
- Install QuickBooks.
- To deactivate, use the command: net user administrator /active:no.
Check if this solution helps resolve the error. If not, try the next solution.
Solution 7: Install QuickBooks while you are Logged Off the Network
If you encounter difficulties due to network connections, install QuickBooks while you are signed out of your network through the following steps in the respective Windows Operating systems:
Windows 8, 7, Vista:
- Hit the Start button in Windows > Access the Control Panel > Navigate to the Network and Sharing Center > Click the Change Adapter Settings option.

- Right-click on each adapter and choose the Disable option. Note: You may receive notifications about the loss of your connection. Do not reconnect to your network.
- Keep this window open and proceed to install QuickBooks.
- Once the installation is finished, go back to the Network Connections window and enable all your network connections by right-clicking on each adapter and selecting Enable.

Windows XP
- Click on the Start button in Windows > Access the Control Panel > Navigate to Network Connections.
- In the LAN or High-Speed Internet section, identify the connections listed as Enabled in the Status column. Note: If the Status column isn’t visible, right-click on the grey bar displaying column names and choose Status.
- For each entry marked as Enabled, right-click on the connection name and choose Disable. Note: You may receive notifications indicating a loss of connection. Refrain from reconnecting to your network.
- Once all connections under LAN and High-Speed Internet are Disabled, keep this window open and proceed to install QuickBooks.
- After the installation is complete, return to the Network Connections window and enable all your network connections by right-clicking on each adapter and selecting Enable.
Read Also : What is QuickBooks Error 400
Solution 8: Create A New Windows Admin User
Creating a new Windows user profile can help resolve the error 1327 invalid drive, especially if your current profile is corrupted.
Windows 11/ 10
Create a user account locally
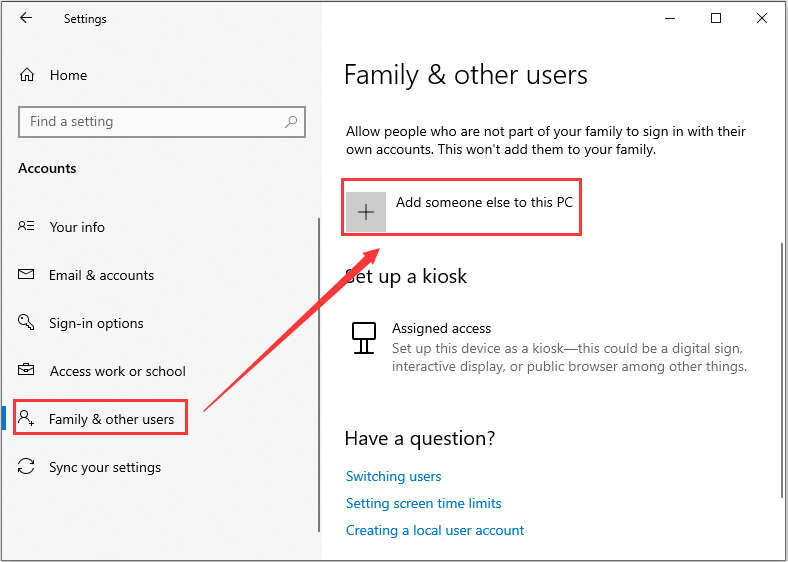
- Click on Start > Go to Settings > Access Accounts, and then choose Family & Other Users. (In some Windows versions, it may appear as Other users.)
- Next to “Add someone else to this PC,” access the Add account option.

- Choose the options sequentially: “I don’t have this person’s sign-in information,” then “Add a user without a Microsoft account” on the following page.
- Provide a username, password, or password hint—or select security questions—and click Next.
Now, modify a local user account to an administrator account
- Click on Start > Navigate to Settings > Access Accounts.
- Under Family & Other Users, click on the account owner’s name (you should see “Local account” below the name), and then select Change Account Type.
Note: If you pick an account displaying an email address or lacks the mention of a “Local account,” you are granting administrator privileges to a Microsoft account, not a local account. - Under Account type, hit Administrator, and then click OK.
- Log in using the newly created administrator account.
Windows 8/ 7/ Vista
- Click on the Start button > Access the Control Panel > Navigate to User Accounts > Choose Manage Another Account.
- Click on Create a new account.
- Assign a name and choose Administrator.
- Click on Create Account.
- Restart the computer and log in using the newly created administrator account.
- Proceed to install QuickBooks.
Note: Icons may not be visible on your desktop in account profiles other than the one used for installation.
Windows XP
- Select the Start button > Access the Control Panel > Navigate to User Accounts.
- Click on Create a new account and then proceed to follow the on-screen instructions for creating a user account with administrative permissions.
- Restart the computer and log in using the recently established administrator account.
- Proceed to install QuickBooks.
Note: Icons may not be visible on your desktop in account profiles other than the one for installation. - If the process is successful, retain this new account profile on your computer.
Follow the next solution and repair Windows registry if this solution doesn’t help resolve the error.
You may read also : Fix QuickBooks Administrator Permissions Needed Issue
Solution 9: Repair Windows Registry Keys
If your Windows registry keys are damaged, fix them through the Microsoft Windows steps. However, making changes to your registry is a complex task where you have to be cautious. Incorrect steps can cause problems in running the PC properly.
Before you run the Windows registry, make a backup of your registry keys. Opening the registry keys requires following the steps below:
- Open the taskbar search box and type regedit. Click Registry Editor (Desktop Application) from the results.
- Right-click Start and click the Run option. Input regedit in the Open: box, then tap OK.
If you still find the error disrupting QuickBooks installation, follow the next solution.
Solution 10: Change the Network Drive
Here’s another solution to try when you get the error 1327:
- Log in to Windows with administrator privileges.
- Close all currently open programs.
- Connect an external flash drive to your computer (either an external hard drive or a pen drive).
- Access the Control Panel, choose Administrative Tools, and then click on Computer Management.
- Within the Computer Management window, select Storage, and then proceed to Disk Management.
- Right-click on the recently connected External drive and tap Change Drive Letter and Paths.
- Click on the Change button, modify the drive letter to correspond with the letter indicated in your update error message (e.g., E:), and confirm the change by selecting OK.
- Start the QuickBooks setup. It should indicate that QuickBooks is already installed.
- Follow the steps to uninstall QuickBooks here.
- If the Uninstall encounters Error 1327, skip step 10 and proceed with the following steps to repair and then uninstall/reinstall QuickBooks:
- Initiate the QuickBooks setup. On the screen indicating that QuickBooks is already installed, choose Remove; on the subsequent screen, tap Repair.
- Once the repair is finished, uninstall QuickBooks. This time, the uninstallation process should be successful.
- Upon completion of the uninstallation, reinstall QuickBooks.
If you get the error even after changing the network drive, follow the next solution.
Recommended to read : What is QuickBooks Network Connection Error
Solution 11: Download a Manual QuickBooks Update
A manual QuickBooks Desktop update provides security patches, improvements, and bug fixes that can help resolve error 1327 in QuickBooks Desktop. Automatic updates may get patchy or conflict with the current installation path or file, so this process can ensure no errors arise. Therefore, getting a manual QuickBooks update after resetting them might help resolve the issue:
- Exit your company files and QuickBooks.
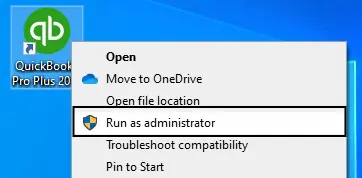
- Access the Start menu in Windows OS.
- Look for QuickBooks Desktop. Right-click the QuickBooks Desktop icon on the PC and choose Run as administrator.

- While on the No Company Open screen, hit the Help menu and tap Update QuickBooks Desktop.

- Access the Options tab. Click on Mark All and then hit Save.
- Move to the Update Now tab and tick the Reset Update option.
- When you’re prepared, click Get Updates.

If updating QuickBooks doesn’t help resolve the error, you must try the next solution.
Solution 12: Change Drive Letter and Paths for QuickBooks Setup
Encountering QuickBooks Error 1327 during the update process may suggest that the drive on which QuickBooks was originally installed has either been disconnected or assigned a different drive letter. Altering the drive letters and paths for the QuickBooks setup can help you counter the problem:
- Log in to Windows with administrator privileges.
- Close all currently running programs.
- Access the Control Panel, choose Administrative Tools, and then open Computer Management.
- Within the Computer Management window, click Storage and proceed to Disk Management.
- Right-click on the drive where QuickBooks is installed and choose Change Drive Letter and Paths.
- Select Change, and modify the drive letter to correspond with the letter specified in your update error message. Click OK and confirm the change.
Important: Altering drive letter paths may lead to instability in other programs if they are assigned different drive paths than QuickBooks. Exercise caution when executing these steps. If you are not comfortable doing this yourself, seek assistance from a computer technician.
Summing Up
We hope our detailed guide about QuickBooks Error 1327 helps you resolve the issue effectively and immediately. The solutions we have mentioned should be sufficient to fix the root cause of this invalid drive letter on your PC. However, if you’re still troubled by this problem and require experts to intervene and resolve it, contact our Proadvisor solutions specialist team.
FAQs
How do I see hidden files in Windows to clean install QuickBooks Desktop?
The steps to display hidden Windows files for the QuickBooks error Code 1327 resolution are as follows:
1. Open File Explorer by hitting the folder icon on your Desktop or System Tray.
2. Navigate to the View tab and hit Hidden Items.
If you want to launch specific hidden files, do the following:
1. Use Windows+E on your keyboard to launch Windows Explorer.
2. Press Ctrl+F to activate the Search Box.
3. If you can’t recall the complete file name, attempt entering a portion of it.
4. In case you only know the file extension, replace the file name with an asterisk and include the extension. For instance, input *.qbw to search for QuickBooks data files or *.doc to search for Microsoft Word documents.
5. Review the displayed search results.
What are the various variants of QuickBooks error 1327?
Various forms of this error include attempting to install a WiFi dongle with error 1327 related to an invalid drive F, encountering QuickBooks error 1327 with an invalid drive while using QuickBooks, and dealing with an invalid drive G.
What is Error code C=1327 in QuickBooks?
QuickBooks Error 1327 typically occurs during the installation process. This error probably appears if the drive letter is unavailable or doesn’t exist, corrupted . NET Framework, or incorrect registry settings, or issues with storage devices.
More useful articles :
QuickBooks Error 10000: Exploring the Causes and Resolutions
How to Download or Install QuickBooks Payroll Tax Table Update?
Learn Easy Ways to Fix QuickBooks Sales Tax Rounding Error
QuickBooks Drop Down Menus Not Working: Desktop & Online
How to Fix QuickBooks Error PS038 (when paychecks get stuck)

Erica Watson is writing about accounting and bookkeeping for over 7+ years, making even the difficult technical topics easy to understand. She is skilled at creating content about popular accounting and tax softwares such as QuickBooks, Sage, Xero, Quicken, etc. Erica’s knowledge of such softwares allows her to create articles and guides that are both informative and easy to follow. Her writing builds trust with readers, thanks to her ability to explain things clearly while showing a real understanding of the industry.