Are you unable to update QuickBooks or the payroll tax table due to QuickBooks Error 15204? Don’t worry; this is a common 15XXX series error, which can be resolved by following our comprehensive guide.
The QuickBooks payroll service is used to perform various essential activities, like paying employees through direct deposit, setting up payment schedules, tracking employee hours, tax calculations, filing state and federal e-forms, etc. Users need to download updates regularly to use these payroll services seamlessly. However, sometimes, errors such as QuickBooks error code 15204 might arise during the update process, preventing users from downloading the latest payroll updates and features. When it comes to the triggers behind this update error, a disabled file copy service and an unverified digital signature certificate are mainly responsible. All things considered, the error needs to be rectified on priority to ensure that the payroll tax table is successfully updated. Thus, to help you fix this update error, we have curated this blog explaining the major reasons and troubleshooting solutions. So, let’s move further and learn how to tackle this error code once and for all.
The solutions in this detailed article will help you resolve the QB update issues. However, if you want an expert to deal with the error on your behalf, you can reach out to our Proadvisor solutions’ professionals by dialing 1.855.888.3080 Our team will help you resolve the error easily and immediately.
Table of Contents
Primary Reasons Why QuickBooks Error Message 15204 Arises
Before learning about the solutions to fix QuickBooks error 15204, it is important to understand why the error occurs. Knowing the main triggers behind the error can help you fix the error with more clarity and understanding. Go through the below-mentioned reasons to know why this update error occurs –
- The shared download drive might be incorrectly mapped, or the download location might be invalid.
- Some essential files or components required for the QB payroll update process are missing.
- Crucial Windows OS files might be damaged or corrupted, which can cause update problems in QB payroll.
- The QuickBooks digital signature certificate might be unverified, invalid, or outdated.
- The Windows firewall or an antivirus program might be incorrectly configured to create blockages in the payroll update process.
- QuickBooks file copy service, which is used to execute the update process, might be disabled.
- Your QuickBooks Desktop might not be updated to the latest release, which can cause issues while downloading payroll updates.
- Your QuickBooks Desktop might be incorrectly installed, and essential installation files might be damaged, corrupted, or missing.
- You are not downloading the payroll updates with proper admin rights, which can cause privilege issues in the process.
- The Internet Explorer settings might be incorrectly configured, which can interfere with the update process in QB.
These are the main reasons why you are getting QuickBooks error 15204. Now, let’s move to the next section to learn about the troubleshooting solutions and resolve this update error.
Working Solutions to Address QuickBooks Desktop Error 15204
Since QB error code 15204 interferes with the update process, it is crucial to resolve it in order to download the updates successfully. Once you have understood the reasons behind this error, perform the solutions given below to remove the update issues.
Solution 1 – Configure Windows Firewall and Internet Security Settings
Sometimes, the Windows firewall might be configured to block QuickBooks. To address this scenario, configure the firewall settings to allow QuickBooks proper internet access in the following manner –
Step 1 – Download QB Tool Hub
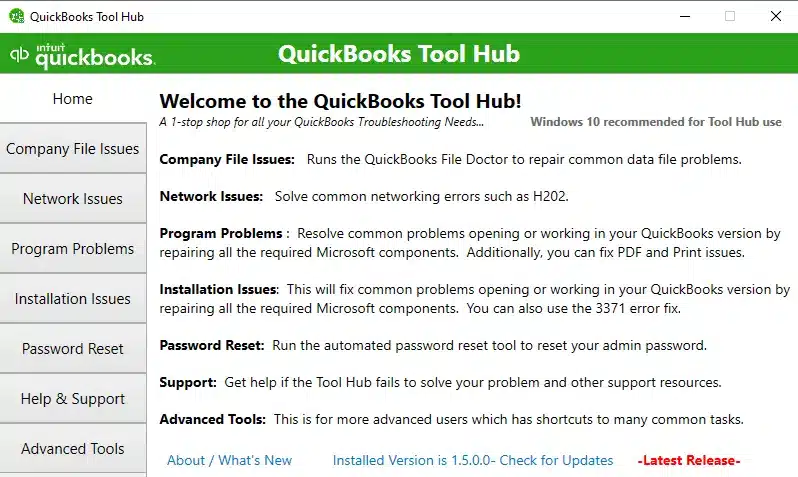
QuickBooks Tool Hub has a collection of tools that help easily diagnose and resolve common errors in QuickBooks. To download this utility and access its tools, follow the steps below –
- Exit QuickBooks, download the most recent version of the QuickBooks Tool Hub from Intuit and save the file at an accessible location on your PC.
Note: If you have installed the QB Tool Hub utility before, you can find out its current version at the bottom of the Home menu.
- Open the QuickBooksToolHub.exe file you downloaded, then follow the on-screen prompts to install and agree to the terms and conditions.
- When the installation is complete, double-click the QB Tool Hub icon on your Windows desktop to access the utility. However, if you can’t find the icon, you can manually search for “QuickBooks Tool Hub” in your Windows search bar and open the program.
Once QB Tool Hub is correctly installed, you can perform the steps given in the next section to run the QuickBooks File Doctor Tool.
Step 2 – Use QuickBooks File Doctor
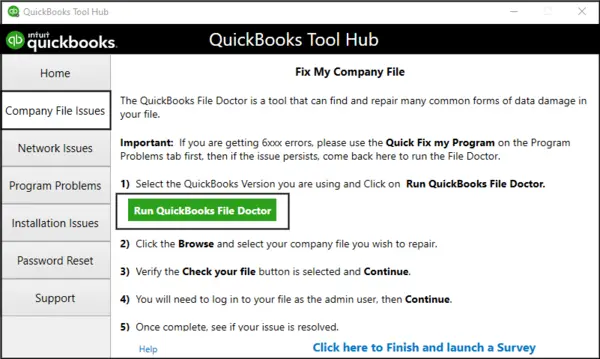
The next step is to open the QuickBooks Tool Hub and access the QuickBooks File Doctor tool. You can run this tool to fix company files and network problems, and to configure Windows firewall automatically. Let’s follow the detailed instructions below to run the tool swiftly.
- From the QuickBooks Tool Hub, select the Company File Issues tab, then locate & select the QuickBooks File Doctor tool.
Note: It can take up to a minute for the QB File Doctor to open; however, if the tool doesn’t open, you can manually search for “QuickBooks Desktop File Doc” and access the utility.
- In the QuickBooks File Doctor utility, choose the company file you wish to repair from the dropdown menu. If you can’t see the file, select Browse and search to locate the QB company file.
- Select Check your file and network, then hit Continue and enter your admin credentials.
- Select Next and wait for the scan process to complete, then open QuickBooks and access the company file.
Note: The scan time usually takes up to 5 minutes, depending on your file size. Remember that sometimes the scan may say it was unsuccessful, even if it fixes your issues.
Rerun the QB and payroll updates to check if the update issues are removed. But if you still get an error, move to the next step and configure the Windows firewall manually.
Step 3 – Manually Configure Windows Firewall Settings
If running QB File Doctor doesn’t help remove the network issues and firewall blockages while running the updates, follow the steps below to manually perform the firewall configuration –
Add Firewall Port Exceptions for QB
You need to create port exceptions to allow QuickBooks internet access without firewall restrictions. To add firewall port exceptions and remove the blockages while running QB updates, follow the steps below –
Note: If you are using multiple QB Desktop versions on the same computer, you need to perform these steps for each version.
- Go to the Windows Start menu and type “Windows Firewall” in the search panel, then open the utility.
- Now, navigate to the Advanced Settings tab, then right-click the Inbound Rules option.
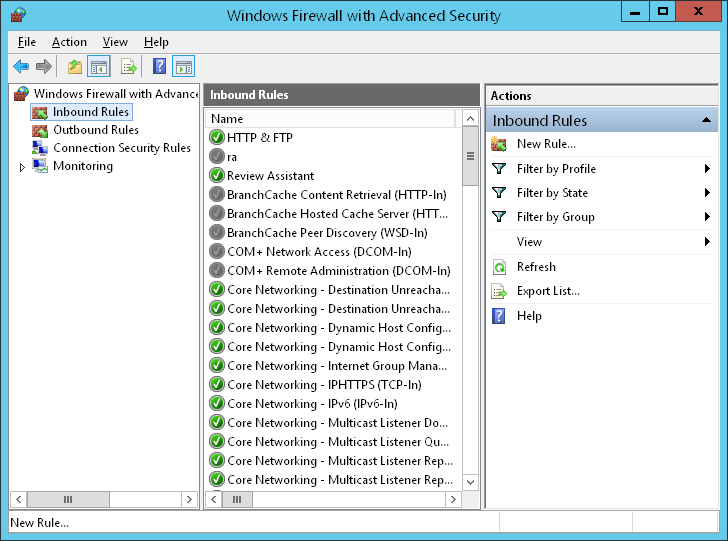
- Choose New Rule, select Port, then click Next.
- Ensure that the TCP option is selected, then enter the specific ports as per your QB version in the Specific Local Ports field from the port list below –
- QuickBooks Desktop 2020 and later: 8019, XXXXX.
- QuickBooks Desktop 2019: 8019, XXXXX.
- QuickBooks Desktop 2018: 8019, 56728, 55378-55382.
- QuickBooks Desktop 2017: 8019, 56727, 55373-55377.
Note: Remember, if you use multiple QB Desktop versions, you need to add each year’s (versions) ports in the Specific Ports list.
Important: If you use QuickBooks Desktop 2019 or later versions, you need to add the dynamic port number, as these versions use dynamic ports. These are specific firewall ports assigned during installation to make sure that QuickBooks gets exclusive use of a particular port.
- To get the Dynamic Port Number according to your QB Desktop version, you can follow the steps below –
- First, go to the Start menu, enter “QuickBooks Database Server Manager” in the Windows search panel, and access the QB Database Server Manager.
- Navigate to the Port Monitor section, then find your QuickBooks Desktop version, and note down the Port Number, which will be included in the port exceptions list.
Note: You can edit the assigned port number (for QB Desktop 2019 and later versions) by clicking Renew. If you choose to renew the port number, you can reset firewall permissions by selecting Scan Now from the Scan Folders menu.
- Enter the port number in the port exceptions list, then select Next and choose Allow the Connection.
- Click Next and make sure all profiles are checkmarked (if prompted), then select Next again.
- Create a new rule named “QBPorts(year).” Once done, hit Finish and repeat the same steps above (see steps 1 to 7) to create Outbound Rules. However, make sure to select Outbound Rules instead of Inbound Rules in step 2.
Once the rules are created, access QuickBooks in a multi-user mode or over the network from the host PC. If you still see issues, create firewall exceptions for QB executable (.exe) files in the next section.
Add Firewall Exceptions for QB Executable Files
QuickBooks uses executable files (.exe) to perform various tasks, and you need to add exceptions to these files to prevent firewall blockages in the following manner –
- Open the Windows Start menu, search for “Windows Firewall” in the search bar, then access the utility.
- Go to the Advanced Settings menu, right-click Inbound Rules, then select New Rule.
- Click Program, hit Next, and choose This Program Path.
- Click Browse, then select an executable file from the file list below, and click Next.
- AutoBackupExe.exe
- Dbmlsync.exe
- DBManagerExe.exe
- FileManagement.exe
- FileMovementExe.exe
- IntuitSyncManager.exe
- QBCFMonitorService.exe
- QBDBMgr.exe
- QBDBMgrN.exe
- QBGDSPlugin.exe
- QBLaunch.exe
- QBServerUtilityMgr.exe
- QBW32.exe
- QuickBooksMessaging.exe
- Select Allow the Connection, hit Next, and ensure that all the profiles are selected (if prompted).
- Select Next, then create a rule and name it “QBFirewallException(name.exe).
- The next step is to create Outbound Rules for QB by using the same steps above (see steps 1 to 6). Remember to replace Inbound Rules with Outbound Rules in step 2.
Once the QB rules are successfully created, reopen QuickBooks Desktop in a multi-user environment and check if the blockages are removed. Then, update QuickBooks and payroll, but if the error code persists, review the antivirus program settings in the next section.
Step 4 – Review the Antivirus Settings
If you configured your Windows firewall but still have issues while running the updates, you need to review your antivirus settings to ensure QuickBooks has general permissions. The troubleshooting steps may vary depending on the antivirus program, and you need to perform the specific steps for your particular antivirus software by following their instructions.
Once Windows firewall and antivirus obstructions are removed, rerun the updates in QB. On the contrary, If error 15204 in QuickBooks persists, follow the next solution to fix the issues.
Solution 2 – Run QuickBooks as an Admin and Download the Latest Updates
You need to make sure that QuickBooks Desktop is correctly updated to the latest release; otherwise, you won’t be able to download the payroll updates. You can run the update process with admin privileges in the following manner –
Step 1 – Run QuickBooks as an Admin
First, access QuickBooks with proper admin rights by following these steps –
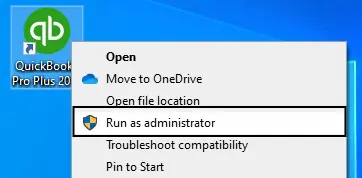
- Close your company files and QuickBooks Desktop, then right-click on the QuickBooks Desktop icon.
- Next, click Run as Administrator, and when the “Do you want to allow this program to make changes to your computer?” message appears on the screen, hit Yes.
Now, download the QuickBooks Desktop updates by following the steps given in the next section.
Step 2 – Download QB Updates
You can update your QuickBooks Desktop to the latest release in the following manner –
- Open the QB Help menu and select Update QuickBooks Desktop, then click Update Now.

- Select the Reset Updates checkbox, click Get Updates, and reopen QuickBooks to install the updates by selecting Install Now.
Once the QB updates are installed, move to the next section and download the latest payroll tax table updates.
Step 3 – Update QuickBooks Payroll Tax Tables
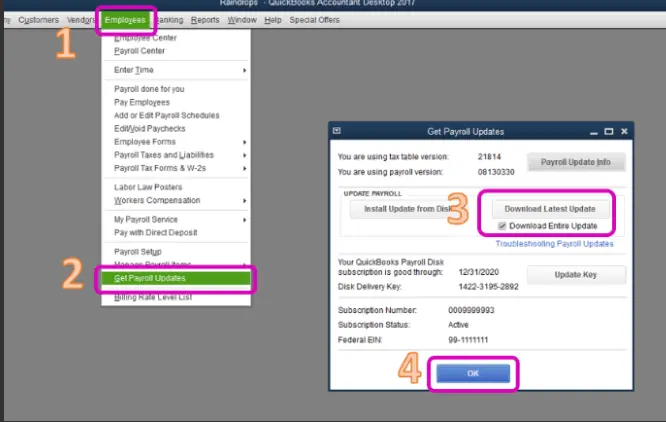
You can download the latest QuickBooks payroll tax tables by following the steps below –
- Open the QuickBooks Employees menu, select Get Payroll Updates, then click Download Entire Update.
- Further, select Update and wait for the informational window to appear, indicating that your download is complete.
Once QuickBooks Desktop and the payroll tax tables are updated, check the status of error 15204 QuickBooks. If the error message keeps appearing, you can move to the next troubleshooting solution to address the issue.
Solution 3 – Install a Digital Signature Certificate
An unverified or expired digital signature certificate can prevent users from downloading QB and payroll updates. To resolve this issue, install a fresh digital signature certificate in the following manner –
- Go to the C Drive, select Program Files, then click the Intuit folder.
- Choose the QuickBooks folder, locate and right-click the QBW32.exe file, then select Properties.
- Select Digital Signature and ensure that Intuit is selected in the signature list.
- Select Details, go to the Digital Signature Details window, and select View Certificate.
- In the Certificate window, select Install Certificate, then hit Next.
- Select Next until Finish is displayed, then select Finish and restart your computer.
Once done, reopen QuickBooks and download the QB and payroll updates again. Check the status of QuickBooks error 15204 to ensure that it is rectified, but if the error exists, move to the next solution.
Solution 4 – Repair QB Desktop
A damaged or incorrectly installed QB program can be another trigger for the update issues in the app. Thus, you need to fix the program issues and installation problems before running the update process. For this, use the QuickBooks Tool Hub features in the following manner –
Step 1 – Run the Quick Fix My Program Tool
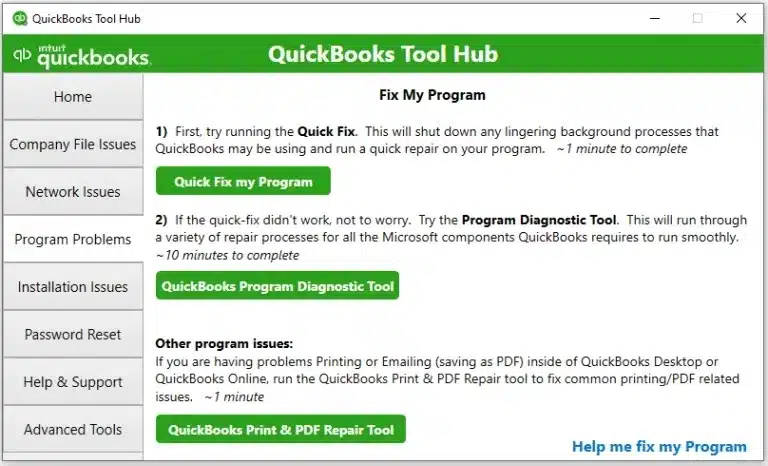
This tool helps shut down any background processes used by QuickBooks and can resolve general program issues. You can run the tool to fix QB program problems in the following manner –
- Ensure that QB Tool Hub is installed (see step 1 of solution 1), open the utility, then go to the Program Problems tab.
- Select the Quick Fix My Program tool, and once the tool stops running, rerun QuickBooks Desktop and open your data file.
Now, check if the program problems are resolved, and if you are able to run the update process in QB. If you still get the error, move on step 2 to run the QuickBooks Install Diagnostic Tool.
Step 2 – Use QuickBooks Install Diagnostic Tool
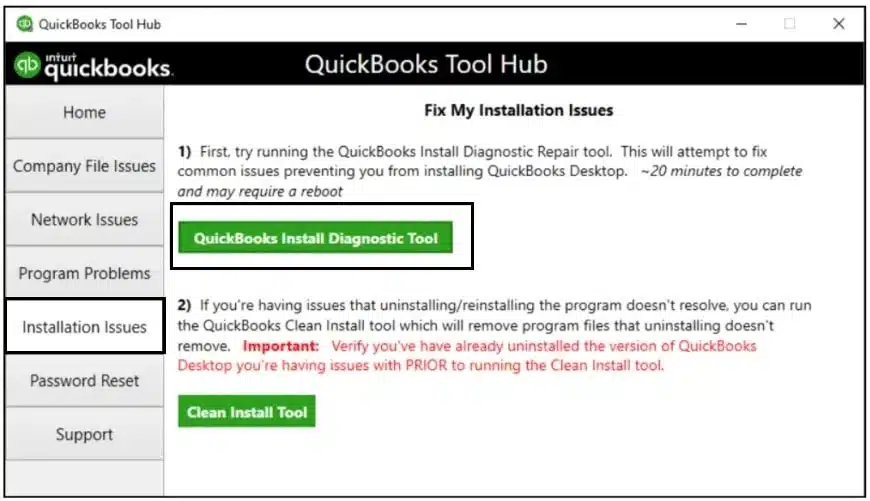
If the Quick Fix My Program tool is unable to address the issues, try fixing the installation problems. Issues during the QuickBooks installation process can be rectified by running the QuickBooks Install Diagnostic Tool in the following manner –
- Open the QuickBooks Tool Hub, go to the Installation Issues menu, and select the QuickBooks Install Diagnostic Tool.
- Let the tool run, which can take up to 20 minutes, and once the tool finishes, restart your PC.
- Restart QuickBooks Desktop, then open your data file and update the app and QB payroll to the latest release (see solution 2).
Check the status of QuickBooks error message 15204 to ensure that the update problems are removed. However, if the issues still appear, you can move to the next solution to reinstall the app.
Solution 5 – Reinstall QuickBooks Desktop
If repairing QuickBooks doesn’t help with the update issues, you can try reinstalling the app to remove the problems with the current QB version. Running a fresh installation process in the following manner can ensure that any general issues in the current version are fixed, which can help address the update error –
Prerequisites –
Before undertaking the reinstallation process, make sure to download the installer for your QB Desktop version. Also ensure that you have your license number handy so that the installation process goes seamlessly.
Once done, follow the steps below to reinstall QB successfully.
Step 1 – Remove QuickBooks
The first step is to remove QuickBooks Desktop from your system. For this, you can follow the steps given below –
- Open the Windows Start menu and search for “Control Panel” in the search bar.
- Access the Control Panel, select Programs and Features, or Uninstall a Program.
- From the list of programs, select the QB version you want to remove, then select Uninstall/Change, Remove, and hit Next.
Note: If you don’t see the “uninstall/change, remove” option, sign out and sign back into Windows with admin rights and then run the uninstallation process.
Once QB is successfully removed, reinstall the software in the next section.
Step 2 – Reinstall QuickBooks
You need to reinstall QuickBooks after removing the current version. Remember, QB will automatically install new folders and rename the old ones during the installation process. To reinstall QB, you need to first ensure that the system requirements are met, then follow the steps given below –
- Firstly, download your QuickBooks Desktop version, then save the file at an accessible location on your PC.
- Open the downloaded QuickBooks.exe setup file, then follow the on-screen prompts, and accept the software license agreement.
- Select Next, then enter your product and license numbers, and select Next again.
Note: Make sure you have an active internet connection to install the QB Desktop software.
- Further, select Express as the Installation Type, then hit Next, and click Install.
- When the installation process ends, select Open QuickBooks.
After you install, QuickBooks will ask you to activate the software, and you can activate QB by performing the steps given in the next section.
Step 3 – Activate QB Desktop
Once QB is installed in the system, you can activate it manually with these steps –
- Open QuickBooks, then access the Help menu and select Activate QuickBooks Desktop.
- Now, follow the steps on the screen to verify your info, and once done, try updating QB and the payroll service again.
If you are unable to run the update process even after reinstalling the app, move to the next troubleshooting solution to fix error 15204 QuickBooks.
Solution 6 – Enable QuickBooks File Copy Service
If your Intuit QuickBooks FCS is not running correctly, the software won’t be able to initiate and execute the update process. Thus, ensure that the QuickBooks FCS is enabled in the following manner –
Step 1 – Manually Start QuickBooks FCS
Intuit QuickBooks File Copy Service can be manually enabled by following these steps –
- Press the Windows + R keys on your keyboard to open the Run window, then type COMPMGMT.MSC in the Run command box.
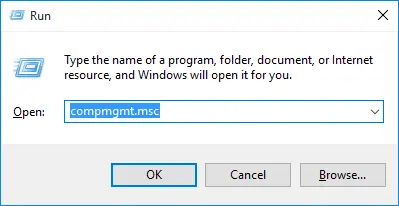
- Hit OK, then on the Computer Management Window, select Services and Applications.
- Click Services and scroll the cursor down to locate Intuit QuickBooks FCS, then double-click the service.
- Click on Startup type and choose the Manual option, then hit Apply and OK to enable the service.
Once done, revalidate the payroll service key to refresh the connection in the next section.
Step 2 – Revalidate QuickBooks Payroll Service Key
You can revalidate the payroll service key in QuickBooks by following the steps below –
- Open the Employees menu in QuickBooks, then choose My Payroll Service.
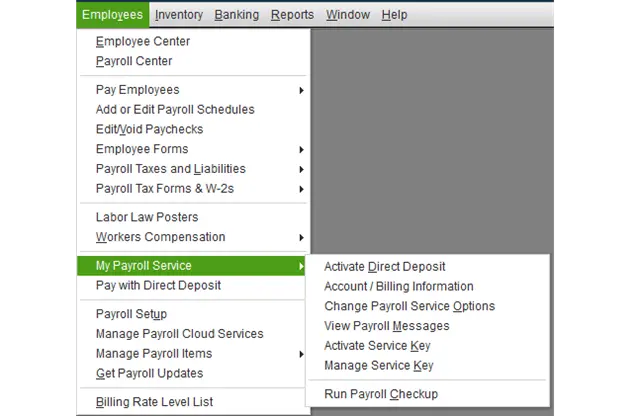
- Select Activate Service Key, then highlight the current payroll in the Service Keys window.
- Select Edit, and hit Next until Finish comes up, then click Finish.
Now, update QuickBooks Desktop and payroll again and check if you are still getting QuickBooks error 15204. If the error continues to appear, go to the next solution to resolve it.
Solution 7: Edit Internet Explorer’s Security Settings
Incorrect Internet Explorer settings can interfere with QuickBooks and payroll updates. If none of the above solutions worked, edit the IE security settings to troubleshoot QuickBooks error 15204 in the following manner –
- Firstly, open Internet Explorer, click the Gear icon and select Internet Options.
- Go to the Advanced menu, then move to the Security section, and checkmark the Use SSL 3.0 and Use SSL 2.0 options.
- Lastly, hit Apply and then click OK to save the changes, then rerun QuickBooks Desktop.
Run the QB and payroll update process again to check if the error code is fixed. If the error still appears, move to the next solution to review the shared mapped drive.
Solution 8: Review the Shared Mapped Drive
An incorrectly mapped shared drive can be another reason behind QB error code 15204. If none of the above solutions work, try resolving the QB update issue by reviewing the shared mapped drive and remapping the drive letter in the following manner –
- Press Ctrl + 1 to open the Product Information window, then locate the mapped path and note down the location.
The mapped path will look something like this –[x]:[folder name][data file name]. - Once the mapped path is located, update QuickBooks Desktop (see solution 2 above).
- Next, go to the Options tab, then review the Shared Download settings as follows –
- If Yes is selected for Shared Download, ensure that the drive in the Download Location and the drive in the Product Information section match.
- If No is selected for Shared Download, check if the directory in the Download Location and the QB Installation Directory are the same.
- Further, if the download location isn’t correctly set, modify the state of the location as follows –
- If Yes is already selected for Shared Download, select No and hit Save to save the modifications.
- On the other hand, if No is already chosen for Shared Download, select Yes and click Save to save the changes.
- If the shared download location is correct, remap the drive to a new letter as follows –
- Press the Windows icon and type This PC in the search bar, then choose This PC.
- Go to the Computer menu, select the Map a Network Drive option, and choose an unused drive letter.
- Click Browse and go to the Network Location where the company file is stored, then hit OK and Finish.
Note: If you’re facing issues while mapping the network drive using the UNC, use the IP address of the server instead.)
- Lastly, relaunch QuickBooks Desktop and reopen the company file from the new mapped drive.
- Once the drive letter is mapped, go to the QB Help menu and select Update QuickBooks.
- Navigate to the Options tab, then turn the Shared Download Location Off and then turn it back On to ensure that the download location is correctly mapped to the new drive letter.
- Hit Save and Close.
Rerun the QB and payroll updates, and check the status of QuickBooks error message 15204 to ensure that it is fixed.
Conclusion
We hope our detailed guide has helped you resolve QuickBooks error 15204 successfully. However, if you are stuck in the troubleshooting process or these solutions are ineffective in fixing the update problems, you can get direct assistance from our Proadvisor solutions’ support team at 1.855.888.3080. Our team will guide you in resolving the update issues easily.
FAQs
What is QuickBooks error 15204?
QuickBooks error 15204 is a common 15XXX series error that can arise while running QuickBooks or payroll updates in the app. This error can appear while downloading the recent updates and create hindrances in the process, making it unsuccessful.
Why does QuickBooks error 15204 arise?
QuickBooks error 15204 can occur due to the possible causes given below –
1. Your QuickBooks Desktop is not correctly updated.
2. You are not running the payroll updates with proper admin rights.
3. Your QuickBooks program might be damaged or incorrectly installed.
4. The digital signature certificate in QB might have expired, or become invalid.
5. Intuit QuickBooks FCS is disabled during the update process.
6. The Internet Explorer settings might be incorrect or misconfigured while running the updates.
7. Windows firewall or an antivirus app might create blockages and obstructions in QB.
8. The shared download drive location might be incorrectly mapped.
What are the solutions to fix QuickBooks error code 15204?
QuickBooks error message 15204 can be easily rectified by following the solutions below –
1. Rerun the QB and payroll updates with admin rights.
2. Configure Windows firewall and the antivirus app to remove blockages in QuickBooks.
3. Edit the Internet Explorer security settings.
4. Install the digital signature certificate.
5. Enable Intuit QuickBooks FCS manually.
7. Repair QuickBooks by using the QB Tool Hub features.
8. Reinstall QuickBooks to fix installation problems in the app.
How can I update the QuickBooks payroll?
You can easily download the latest QB payroll updates by following the steps below –
1. Open the Employees menu in QB, select Get Payroll Updates, and click the Download Entire Update option.
2. Further, click Update, and wait for the informational window to appear once the download process is complete.

Erica Watson is writing about accounting and bookkeeping for over 7+ years, making even the difficult technical topics easy to understand. She is skilled at creating content about popular accounting and tax softwares such as QuickBooks, Sage, Xero, Quicken, etc. Erica’s knowledge of such softwares allows her to create articles and guides that are both informative and easy to follow. Her writing builds trust with readers, thanks to her ability to explain things clearly while showing a real understanding of the industry.