QuickBooks users run the Verify and Rebuild Data utilities to resolve the company file problems. However, users may go to the QBWin.log file when the Verify Data utility fails. This log file may show QuickBooks LVL Server Error as the following messages, “LVL_SEVERE_ERROR–GetDecryptedCreditCardNumber Failed: The decryption has failed. CHECKPOINT: Failed to decrypt customer’s credit card number. Customer ID: nnnn,” or “LVL_ERROR–Unable to decrypt social security number/Social Security number.” Let’s understand the reasons for this error and quick fixes to implement.
If you’re tired of resolving the QuickBooks LVL Server error, contact our Proadvisor solutions specialists at the toll-free number 1.855.888.3080. We’ll help fix this problem swiftly without hassle.
Table of Contents
Reasons for QuickBooks LVL Server Error
Here are the primary reasons behind the QBWin.log: LVL_ERROR:
- You may encounter this error when the encryption of sensitive fields like your credit card numbers, Social Security, and Bank Accounts is missing or damaged.
- Your QuickBooks Admin user may be damaged.
Prerequisites to Fixing QuickBooks LVL Server Error
Here are the requirements to consider before fixing the QuickBooks LVL_ERROR:
Update QuickBooks to Get the Latest Bug Fixes
Before you implement quick fixes for the LVL error, update the QuickBooks program as follows:
- Tap the Help menu, then choose Update QuickBooks Desktop.
- Click Update Now, then tap the Get Updates option.
- Close QuickBooks, reopen it, then reinstall the QuickBooks update.
You can check if the update got installed successfully by pressing the F2 key and opening the Product Information screen.
Create a Backup or Portable Company
If you want to protect your data, create a backup or portable company as follows:
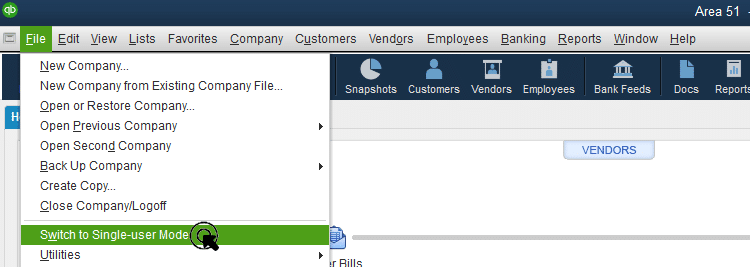
- Choose the File menu in QuickBooks, then tap the Switch to Single-user mode option.
- Again, choose QuickBooks, tap Back Up Company, and then hit Create Local Backup.
- Access Local Backup in the window, then Next.
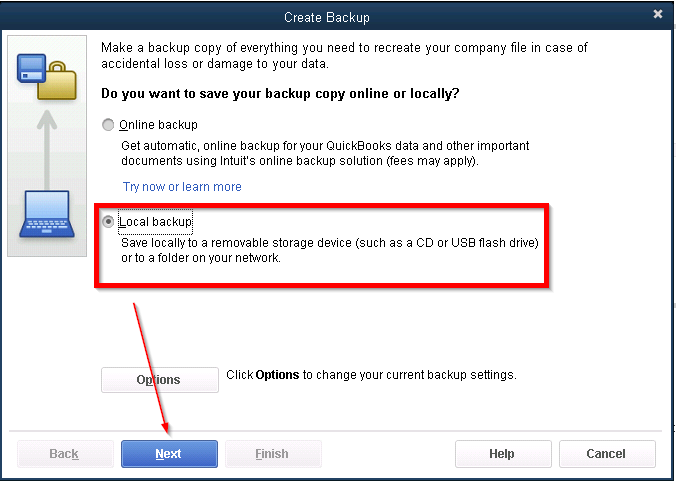
- Hit Browse in the Local Backup Only section and choose a place to save your backup company file.
- After you’re ready, click OK.
- Choose the Save it Now option, then Next.
Recommended to read : How to fix QuickBooks Not Opening
Expert Fixes for QuickBooks LVL Server Error
Here are the solutions you must try to resolve the QuickBooks Verify Data LVL Error:
Solution 1: Verify the QuickBooks Admin User
Check the QuickBooks admin user and see if it’s damaged:
- Enter your company file as the Admin.
- Reset the admin password through the following steps (for QuickBooks 2020 or later):
- Launch QuickBooks and access your company file.
- Tap the “I forgot my password” option on the sign-in screen.
- Choose an email, then click Next. You’ll get a token to reset your password on your email. If your email address is not visible, tap “Don’t see your email in the list above?” and follow the onscreen instructions.
- Input the token received in your email.
- Note that our emails might end up in your spam folders, so check your spam and junk folders if you can’t find the code in your inbox.
- QuickBooks will initiate the re-encryption of data in your file, and please be aware that this process may require several minutes.
Crucial Note: In case of a QuickBooks crash during the encryption process, please contact the support team. They may have to forward your file to Data Services to eliminate sensitive information.
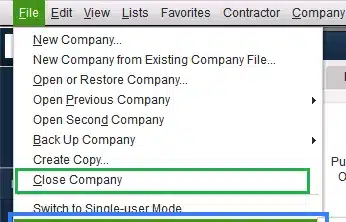
- Afterward, sign out of your company file. Navigate to the “File” menu, then choose “Close Company” or “Logoff,” and subsequently, close QuickBooks.
- Reopen QuickBooks and log in as the administrator to finalize the re-encryption procedure.
Now, verify if the re-encryption is successful:
- Run the Verify Data utility through the steps below:
- Choose File, then tap Utilities.
- Select Verify Data.

- Look into the most recent entry in the QBWin.log file as follows:
- From Product Information=
- Navigate to the Home page and use F2 or Ctrl + 1 to access the Product Information window.
- To open the Tech Help window, press F3 or Ctrl + 2, then choose the Open File tab.
- Click on QBWin.log and select Open File.
- Pro tip: Use Ctrl + F and input “Begin Verify” to locate the latest entry of “Begin Verify” in your log file.
- On Windows=
- Use File Explorer to locate the location of the QBWin.log file.
- The location can be C:\Users\YOUR USER NAME\AppData\Local\Intuit\QuickBooks\log\XX.X\QBWin.log.
- In this pathway, XX.X signifies your QuickBooks Desktop version. For instance, 17.0 corresponds to Enterprise 17.0, and 27.0 indicates QuickBooks 2017.
- Quick Tip: A quicker method is to type %localappdata%\Intuit\QuickBooks\log\XX.X\QBWin.log directly into your address bar.
- From Product Information=
- If any of the following errors emerge, contact QuickBooks professionals immediately. Else, proceed to the next solution:
- LVL_SEVERE_ERROR–GetMasterKey Failed: The decryption has failed.
- LVL_SEVERE_ERROR–GetDataAccessKey Failed: The decryption has failed.
When you get the MasterKey error in the admin user, get help from QuickBooks experts. On the other hand, delete and recreate the affected users if the error applies to non-admin users:
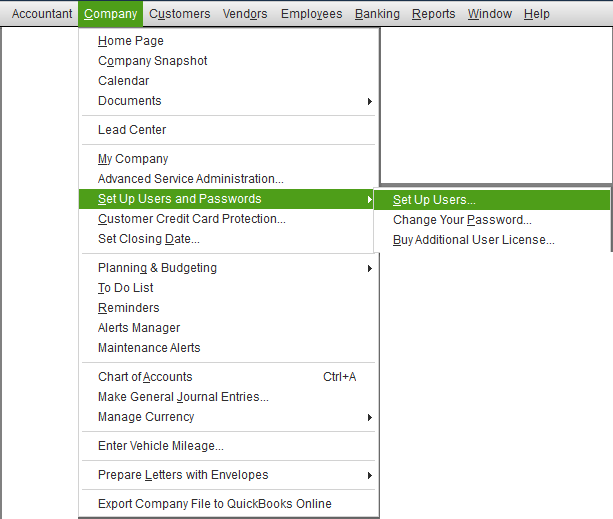
- Access the Company menu, select Set Up Users and Password, and then click Set Up Users. Choose to Add User…
- Complete the User Name, Password, and Confirm Password fields, and then proceed by selecting Next.
- On the Access for user: (username) window, indicate the specific areas of QuickBooks the user can access, then click Next.
- If you click Selected areas of QuickBooks, customize the restrictions for various sections of the company file for the newly added user by selecting No Access, Full Access, or Selective Access.
- Once finished, select Finish.
Read Also : I am getting QuickBooks Error 1324
Solution 2: Fix the Damaged Encrypted Fields
Follow the steps below to address issues with missing or damaged encrypted fields. Although these steps are specific to credit card numbers, you can apply comparable procedures to rectify problems with Vendor Tax IDs or Employee SSNs.
Step 1: Use the Verify Data utility
Run this utility by following the steps mentioned in Solution 1.
Step 2: Identify the Error Message in QBWin.log
See what’s affected by checking the error message in QBWin.log:
- Locate the QBWin.log through the steps in Solution 1 and save it to any location that is easily accessible, like your Desktop.
- Right-click the QBWin.log file. Choose Open with, now click Notepad.
- Write the customer names and IDs appearing in the QBWin.log.
Step 3: Revise the Credit Card Number of the Affected Customer
Modifying the credit card number resolves the corrupted data causing the QuickBooks Desktop LVL_ERROR. You can use the advanced import feature to override the damaged credit card information if numerous users are affected, ensuring a more efficient resolution.
- Access the Customer Center by navigating to the Customers menu.
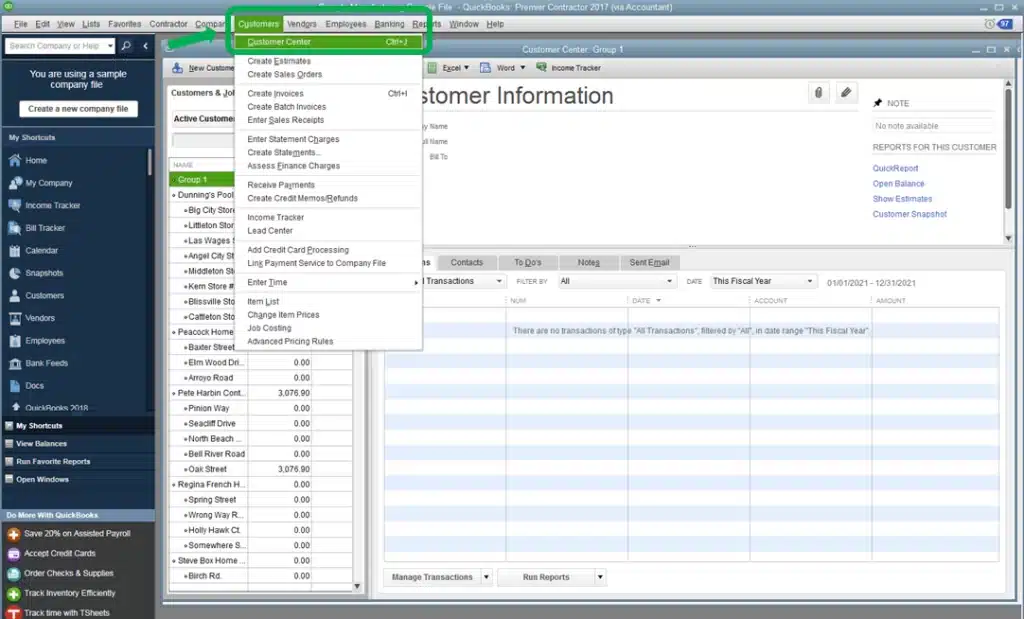
- Click on the small arrow icon above the search bar and choose All Customers.
- Locate the Customers or Jobs whose names you’ve recorded.
- If the Customer or Job name is not on the list:
- Export the Customer list as an IIF file.
- Right-click on the IIF file, choose Open With and select Microsoft Excel or any text editor. Note: If a prompt appears when opening the file, select Next. Under the Delimiter section, mark Other: and insert an apostrophe (‘). Don’t mark the rest, then select Finish.
- On the Spreadsheet, verify if the Customer ID from the log file matches any Customer ID under the REFNUM column. Make a note of the names of Customers that have a match.
Note: If a prompt appears when opening the file, select Next. Under the Delimiter section, mark Other: and insert an apostrophe (‘). Don’t mark the rest, then select Finish. - On the Spreadsheet, verify if the Customer ID from the log file matches any Customer ID under the REFNUM column. Make a note of the names of Customers that have a match.
- Double-click on the Customer or Job to edit, then access the Payment Settings tab.
- Click OK to input a 16-digit dummy credit card number and expiration date.
- Return to the Payments Settings tab.
- Input the correct credit card number and expiration date, then hit OK.
Note: Repeat this process for all Customers or Jobs you recorded in the QBWin.log file.
You may read also : What is QuickBooks Error 15223
Step 4: Verify if the Data has No Errors Anymore
Rerun the Verify Data utility to determine if the issue has been resolved.
- If the utility doesn’t detect any problems, consider the problem resolved.
- If the verification fails, scan the QBwin.log for additional errors that led to the verification failure. If Customers are still appearing, repeat Step 3.
Conclusion
We hope our in-depth guide into the QuickBooks LVL Server error resolves your problem without issues. If you still see the error, we suggest you contact our Proadvisor solutions specialists at 1.855.888.3080. We don’t want you to lose anything or get stuck in the complexities. So, try to resolve the problem immediately with our assistance.
FAQs
How do I update QuickBooks on Mac to resolve the QuickBooks LVL Server error?
The steps to update QuickBooks on Mac to resolve the QuickBooks LVL Server are as follows:
1. Choose the QuickBooks menu in QuickBooks for Mac.
2. Select Check for updates.
3. Now, hit Install and relaunch.
If I have QuickBooks 2019 or earlier, how can I reset my password to resolve the QuickBooks LVL Server error?
The steps to follow include:
1. Launch QuickBooks Desktop and, on the login window, click on “I forgot my password.”
2. Finish the form by inputting the following information:
● Your license number for QuickBooks Desktop (Access by holding down F2 on your keyboard from the login window).
● Input the name, email address, phone number, and ZIP code associated with your product purchase.
Note: Retrieve this information by signing in to your Customer Account Management Portal (CAMPS). If you encounter issues with the sign-in, you can reset your CAMPS password.
3. Click OK. If the provided information is accurate, you will receive a code sent to the primary email in your CAMPS. Please be aware that our emails might be found in your spam folders, so check both spam and junk folders if the code is not visible in your inbox.
4. Follow the guidance from QuickBooks to create a new admin password.

Erica Watson is writing about accounting and bookkeeping for over 7+ years, making even the difficult technical topics easy to understand. She is skilled at creating content about popular accounting and tax softwares such as QuickBooks, Sage, Xero, Quicken, etc. Erica’s knowledge of such softwares allows her to create articles and guides that are both informative and easy to follow. Her writing builds trust with readers, thanks to her ability to explain things clearly while showing a real understanding of the industry.