Is QuickBooks Error 1712 making it difficult to install or update QuickBooks Desktop? It’s common to encounter this error with messages like “We’re sorry! Something went wrong with your installation” or “Error 1712. One or more of the files required to restore your computer to its previous state could not be found. Restoration will not be possible.” The user falls into the vicious trap of resolving the installation error, facing constant QuickBooks crashes, and getting the pop-up error message. Let’s look into the must-try steps for users to fix this issue quickly.
Since QuickBooks error 1712 relates to Microsoft components, you may find it challenging to resolve yourself. Such cases may require obtaining professional help. Our expert team is right beside you to fix this frustrating error. Call our toll-free number 1.855.888.3080 today.
Table of Contents
Causes Behind Occurence of QuickBooks Error 1712
The reason why error 1712 QuickBooks comes on your screen is as follows:
- One or more missing Windows components can trigger this error.
- Specific programs may be causing blockages in installing the software properly.
- Issues with the Windows user or admin-level permissions may trigger this issue.
- Outdated Windows OS or incompatibility with the Windows update may cause error 1712 when installing QuickBooks.
Solutions That Fix QuickBooks Install Error Code 1712
Here are the expert recommendations you must try to resolve error 1712 when installing QuickBooks for desktop:
Fix 1: Run Quick Fix My Program
You may have to close your QuickBooks application and run QuickBooks Tool Hub to resolve the QuickBooks Install error 1712. This error usually relates to problematic Windows components, and the Quick Fix My Program tool from the tool hub can help fix it. This utility repairs the Windows components that cause trouble when it runs automatically, so users don’t have to try complicated steps. Here’s how you can attempt the Quick Fix My Program solution:
Step 1: Download/ Install QuickBooks Tool Hub
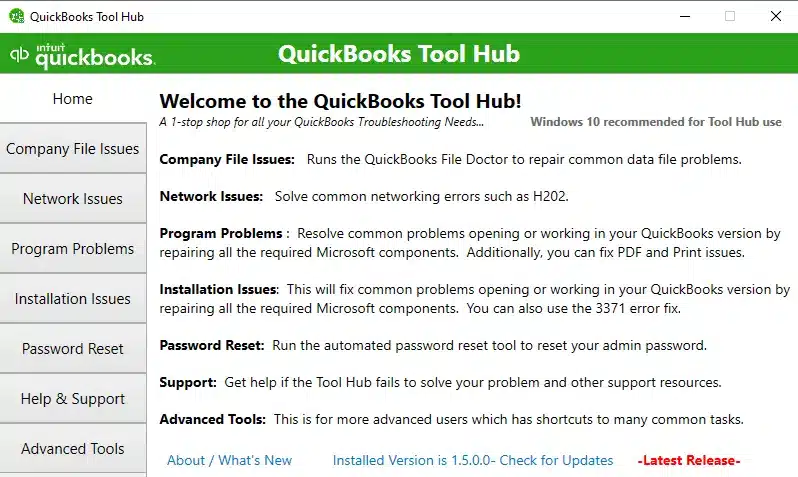
- Access the latest QuickBooks Tool Hub package from Intuit after closing the QuickBooks application on your system.
- Save the QuickBooks Tool Hub download file in a convenient location to open without problems.
- Access the QuickBooksToolHub.exe downloaded file on your desktop and start its installation.
- The InstallShield instructions will keep running on the screen, and the License Agreement will ask for your acceptance.
- Read it thoroughly, accept it, and then finish installing the tool hub.
- As the tool hub ends installing, you may notice a QuickBooks Tool Hub icon on the desktop.
Step 2: Get the Help of the Quick Fix My Program tool
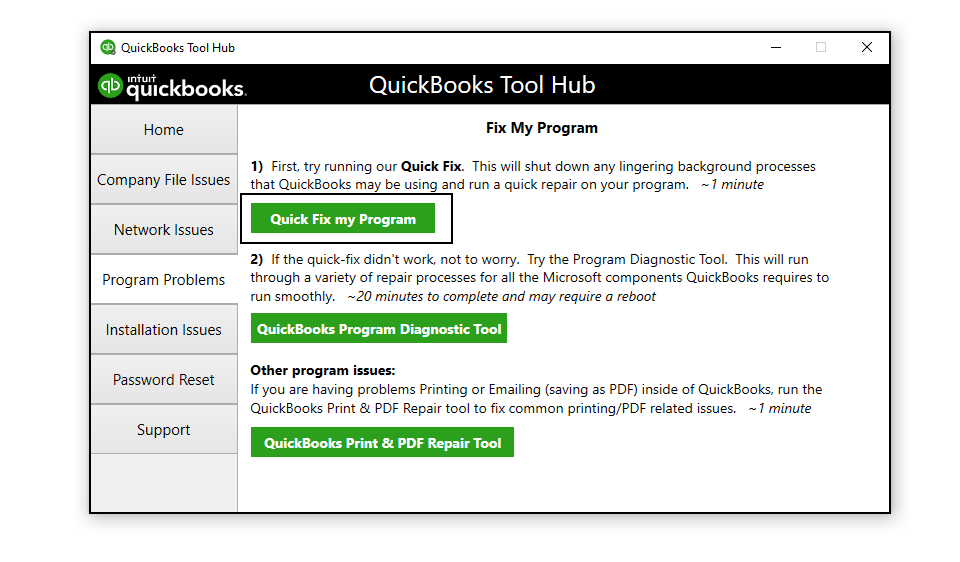
- Finally, after you have installed QuickBooks Tool Hub, open it.
- Then, tap Program Problems.
- Now, click Quick Fix My Program.
- Retry installing QuickBooks Desktop after this step.
Recommended to read : How to fix QuickBooks Error 1327
Fix 2: Add or Create a Windows User with Admin Rights
Another way you can fix error 1712 is by changing the Windows user account and giving them admin rights for QuickBooks programs. The steps to be followed for this practice are as follows:
Step 1: Adding a Windows User with Admin Rights
In Windows 11/10-
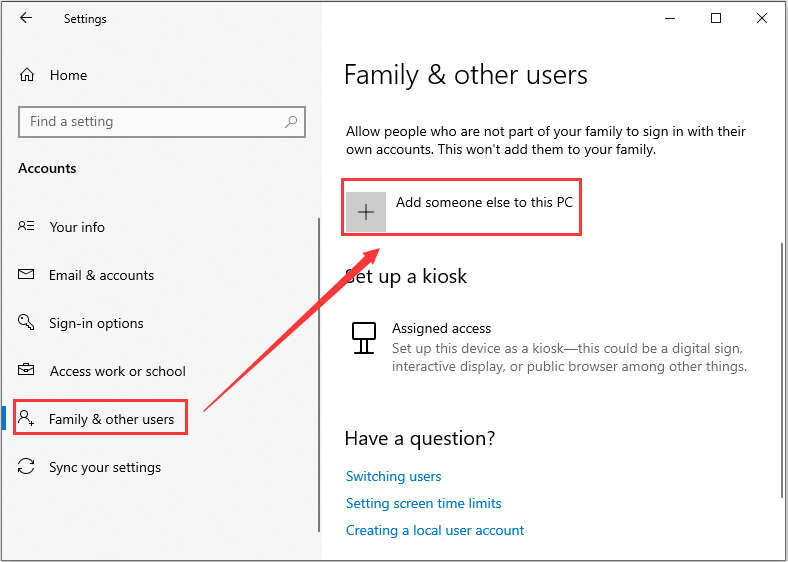
- Choose Start > Go to Settings > Tap Accounts and then hit Family & Other Users. (In certain Windows versions, it might show as Other users.)

- Tap Add Account, which is placed next to Add Other User.
- Choose the option “I don’t have this person’s sign-in information.” Then, on the subsequent page, hit the option “Add a user without a Microsoft account.”
- Input a username, password, or password hint—or you can choose security questions—and then click Next.
- Now, convert a local user account to an administrator account by clicking Start > Going to Settings > Accessing Accounts.
- Look under the Family & Other Users section, click on the account owner’s name (you should locate “Local account” below the name), and then click on Change account type.
Note: If you tap an account displaying an email address or lacking the mention of a “Local Account,” you are granting administrator permissions to a Microsoft account, not a local account. - Now, hit Administrator under Account Type, and then click OK.
- Log in through the newly created administrator account.
The steps to try for Windows Small Business Server 2011 and 2008 R2:
- Launch the Windows Start menu.
- Choose All Programs. Navigate to Windows Small Business Server and then select Windows SBS Console.
- Tap Users and Groups, and then access the Add a New User Account tab.
- Complete the user information, and proceed to follow the steps outlined in the Add a New User Account wizard.
- Grant administrator rights to the newly created user.
- Upon completion, select Finish.
Step 2: Offer Admin Access to QuickBooks Programs
- Exit QuickBooks Desktop.
- Launch the Windows Start menu.
- Open the Control Panel and hit User Accounts.
- Access the QBDataServiceUserXX corresponding to your QuickBooks Desktop version. For QuickBooks Desktop 2020, search for QBDataServiceUser30. For the 2019 version, search for QBDataServiceUser29. The number decreases with each version.
- Select Change the Account Type, then tap Administrator. Then, click on Change Account Type.
- Choose Apply to save your modifications.
- Repeat these actions for each instance of QuickBooks Database Server Manager you use.
Now, install QuickBooks Desktop again.
Read Also : What is QuickBooks Administrator Permissions Needed Issue
Fix 3: Get the Latest Windows Update
Update your Windows operating system and ensure you have the latest release. Having the newest Windows version keeps you up-to-date with security enhancements, features, and more. Further, the Windows update ensures compatibility with QuickBooks Desktop versions. So, try the update process as follows:
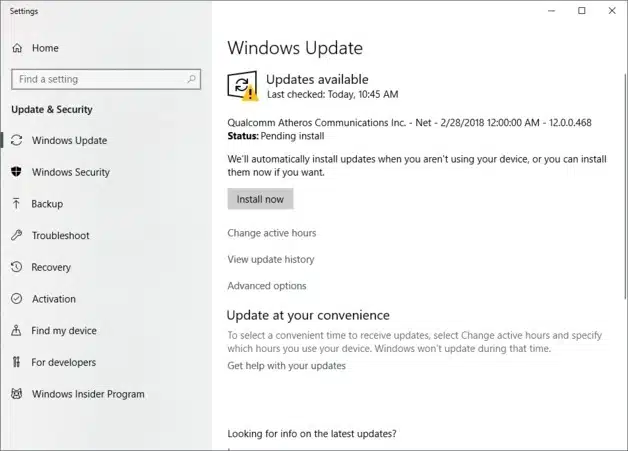
- Click the Start menu (Windows icon).
- Type Check for Updates.
- Press Enter and look for any new updates available.
- If they are, click the Install Now button to obtain the latest Windows update.
- Then, try installing QB.
Fix 4: Use the Windows Installer Troubleshooter
If you’re facing problems that block programs from getting installed on your system, use the Program Install and Uninstall Troubleshooter. The Program Install and Uninstall troubleshooter aids in automatically resolving issues encountered when installing or uninstalling programs, and it also addresses problems with corrupted registry keys.
To begin, you will need to download the troubleshooter.
- Download the troubleshooter.
- If the File Download box appears upon starting the download, choose Run or Open.
- The troubleshooter offers step-by-step instructions to follow. If a program is not listed in the uninstall options, you will be prompted to provide the program’s product code. To retrieve the code, you will need a tool designed for reading MSI files, typically available to IT professionals. The product code is located in the property table of the MSI file.
Issues the troubleshooter addresses:
- Corruption of registry keys on 64-bit operating systems.
- Corruption of registry keys controlling update data.
- Obstacles preventing the installation of new programs.
- Issues preventing the complete uninstallation or updating of existing programs.
- Things preventing the uninstallation of a program through Add or Remove Programs (or Programs and Features) in the Control Panel.
You can contact an IT professional if you don’t feel comfortable performing these steps.
Fix 5: Use the QuickBooks Install Diagnostic Tool
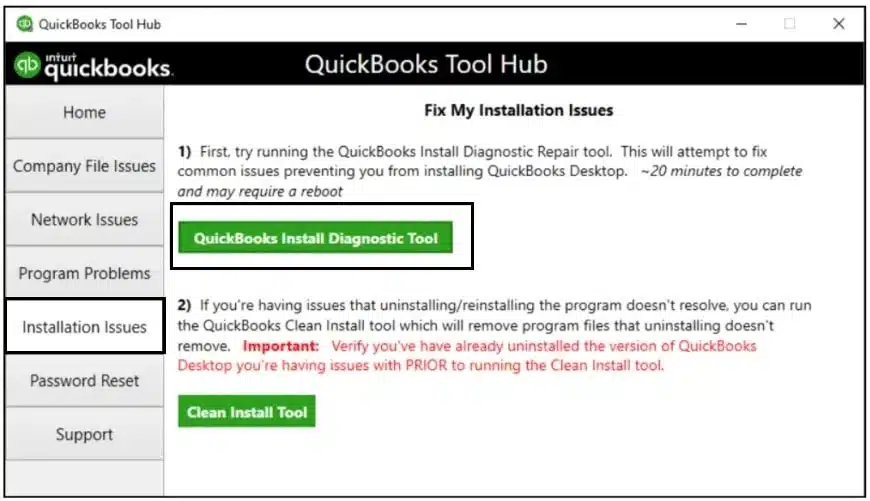
When you’re unable to install QuickBooks and the Microsoft .NET Framework, causing QuickBooks Desktop error 1712, you should trust another QuickBooks Tool Hub utility called the QuickBooks Install Diagnostic Tool. This tool helps resolve installation problems and fixes the Microsoft components necessary for QuickBooks to run smoothly. After downloading, installing, and setting up QuickBooks Tool Hub, you must follow the steps below to run this tool:
- Open the Tool hub.
- Choose Installation Issues.
- Tap QuickBooks Install Diagnostic Tool and let it run for 20 minutes or until it shows results.
- Reboot your PC after the tool ends.
Fix 6: Manually Fix the Microsoft .NET framework
Since the QB app uses Microsoft programs to run web-based apps, problems with the Microsoft .NET Framework can affect the installation or uninstallation of the program. Therefore, repairing it through the following steps becomes crucial.
For Windows 10 and later versions:
- Close all currently open programs.
- Access the Start menu in the Windows.
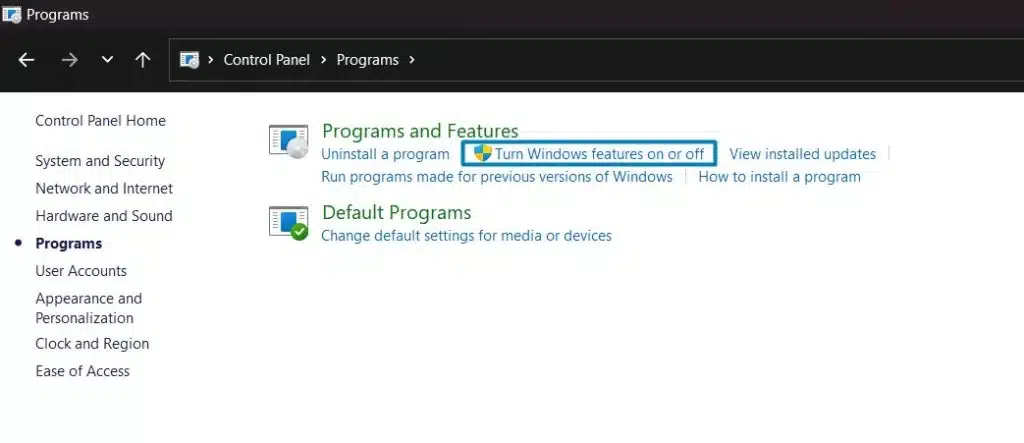
- Put “Control Panel” into the Start menu’s search query and open Control Panel.
- Tap Programs and Features.
- Hit Uninstall a Program; note that you are not uninstalling anything.
- Choose Turn Windows features on or off.

- Access the .NET Framework on the list.
- Ensure to check the settings for both .NET Framework 4.5 (or later) and .NET Framework 3.5 SP1.
Note: The steps for fixing .NET Framework 4.5, 4.6, 4.7, and 4.8 are identical.
Check .NET Framework 4.5 (or later):
- If the .NET Framework 4.5 (or later) checkbox is unchecked:
- Select the checkbox to activate .NET Framework 4.5 (or later).
- Hit OK to save changes.
- Restart your computer.
- If the .NET Framework 4.5 (or later) checkbox is already checked:
- Uncheck the checkbox to deactivate .NET Framework 4.5 (or later). Do not re-enable it.
- Hit OK to save changes.
- Restart your computer.
- After signing back into Windows, follow the steps to reactivate .NET Framework 4.5.
Check .NET Framework 3.5 SP1:
- If the .NET Framework 3.5 SP1 checkbox is unchecked:
- Select the checkbox to enable .NET Framework 3.5 SP1.
- Hit OK to save changes.
- Restart your computer.
- If the .NET Framework 3.5 SP1 checkbox is already checked:
- Uncheck the checkbox to disable .NET Framework 3.5 SP1. Do not re-enable it.
- Select OK to confirm changes.
- Restart your computer.
- After signing back into Windows, follow the steps to enable .NET Framework 3.5 SP1 again.
If you encounter an error while turning the .NET Framework on or off, seek assistance from an IT professional or Microsoft. The issue may be related to your operating system rather than QuickBooks.
Recommended to read : How to fix QuickBooks Error 15240
Fix 7: Repair Microsoft MSXML
Microsoft XML Core Services (MSXML) is a collection of services that enables the development of Windows-native XML-based applications using Script, VBScript, and Microsoft development tools. This Windows component, when damaged, can lead to operational issues in QuickBooks Desktop.
To register the MSXML DLL files on a 64-bit operating system, follow these steps:
- Access the Windows Start menu and input cmd.
- Right-click cmd and hit Run as Administrator.
- In the command prompt at the C: prompt, write cd\windows\syswow64.
- Input regsvr32 MSXML6.dll and press Enter.
- Proceed with the installation of QuickBooks Desktop.
For a 32-bit operating system, register MSXML using the following commands:
- Launch the Run command by pressing Windows+R on your keyboard.
- Write cmd and press Enter.
- In the command prompt, note regsvr32 MSXML6.dll and press Enter.
- Continue with the installation of QuickBooks Desktop.
Fix 8: Uninstall Antivirus
If you suspect security programs like antivirus and firewalls are causing restrictions in installing the QuickBooks program, we suggest you uninstall or disable them for a while. Uninstalling an antivirus program requires following the steps below:
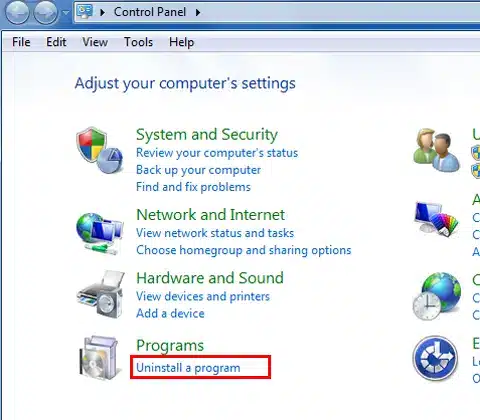
- Tap the Windows icon and input Control Panel in the search bar.
- Open the Control Panel and tap Uninstall a Program.

- Choose the antivirus program that causes conflict and follow the uninstall steps.
- Remove it thoroughly, reboot the PC, and then reinstall QuickBooks Desktop.
Fix 9: End All QuickBooks Tasks on the Task Manager
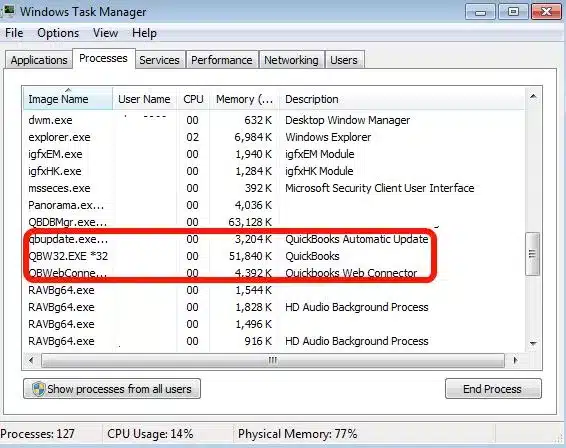
The error 1712 in QuickBooks appearing while you repair the program may appear due to one or more missing Windows components. In such cases, it’s beneficial to kill the processes through the Task Manager through the following steps:
- Reboot the PC.
- Press Ctrl + Shift + Esc.
- Open Task Manager and tap the Processes tab.
- Right-click QuickBooks-related processes, including QBW32.exe, QBupdate.exe, QBDBMgrN.exe, etc., and tap End Task.

- After closing all background processes running in the Task Manager, try installing QB again.
Fix 10: Repair QuickBooks Desktop
You can try to repair the QuickBooks application if you receive QuickBooks error 1712. This error requires you to resolve the Microsoft components necessary to run QuickBooks. The repair utility in the Control Panel can help you fix these components and have them up and running quickly. So, try the following repair steps:
- Open the Control Panel by searching it on the Windows Start menu or tap the desktop icon.
- Click Programs and Features and scroll the list to choose QuickBooks.
- Right-click QuickBooks and tap the Uninstall/ Repair option.
- Click Repair and proceed with the repair instructions.
- Finish doing so, then install QuickBooks again to see if the QuickBooks error code 1712 remains.
You may read also : What is QuickBooks Error 400
Fix 11: Use Selective Startup to Install QuickBooks
If you encounter difficulties installing or uninstalling QuickBooks on the computer, like the QuickBooks error message 1712, switch to Selective Startup and attempt the process again. Here’s a guide to help you through the Selective Startup steps:
Before you proceed, ensure that you:
- Create a backup of the company file through the steps mentioned below:
- Click File, then switch to single-user mode.
- Tap File. Now, choose Back Up Company, then Create Local Backup.
- When the Local Backup Only section arises, click Browse and a location to save your company file.
- Choose the number of backups you want optionally.
- Run a test to ensure your backup file is perfect before saving.
- Hit the OK option once you are prepared.
- Tap the Save It Now option, then hit Next.
- Keep a copy of your QuickBooks Desktop product and license information with you.
Step 1: Switch to Selective Startup
To ensure a smooth process without interference from other applications, switch to Selective Startup. If you feel uncertain about the steps, seek assistance from your computer’s manufacturer or a Windows expert.
- Press Windows+R through your keyboard’s keys to open the Run command.
- Write msconfig and select OK.
- Use the General tab to hit Selective Startup and Load System Services.
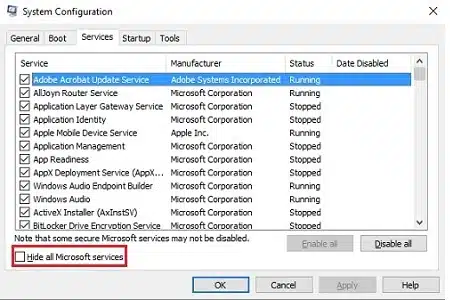
- Navigate to Services and hit Hide all Microsoft Services.
- Select Disable All.
- Unmark Hide all Microsoft services.

- Tap Windows Installer from the services list that opens.
- Select OK.
- Access the Restart button on the System Configuration window.
Step 2: Uninstall and Reinstall QuickBooks Desktop
Follow the steps to delete the QuickBooks application through the steps below:
- Access the Control Panel.
- Choose Uninstall a program.
- Hit QuickBooks in the apps list.
- Click Uninstall and follow the steps to delete the application.
- After deleting QuickBooks and its files, you can reinstall the program.
Step 3: Get Back to Normal Mode
Now, we’ll run the normal mode to ensure the app’s installed and is running successfully:
- Press Windows+R through your keyboard’s keys to open the Run command.
- Write msconfig and select OK.
- Look in the General tab and choose Normal Startup.
- Select OK.
- Tap the Restart button on the System Configuration window.
Bottom Line
We hope our thorough blog on QuickBooks Error 1712 helps you fix your issues quickly and effectively. We have listed every possible reason and solution that can trigger this issue. However, if you are uncomfortable carrying out these steps yourself and require an expert beside you, talk to our Proadvisor solutions specialists team at 1.855.888.3080.
FAQs
Where does the Windows OS troubleshooter work?
The Windows OS troubleshooter works on Windows 10, 8.1, 8, and 7. So, you can use it to troubleshoot the error 1712 in QB Desktop.
What are the various instances where QuickBooks error 1712 arises?
QuickBooks error 1712 arises in the following situations:
1. If you get a persistent message about installing .NET Framework (the latest version), trying to update the app may cause failure and lead to error 1712.
2. While installing or uninstalling QB Desktop, the program crashes, and an issue with placing the icon on the desktop appears with the 1712 message.
3. When updating QuickBooks Pro 2019, you may encounter the QuickBooks Error 1712 Windows 10.
4. You may be able to uninstall your QB app successfully, but reinstalling it gives errors like error 1712.
5. When you try repairing the application, you might receive QuickBooks error 1712.
Where does the error 1712 arise?
The QuickBooks Error 1712 Windows 10 arises in the following systems:
1. QuickBooks Desktop Premier 2023
2. Windows 10 version 22H2 OS, 64-bit
3. QB Desktop 2019
4. QuickBooks Pro 2019
5. QuickBooks Desktop Pro 2020

Erica Watson is writing about accounting and bookkeeping for over 7+ years, making even the difficult technical topics easy to understand. She is skilled at creating content about popular accounting and tax softwares such as QuickBooks, Sage, Xero, Quicken, etc. Erica’s knowledge of such softwares allows her to create articles and guides that are both informative and easy to follow. Her writing builds trust with readers, thanks to her ability to explain things clearly while showing a real understanding of the industry.