QuickBooks error 15225 is an update error related to error series 15xxx in QuickBooks. It appears while downloading payroll or software updates in the QB application. The reasons for it lie with network connectivity, misconfigured internet settings, or outdated security certificates, preventing QuickBooks from verifying updated files digital signatures. However, this is not all.
In this blog, we will explore all the reasons in detail, and show you how to troubleshoot error code 15225.
The guide should prove helpful for self-troubleshooting. However, if you are not entirely confident, call the support team on +1.855.888.3080 for on-call assistance in tackling the error.
Table of Contents
What is the reason for QuickBooks Error 15225?
A set of reasons can give rise to the QuickBooks Error 15225, and as a user, you must be aware of them as it will be of aid when fixing the issue. In this guide, we will start by talking about those reasons that can trigger the error code 15XXX, and eventually, we will move to the solutions based on the triggers.
- The present configuration of Microsoft Internet Explorer is incompetent and can stop the downloading and installing of QuickBooks Desktop updates.
- QuickBooks cannot verify the digital signature of the files downloaded through it and, therefore, may cause the QuickBooks Error message 15225.
You may read also: QuickBooks Error 15102
Verified solutions for error code 15225 in QuickBooks
After studying the reasons behind error code 15225 in QuickBooks, the solutions were verified by the support team. These ways have successfully helped multiple users handle similar update and download errors in QuickBooks, and we hope the same for you.
Solution 1: Add Intuit as the Trusted Site in the Internet Explorer
When Intuit and its related sites are not on the list of trusted ones for Internet Explorer, it can cause download and update errors in QuickBooks. Now, to regulate this cause of the QuickBooks Update Error 15225, we suggest that you follow the steps given below.
- Open the Internet Explorer web browser.
- Choose the Gear icon and click on Internet Options.
- Select the Security tab and then the Trusted sites.
- Click on the Site option to add the following domains.
- Users who employ the US version of QuickBooks add the following sites.
- *.quickbooks.com
- *.intuit.com
- For the Canadian version of QuickBooks.
- *.quickbooks.ca
- *.intuit.ca
- Press Close and then Apply.
- Finally, click on OK.
Solution 2: Install the QuickBooks Desktop Digital Security Certificate
The digital security certificate is essential to establish a secure network connection. In addition, the certificate holds essential details that help protect your crucial data. Therefore, you must use the steps listed below to manually install the QuickBooks digital security certificate.
- On your Windows, you must search the QuickBooks.exe file.
- Once you locate the file, right-click on it.
- Click on Properties. The Properties window will open.
- Choose the Digital Signatures tab and see Intuit Inc.’s presence in the Signature list field.
- Choose Details.
- Select the View Certificate option.
- Now that you are on the Certificate window go to the General tab and choose the Install Certificate option.
- Select Next and keep on clicking Next until you reach the Finish option.
- Once Finish is displayed on your screen, click on it.
- Next, restart your computer.
- Open the QuickBooks desktop application and attempt to download the updates.
Solution 3: Modify Windows Firewall manually
In this next solution, we will configure the Firewall to add the port exception for the QuickBooks application. As a user who may have various versions of QuickBooks Desktop installed on a single computer, you must perform steps for each version.
- Click on the Start menu and use the search bar to look for Windows Firewall.
- Once you have Windows Firewall launched on your system, navigate to the Advanced Settings.
- Right-click the Inbound Rules option.
- Click on New Rule.
- Choose Port and then hit Next.
- You just mark the TCP option.
- Under the Specific local ports field, you must enter the precise ports as per the QuickBooks year version you have:
- QuickBooks Desktop 2020 and later: 8019, XXXXX.
- QuickBooks Desktop 2019: 8019, XXXXX.
- QuickBooks Desktop 2018: 8019, 56728, 55378-55382.
- QuickBooks Desktop 2017: 8019, 56727, 55373-55377.
Important: Versions of QuickBooks like QuickBooks Desktop 2019, 2020, and above make use of the dynamic ports, which is not a range like we saw above. During the installation of QuickBooks, these ports are assigned so that the QuickBooks application attains sole use of that given port.
- On entering the port numbers as per your QuickBooks version, click on Next.
- Choose Allow the Connection.
- Select Next and mark all the profiles.
- Click on Next.
- You must now create a new rule.
- Assign this new rule a name such as QBPorts(year).
- Press the Finish option to complete the new rule creation.
The complete process only creates Inbound Rule, and you must repeat them to form an Outbound Rule.
Solution 4: Clean Install QuickBooks Desktop and resolve the QuickBooks Error 15225
Clean Install is an operation that will work on the issues in your company file, and you can rest assured that no data is hampered when performing this solution. We will start with the first step, uninstalling the QuickBooks application from the system. If you have multiple versions, repeat the solutions for each of them.
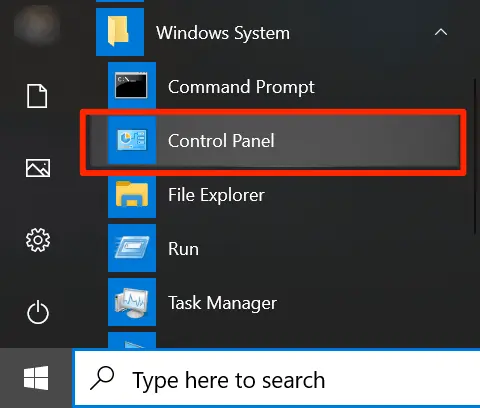
- First, use your system’s Start menu.
- In the search bar, type Control Panel and hit the Enter key.

- You will see the Control Panel window appear on the desktop.
- Choose the Programs & Features option, or for some windows, you must use the Uninstall a Program option.
- Use the list of programs installed on your system and highlight the QuickBooks version you want to uninstall.
- Select the Uninstall/Change option and then Remove.
- Choose Next.
Note: If you are logged in as a regular user on your computer, you might not see the Uninstall/Change option. Hence, log out of the computer and sign back in with admin credentials. - Finally, Reinstall the QuickBooks Desktop application.
You may see also: How to fix QuickBooks Error 15276
Conclusion..
Now, you can try updating QuickBooks and see if QuickBooks Error 15225 persists. On completing the above solutions, you must not face the error again. However, if you still see it during the installation or download operation, we suggest calling the support team on +1.855.888.3080. The Proadvisor solutions team is available for your assistance and can successfully manage the error while guarding your data.

Erica Watson is writing about accounting and bookkeeping for over 7+ years, making even the difficult technical topics easy to understand. She is skilled at creating content about popular accounting and tax softwares such as QuickBooks, Sage, Xero, Quicken, etc. Erica’s knowledge of such softwares allows her to create articles and guides that are both informative and easy to follow. Her writing builds trust with readers, thanks to her ability to explain things clearly while showing a real understanding of the industry.