Until 2010, the users had to develop a financial statement from their QuickBooks data manually. Intuit saw the technical void and filled it with the update of QuickBooks Statement Writer. The feature teams up with Microsoft Excel (an add-on in Excel as well) to create the financial reports in no time. It is available in all the versions of QB Enterprise and QuickBooks Accountant as well. Along with customized financial statements, the users can also update their reports with the latest QB data and use templates to save time and effort of starting from scratch. However, the QuickBooks Statement writer error is a common occurrence that results in failure whenever the user tries to open the statement writer. Read more about the issue below in the blog.
Implement the solutions below to self-resolve the update error in QB. However, if you aren’t tech-savvy and can’t follow the troubleshooting by yourself, you can contact our support team at 1.855.888.3080 to get immediate help in removing the 15271 error code.
Table of Contents
What is the Statement Writer Error in QuickBooks: A Brief Overview
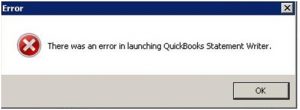
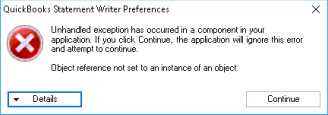
QuickBooks statement writer problem is an urgent issue that can occur while users try to generate their financial statements in the QB app. The issue is a result of a process failure when users use the statement writer features, which can occur due to data inconsistencies, incorrect settings, and other potential problems. Since this issue affects financial statement generation, it needs to be promptly resolved to ensure a seamless process.
You may also see: QuickBooks record deposit without invoice
What are the Reasons behind the QuickBooks Statement Writer Error?
Before moving to the troubleshooting solutions, let’s go through the list of reasons for the QuickBooks statement writer’s fatal error –
- QuickBooks Desktop has not been updated to its latest release.
- The statement writer in QuickBooks lacks the latest update.
- There is some misconfiguration in the Windows settings.
- The user’s Excel version is not compatible with the statement writer’s updated version.
- The QSW data file stored on external storage or the host server is not accessible by
QuickBooks. - QuickBooks does not have the necessary permission to access the statement writer.
- There is some damage to the data in the company file.
- You are not running Microsoft Office 365 with the 32-bit version, which can cause compatibility issues in QuickBooks statement writer.
Practical Solutions to Dismiss QuickBooks Desktop Statement Writer Error
If the QuickBooks statement writer is not working on your QuickBooks application, follow the given instructions step-by-step to fix it.
Solution 1: Download any Pending Update of QuickBooks Desktop
An outdated QuickBooks version could result in discrepancies in Microsoft Excel or Word, especially when used with the Windows OS’s latest release. To prevent it, follow the given steps to update your QuickBooks manually.
- Exit from QuickBooks after closing the company files.
- Press the Windows Key to open the Start menu.
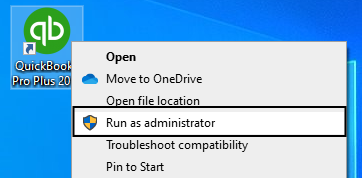
- Type QuickBooks and right-click on the QB icon shown in the results.

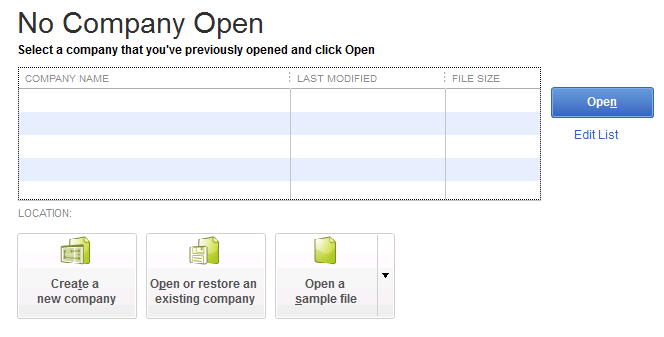
- Select the Run as administrator option and wait for the No Company Open screen to pop-up.

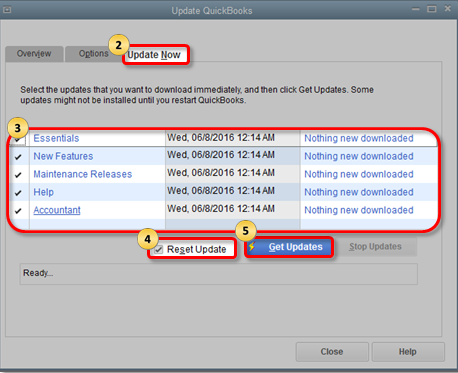
- Under the Options tab, click on Mark All and choose Save.
- Under the Update Now tab, put a check-mark on the Reset Update checkbox.

- Whenever you are ready, click on Get Updates.
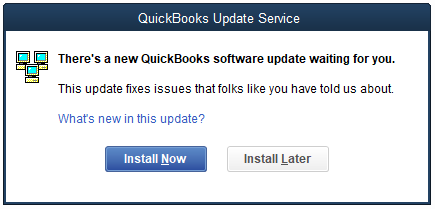
- After the updates are downloaded, restart QuickBooks and choose Install Now to install the updates.

- After the installation process finishes, restart the computer system.
After you have installed the QuickBooks Desktop updates, you must run the statement writer again and generate the statement. However, if the QuickBooks statement writer error continues, move to the next steps in the next troubleshooting solution.
Solution 2: Update to the Latest version of QSW
Updating your QuickBooks Statement Writer to the latest release will solve any bugs in the current version, thus resolving the issue.
- Open
QuickBooks and go to the QuickBooks Statement Writer. - Click on
Help Center and choose Update.
Important: After downloading and installing to the latest version, if the Download/Install prompt comes up on the computer screen every time opening the QSW, click on Cancel to go to the QuickBooks Statement Writer.
Once the QSW version is updated, it’s time to rerun the statement writer, but if QuickBooks statement writer doesn’t work, follow the next resolution step.
Solution 3: Configure some Changes in the Windows Settings
To run QuickBooks smoothly, it is important to set the Windows Configuration in parallel to QuickBooks settings. Follow the two sets of instructions given below to administer the change.
Verify and Change the Regional Settings
- On the system tray below on the screen, check if there are any language codes like EN or JP.
- If there are none, then the regional setting is correct. If there is one, you need to set it to the United States or Canadian English.
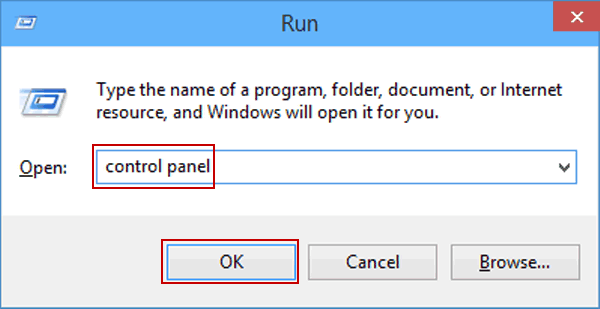
- To change it, open the run command by pressing the Windows + R key.
- Type Control Panel and press Enter.

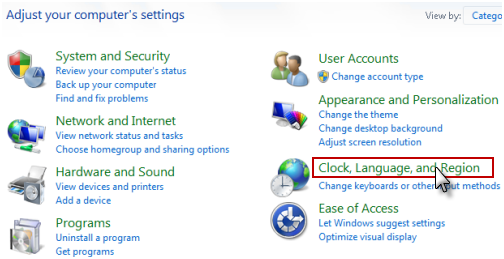
- Select Clock, Language and Region and choose Change Location.

- Under Home Location, choose United States/Canada.
- Under the Administrative tab, choose Change System Locale and select English (United States/Canada).
- Click on Apply and select OK.
- Restart the system.
If you are using Windows 7, follow the below-mentioned Steps to Change the User Settings
- Open the Control Panel by following the same instructions given above.
- Choose User Accounts and click on User Accounts (Classic View).
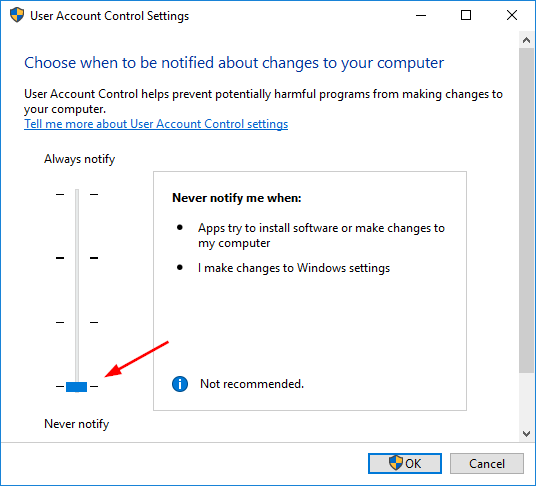
- Choose Change user account control settings and click on Yes if prompted by UAC.
- Turn UAC off by moving the slider to Never Notify and click on OK.

- Turn UAC on by moving the slider back to Always Notify and choose OK.
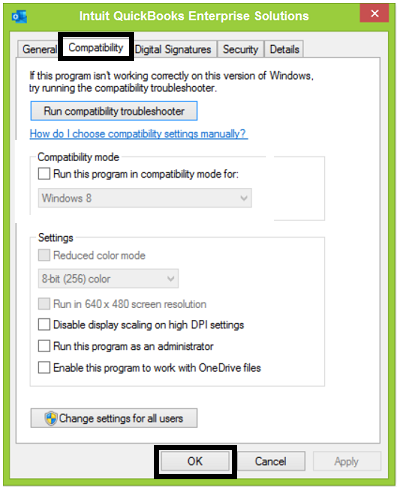
- Right-click on the QuickBooks icon on the Windows desktop.
- Choose Properties and head over to the Compatibility tab.

- Make sure that no boxes are checked and repeat the last two steps for the Excel program as well.
- Reboot your computer system.
After the Windows settings are configured, you must rerun QuickBooks, but if the statement writer still poses issues, follow the steps in the next solution to counter it.
Solution 4: Check if your Excel Version is Compatible with QSW
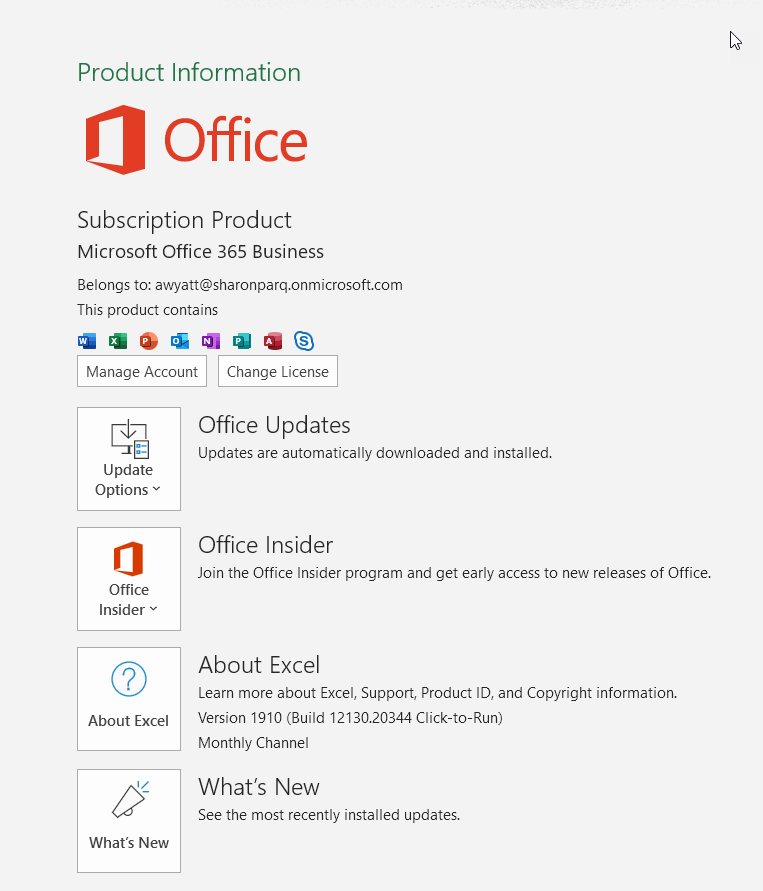
There could be compatibility issues from Microsoft Excel’s side as Excel 2007, 2010 (32-bit), and 2013 are the only Excel versions that run with QSW 2014 and its later releases. Follow the steps mentioned below to check your Excel version.
- Go to Excel and choose Account.
- Check the version number under the Product Information.

- For detailed information (bit-version), click on About Excel.
Once the Excel version is made compatible, the statement writer issue will be eliminated. However, if the QB statement writer problem keeps occurring, you must keep running the troubleshooting process moving forward.
Solution 5: Access the QSW Data File Locally
QuickBooks Statement Writer could not function properly if the .QSM file is inaccessible. To tackle such connection issues, the user must copy the data file from the server and paste it locally on the workstation.
After accessing the QSM data on the local PC, run the statement writer, and if the issue persists, implement the next steps.
Solution 6: Reconfigure the access Permissions of QuickBooks Statement Writer
If the user cannot open the QuickBooks Statement Writer, refreshing the access permissions will solve any trouble with the QuickBooks configuration.
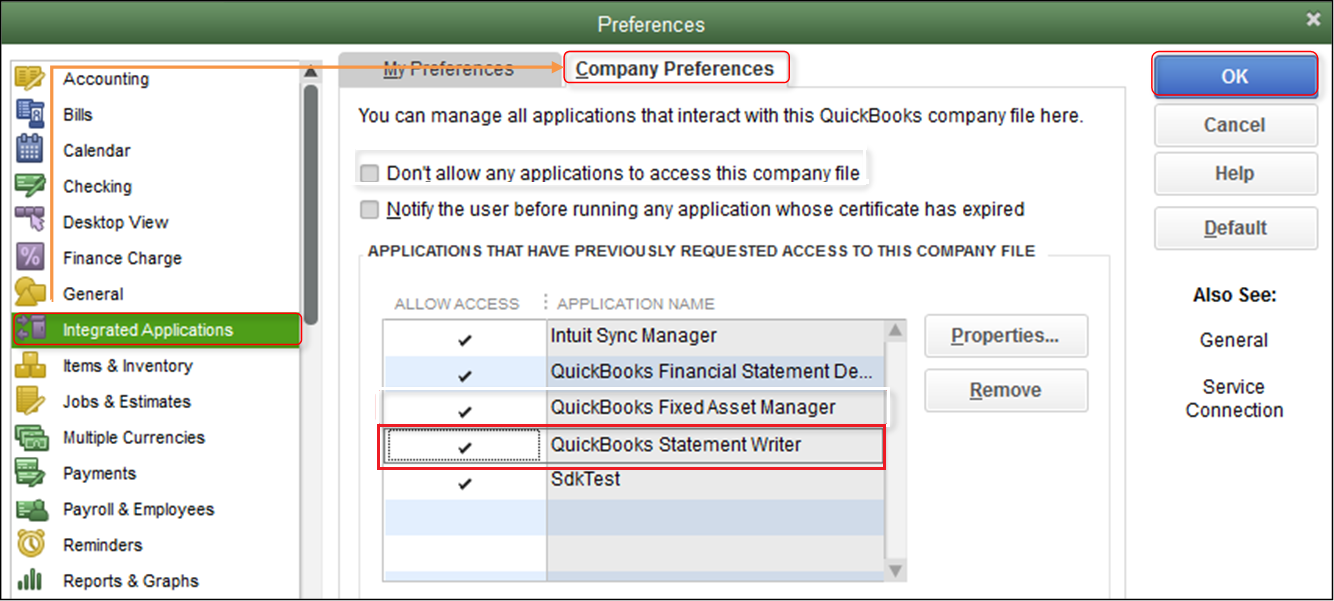
- Open QuickBooks and choose the Edit menu.
- Select Preferences and click on Integrated Applications on the left pane of the window.
- Under the Company Preferences tab, select QuickBooks Statement Writer.

- Click on Remove and exit from QuickBooks.
- Open QuickBooks again later and run the Statement Writer to see if the error is gone.
If the feature doesn’t work even after the statement writer access permissions are changed, go to the next resolution method.
Solution 7: Use QuickBooks Statement Writer Diagnostics
Any error in the statement writer utility in QuickBooks can be found and resolved with the diagnostic tool present in the software application as well. Follow the steps below to run the diagnostics.
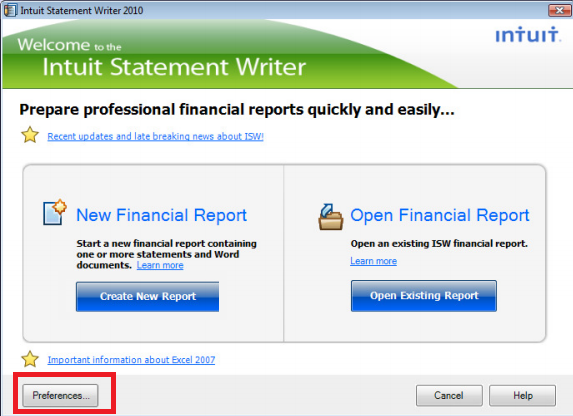
- Restart QuickBooks and go to the QB Statement Writer.
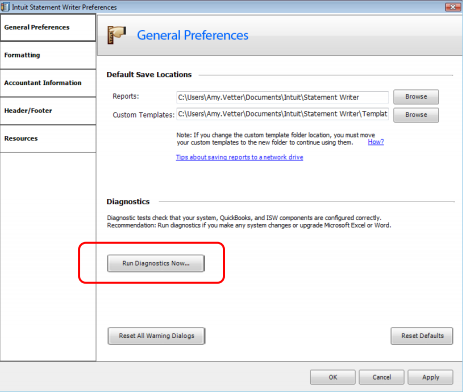
- Under the Statement Writer Welcome Page, click on Preferences & Formats.


- Choose Run Diagnostics Now and follow all the wizard steps to resolve the issues.
After running the tool and completing the diagnosis, check if the QBDT statement writer error is resolved; otherwise, go to the next solution.
Solution 8: Check the Causes of the Problem in the QSW Log File
A .log file in the system is responsible for recording all the activities happening in the software application. We can use the file to determine the cause of the issue and then solve it through the correct troubleshooting procedure.
- Close QuickBooks and open My Computer.
- Go to C: Drive and double-click on the Program Data folder.
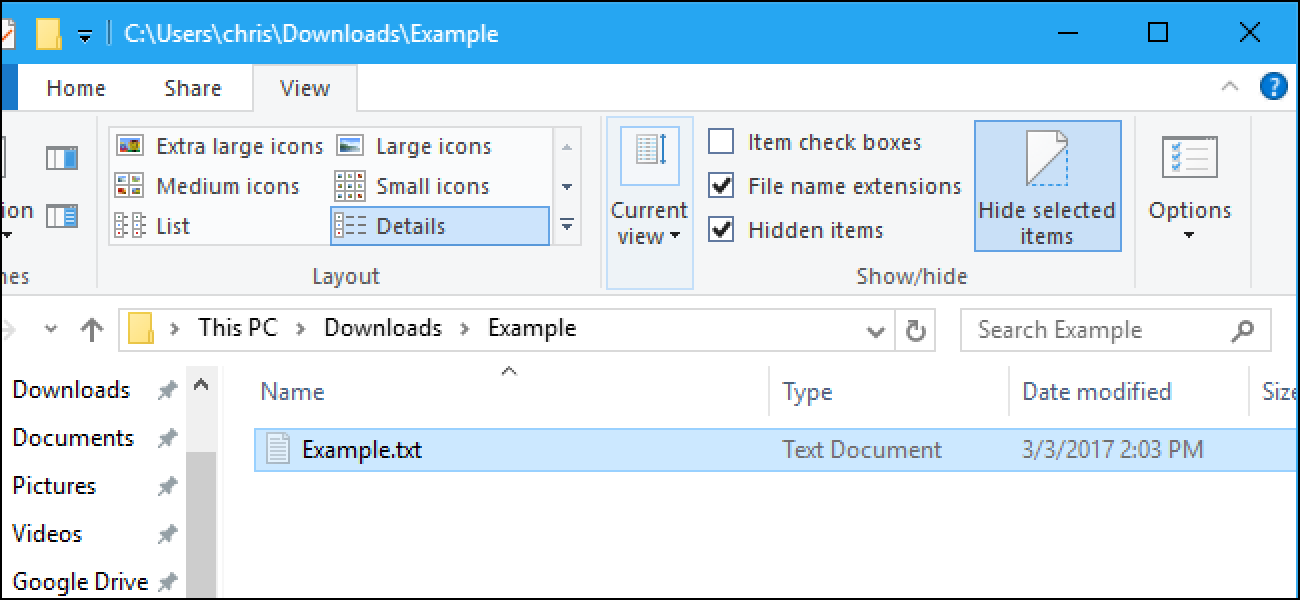
- Under the Intuit folder, open the Statement Writer folder after changing Windows settings to display hidden files and folders.

- Select the isw_XXXX.log file (XXXX being the year of your QuickBooks version).
- The most recent activities and errors will be recorded at the bottom of the text file.
If reviewing the log file doesn’t help fix the error, you can use the instructions in the next solution to resolve it.
Solution 9: Make Additions in the QBDSK.INI File
Due to issues in the initialization of QuickBooks Statement Writer, the feature fails to open. Make the necessary changes in the .ini file by following the given steps.
- Open My Computer and double-click on
the C: Drive. - Go to the Program data folder and open
Intuit folder. - Under the QuickBooks folder,
right-click on the QBDSK.INI file. - Click on Open with and choose Notepad.
- In the text file, add the given instructions
[Log}
Level=verbose
UnlimitedSize=Y
[Parser]
DumpRequestData=Y
SdkAccelerator=N
After adding it, click on File and select Save and reopen QuickBooks to check if the error is gone.
After making editions to the INI file, try generating reports with the statement writer, but if the error persists, move to the next step.
Solution 10: Run the Verify and Rebuild Data Utility
If none of the above solutions fix the issue, there might be corruption in the data file. Repair the damaged company file by running the verify and rebuild data utility in QuickBooks. Before that, make sure to switch the program to single-user mode if it is set to run in multi-user mode and create a backup of the data file to avoid data loss in any unwanted situation.
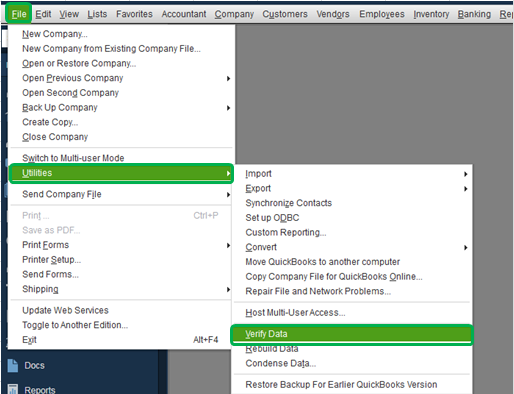
- Open QuickBooks and verify data by going to the File menu.
- Click on Utilities and choose Verify Data.

- Click on OK, and if the process completes, there’s no need to rebuild data.
- If the process fails, QB will suggest you to rebuild data.
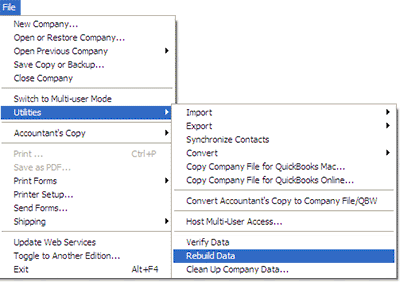
- Click on the File menu again and choose Utilities.
- Select Rebuild Data and click on OK after the rebuild has finished.

- Restart your system to refresh QB data.
After completing the rebuild process with QuickBooks Verify and Rebuild Data, check the status of the QuickBooks statement writer error.
You may also read: QuickBooks validation code in registry
Solution 11: Reinstall Microsoft Office with the 32-bit Choice
You must remember that the 64-bit Office version isn’t compatible with the statement writer and can lead to runtime errors. Hence, if QuickBooks encountered errors while attempting to create statements, you must reinstall Office with the 32-bit choice as mentioned below –
- Access the Control Panel from the Windows Start menu, then choose Programs and Features and select the Uninstall a Program option.
- Further, select Office 365 (64-bit) from the list of installed programs, then click Uninstall/Change and select the Remove option.
- Finally, click Next, follow the onscreen prompts to complete the removal, and reinstall Office in the 32-bit version.
Once done, rerun QuickBooks and use the statement writer to ensure the error is successfully dismissed.
We hope the detailed solutions above help you navigate through the QuickBooks statement writer error with ease. However, if these solutions aren’t working and the error keeps appearing, you can call our team of specialists at 1.855.888.3080 to get immediate and prompt assistance in fixing the statement writer problem.
Common User Questions
What is the function of the statement writer in the QB application?
The statement writer feature in QuickBooks allows users to generate professional financial statements from the data available directly in the application. This QB feature helps create financial statements that are in tune with the GAAP accounting standards.
What is the right way to access statements in QuickBooks?
You can access statements, like bank, customer, and processing statements, by using these detailed steps –
1. Bank statements – Connect your bank to online banking, go to Settings, select Reconcile, and click View Statement.
2. Customer statements – Select Customers from the Sales & Expenses section, select the customer for whom you want the statement, and click Create Statements.
3. Processing statements – Select Activity & Reports in Merchant & Service Center and click All Statements from the drop-down menu.
What are the three types of statements that QuickBooks Online can generate?
QuickBooks Online can generate different types of statements, three of them include –
1. Balance Forwards: display invoices and payment lists that are still unpaid.
2. Open Items: depict all the bill items you haven’t paid yet from the previous year.
3. Transaction Statements: display all transactions that occurred between a certain date range/period.

Erica Watson is writing about accounting and bookkeeping for over 7+ years, making even the difficult technical topics easy to understand. She is skilled at creating content about popular accounting and tax softwares such as QuickBooks, Sage, Xero, Quicken, etc. Erica’s knowledge of such softwares allows her to create articles and guides that are both informative and easy to follow. Her writing builds trust with readers, thanks to her ability to explain things clearly while showing a real understanding of the industry.


