QuickBooks is an accounting and bookkeeping software used by many small businesses to simplify their accounting tasks. In QB, you have the option to host your company file over a shared network, through which multiple people can access and work on it. This is made possible by the QuickBooks Database Server Manager, as it creates and manages a network data file for your company file and monitors your network to ensure proper data sharing.
In this blog, we’ll cover all the information you need to know about downloading, installing, setting up, and using the database server manager QuickBooks.
Are you facing problems trying to host your QuickBooks company file over a shared network? Contact our experts at 1-855-888-3080 today to resolve your issue in no time!
Table of Contents
System Requirements Needed to Use the QuickBooks Database Server Manager
The minimum system requirements needed to use the QB Database Server Manager are given below:
| Operating System | Windows 11-64 bit (Natively installed) |
| QuickBooks | QuickBooks Desktop app that is natively installed and updated |
| Database Servers | Windows Server 2022, Standard and EssentialsWindows Server 2019, Standard and EssentialsWindows Server 2016, Standard and Essentials |
| Browser | Google Chrome |
| Processor | Minimum 2.4 GHz |
| RAM for Your Server | 1-5 Users: 8 GB10 Users: 12 GB15 Users: 16 GB20+ users: 20+ GB |
| Disk Space | Minimum 2.5 GB of disk space. Additional space is required for data files. |
These are the minimum system requirements needed to use the QBDSM.
How to Download, Install, and Set Up the QB Database Server Manager?
There’s no need to download QuickBooks Database Server Manager separately, as it is already part of the QB Desktop file. However, ensure to update your QBDT app before installing it. So let us now cover how you can download, install, and set up the QBDSM in a step-by-step fashion:
Install QB Database Server Manager
Follow the steps below to install QB Database Server Manager:
- Close all open programs on your server PC (including QuickBooks)
- Open the QB installation file
- Named Setup_QuickBooks.exe
- Follow the instructions on your screen
- When QB asks you to choose an installation type, select Custom and Network options
- Do not select the Express option
- Press Next
- Select the best option for your network setup:
- I’ll be using QuickBooks Desktop on this computer, AND I’ll be storing our company file here so it can be shared over our network: Select this if you want both QBDSM and QBDT on your server PC (This is the recommended option)
- I will NOT be using QuickBooks Desktop on this computer: Select this if you only want QBDSM on your server system.
- Follow the instructions you see on your screen
- Select Install
Now, give the QBDataServiceUserXX (XX represents the version of your database manager) permissions to access the folder containing your company file.
Edit Folder Permissions for QB Database Server Manager
- Locate the folder you want to share
- Right-click on it
- Select the Properties option
- Go to the Sharing tab
- Select Share this folder
- If you want to change the name of the shared folder, you can enter a new name in the Share Name field
- Now, navigate to the Security tab
- Select Permissions to set up permissions for each user who will use the folder, including QBDSM
- Press Apply and hit OK
Now, let us proceed to configure the QuickBooks Database Server Manager.
Configure the Database Server Manager
(Note: You can skip this step if you want to use the default settings.)
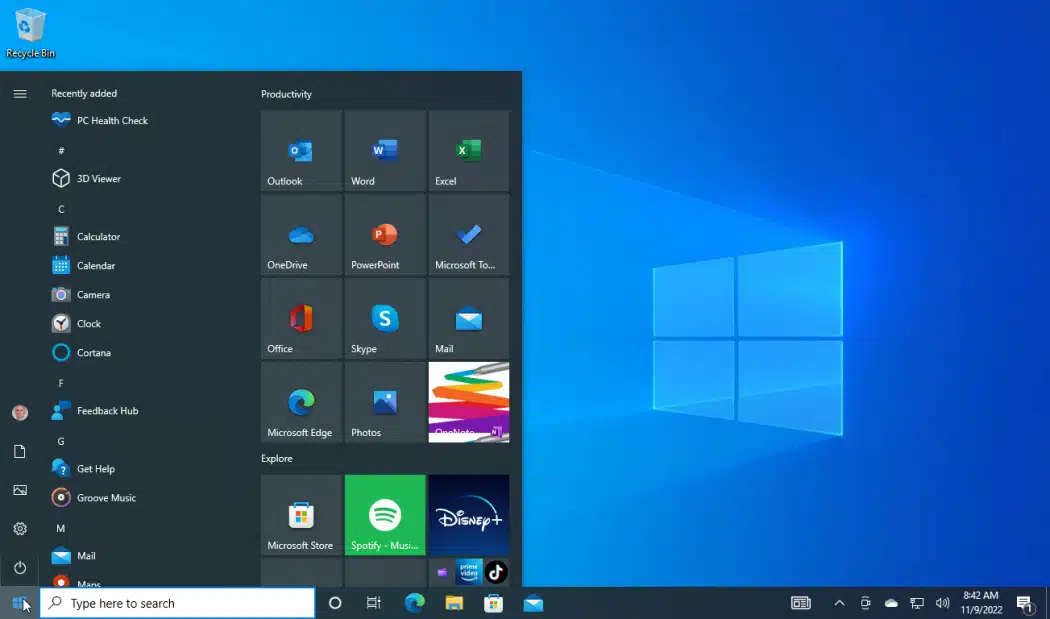
- Open the Start menu on your PC

- Type Services in the search bar
- Open Services
- Select and open the QuickBooksDBXX
- (XX represents the version of the QBDSM)
- Navigate to General
- Search for Service status
- If it’s Started or Running, select Stop
- Now, go to Startup Type and select Automatic
- Go to Recovery
- Now, select Restart the Service for each of the following:
- First failure
- Second Failure
- Subsequent failures
- Now, move back to General again
- Press Start to start the QBDSM
Now, let us make Firewall exclusions for the QuickBooks Database Server Manager.
Set Up Firewall Port Exclusions for the QBDSM
- Open the Start menu
- Search for the Windows Firewall
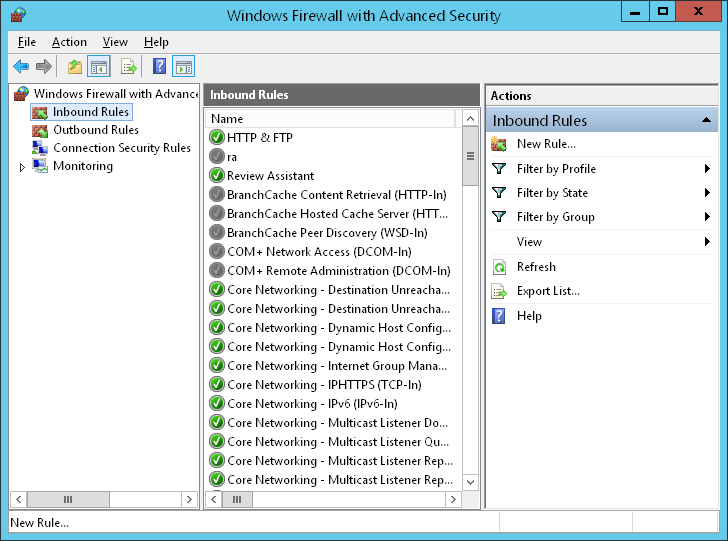
- Open the Windows Firewall
- Click on Advanced Settings
- Right-click on Inbound Rules

- Now, select New Rule
- Click on Port and press Next
- Ensure that TCP is selected
- Now, in the Specific local ports field, enter the ports for your QB version:
- QuickBooks Desktop 2020 and above: 8019, XXXXX
- QuickBooks Desktop 2019: 8019, XXXXX
- QuickBooks Desktop 2018: 8019, 56728, 55378-55382
- QuickBooks Desktop 2017: 8019, 56727, 55373-55377
- Get dynamic port number for QB Desktop 2019, 2020, and above:
- Open the Start menu
- Search for QuickBooks Database Server Manager
- Open it
- Navigate to the Port Monitor tab
- Find your QuickBooks version
- Note down the Port Number
- Use this port for your Firewall exceptions
- After you enter the port number, hit Next
- Click on Allow the Connection
- Hit Next
- Ensure all profiles are marked if you are prompted
- Hit Next
- Create a rule
- Name it something like QBPorts(year)
- Press Finish when you’re done
Now, let us see how you can use the QBDSM.
How to Use QuickBooks Database Server Manager?
In this section, we will show you how to scan your company file folders, monitor drives, and manage the QuickBooks Database Server Manager.
Scan Your Company File Folders
- Open the Start menu on your server PC
- Enter Database into the search bar
- Open the QBDSM
- Now, navigate to the Scan Folders tab
- Click on Browse
- Choose the folders containing your company files (QBW)
- Press OK when done
- Lastly, select Start Scan
After the scan ends, the folders will appear in the QuickBooks company files found section. You would now be able to access them from the other PCs on your network.
Monitor the Drives
After scanning the folders, the Monitored Drives tab will show the drives that hold the folders. Choose the drive to monitor these folders.
- Navigate to the Monitored Drives tab
- Mark the checkboxes for the drives containing your company files
- Make sure to only add drives that contain your company files
You will not be able to monitor mapped drives.
Manage the Database Server Manager
Some of the other tabs in the QBDSM help in its smooth functioning. Some of them are:
- The location in which the QuickBooks Database Server Manager is installed can be seen on the System tab
- To know the real-time status of the tool and who’s connected to it, go to the Database Server tab
This was it about setting up the QB Database Server Manager.
Host Your Company Data in Mult-User Mode in the QB Desktop App
You would need to host your company file over a shared network or server in order to allow other users to access it and work on it. There are many hosting options you can choose to host your company file, such as Dedicated Hosting, Peer to Peer Hosting, and Alternate Hosting.
To host your company file, you must meet three requirements: Windows file permissions, Database server mode, and QuickBooks user login. If any of these requirements are not met, you won’t be able to access the company file on the workstation. Read our comprehensive blog on how to set up multi-user mode in QuickBooks Desktop for further information. Let us now troubleshoot some problems you can face with the QB Database Server Manager.
Troubleshooting Common Issues With the QB Database Server Manager
If you are facing problems with your QB Database Server Manager, you can try the following hacks given below:
Restart the Database Server Manager
A simple restart will sometimes fix most of the errors with the QB Database Server Manager. You can restart the QBDSM with the steps given below:
If You Installed Both QB Desktop & Database Server Manager
If you installed both the QuickBooks Desktop app and the Database Server Manager, follow the steps below to restart it:
- Open the QB Desktop app on your server PC
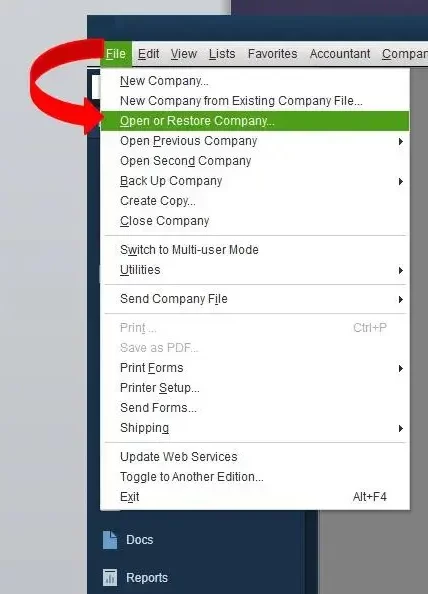
- Navigate to the File menu
- Hit Open or Restore Company

- Click on Open a company file
- Locate and open your company file
- Hit Next
- Mark the Open file in multi-user mode checkbox
- Press Open
- Sign in to the company file
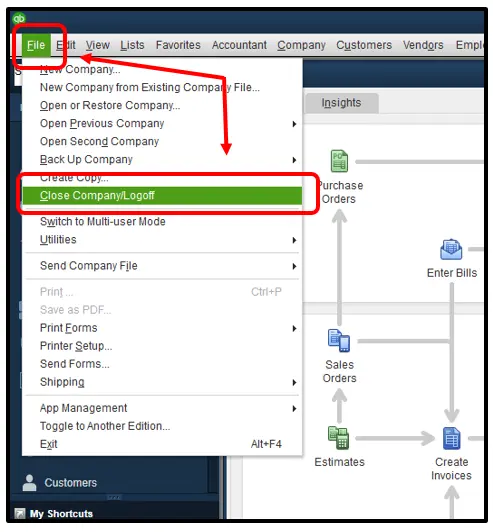
- Navigate to the File menu
- Click on Close Company/Log Off

- This will close your company file on the server
- Now, open the Start menu
- Search Database
- Open the QuickBooks DBSM
If you have only installed the QBDSM, you can perform the steps given below.
If You Only Installed the QB Database Server Manager
If you only installed the QB Database Server Manager, follow the steps given below to restart it:
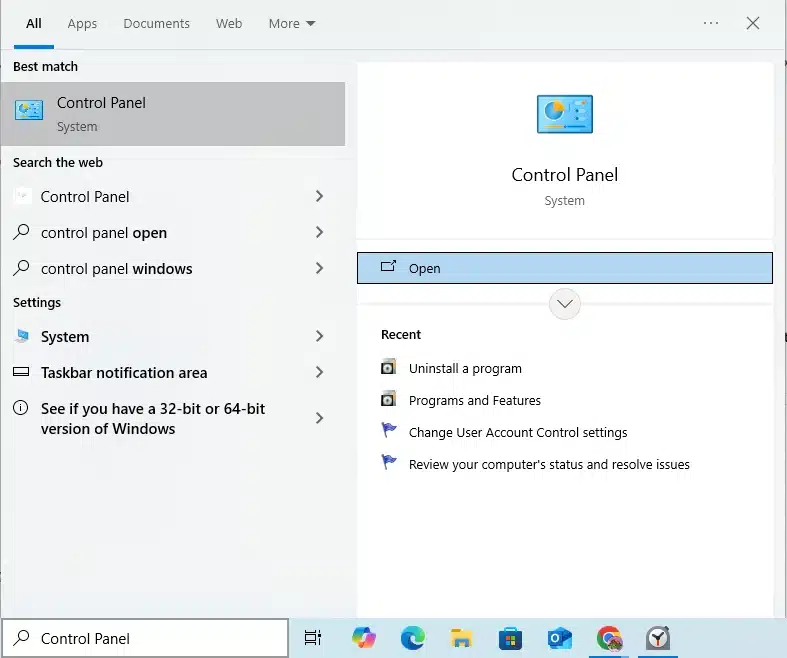
- Open the Start menu
- Search for the Control Panel

- Open the Control Panel
- Select the Administrative Tools option and open it
- Choose Services from the list
- Right-click on the QuickBooksDBXX (XX represents the version of your QBDSM)
- Hit Restart
If the QBDSM doesn’t restart, restart your server PC and then repeat the steps again.
Use the QB Database Server Manager from the Tool Hub
You can run the QB Database Server Manager from the QB Tool Hub to fix issues with your QBDSM with the following steps:
- Download and install the QuickBooks Tool Hub
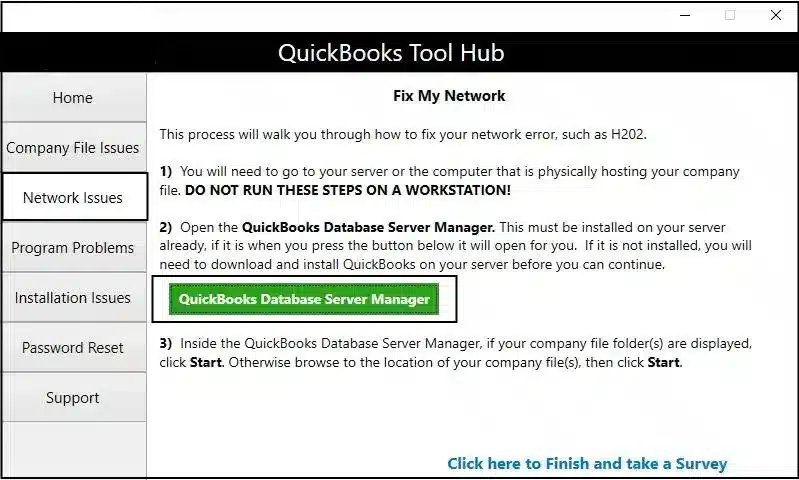
- Click on the Network Issues tab
- Select QuickBooks Database Server Manager

- If you haven’t installed QB on the server, you’ll be prompted to install it
- Now, in the QBDSM, press Start Scan if you see your company file folders
- If you don’t see the folders, press Browse to locate them and then start the scan
- QBDSM will repair your Firewall permissions automatically
- Press Close when the scan is finished
This would resolve problems with the QuickBooks DBSM.
Utilize the QuickBooks File Doctor
You can use the QuickBooks File Doctor from the QB Tool Hub to resolve issues with the QBDSM by following the steps given below:
- Open the QB Tool Hub
- Go to the Company File issues tab
- Click on Run QuickBooks File Doctor
- It might take up to a minute to open
- If the tool doesn’t open, search for QuickBooks Desktop File Doc and open it manually
- Now, select your company file from the dropdown menu
- If you don’t see your company file, press Browse to locate it
- Now, select the Check your Network option
- Hit Continue
- Enter your QuickBooks admin password
- Hit Next
Now, the problem with your QB Database Server Manager will be fixed.
Install the Linux Database Server Manager on Your System
The QuickBooks Desktop Enterprise Linux Database Server Manager is used to host and store your QB Enterprise company file on a Linux server. Let us cover the steps to install and configure the Linux Server Manager. This can only be used for QBDT Enterprise and not the normal version. First, let’s discuss a few things to keep in mind before using the Linux Server Manager.
Things to Keep in Mind Before Using the Linux Database Server Manager
Here are some of the things you need to know before installing the Linux Database Server Manager:
Components of Linux Server Manager
- Database Server Files: These files give the QBDT Enterprise users access to read and write to the QBDT company file on a Linux server.
- Qbmonitord daemon: This ensures that every directory in the qbmonitord.conf has a qbdir.dat file.
- Qbmonitord configuration file (qbmonitord.conf): This helps in listing the directories read by the qbmonitord daemon.
- Qbdir.dat file: This helps the QBDT Enterprise to create an ND file for each QB company file.
- ND file: This helps the QuickBooks Windows client to store the name and address of the host computer.
System Requirements
Given in the table below are the system requirements needed to use the Linux Database Manager:
| Processor | 1.2 GHz Intel Pentium 3 is minimum, while 2 GHz Intel Platinum 4 is recommended. |
| RAM | Minimum 1 GB of RAM. As much as possible is recommended. |
| Disk Space | 2.5GB minimum disk space. Additional space is required for QB company files. |
| File Sharing Software | Samba 2.2.12 |
The Linux DBSM is supported on the 32-bit and 64-bit versions of the following distributions:
| QBDT Enterprise Version | Linux Distributions |
| 21.0 and 22.0 | Fedora 32OpenSuse Leap 15.2Red Hat Enterprise 8 (RHEL 8) |
| 20.0 | Fedora 29OpenSuse Leap 15.0Red Hat Enterprise 7 (RHEL 7) |
Recommendations for Configuration
Given below are some configuration recommendations for the Linux Database Server Manager:
- Case-Sensitive File Names: Linux uses a case-sensitive file system, so make sure your QB company file names are accurate and unique.
- User Permissions and Sharing: You should set up the QB company file shared directories as Samba shares. Ensure that all Samba share users have full access to the shared directories.
- Host Name resolution: Ensure that all Windows clients know the IP address or the host name of the Linux server. Ensure you set up the Samba share with the Domain Name Server. You can list the Linux server in the Windows HOSTS file if you don’t have DNS or WINS.
Firewall Exclusions
Ensure that you have made both Firewall port exclusions and the executable file exclusions for the QuickBooks Desktop Enterprise application. Now, let us see how to install the Linux QuickBooks Database Server Manager.
Install the Linux Database Server Manager for QuickBooks
The steps to install the Linux Database Server Manager for QuickBooks Desktop Enterprise on your PC are given below:
Note: If your Linux server has OpenSuse, you would also need to have the fam-server package 2.7.0.29 turned on.
- Download the Linux Database Server Manager RPM package
- Then, become the root user on Linux:
- Open the terminal window
- Type in sudo password root
- Hit Enter
- Enter your root user password
- Check the integrity of the package:
- Download the public key on your Linux server
- Then, open a new terminal window
- Type in rpm –import qbdbm-pubkey.asc
- Hit Enter to add the public key to the keyring
- Now, type in rpm -K packagename (replace “packagename” with the name of the Linux Server Manager RPM package you downloaded)
- If you see gpg ok, continue to the next step; otherwise, redownload the Linux Database Server Manager RPM package and repeat the steps up until now again.
- Now, in the terminal window, type in rpm -ivh packagename (replace “packagename” with the name of the Linux Database Server Manager RPM package)
- Hit Enter
- Then, create a directory to store your QB company files
- Copy the QB company files to the directory you created
Now, let us take a look at the steps to configure the Linux Database Server Manager.
Steps to Configure Your Linux Server Manager
Ensure to follow the steps given below as the root user of the Linux server:
Update Your qbmonitord.conf file
You would need to list the shared directories in the qbmonitord.conf file in order to give other users access to your company files with the following steps:
- Open a terminal window
- Then, edit the /opt/qb/util/qbmonitord.conf file
- Now, type in the full path of each directory in a separate line. For example:
- /QBData
- /QBcompanyfiles
- Restart the qbmonitord service
Create a Samba share
To create a Samba share for your Linux QuickBooks Database Server Manager, follow the steps given below:
- Become the root user:
- Open the terminal window
- Type in sudo password root
- Hit Enter
- Enter your root password
- Create a user group:
- Type in groupadd -r groupname (replace groupname with a name you want to use for the group, for example, qbusers)
- Hit Enter
- Type in groupname: user1, user2, user3 to the list the users of the group you just created
- Add your users and their passwords:
- Type in useradd user and add each user from the group you created
- Then, for each user, enter smbpasswd -a user for activating the Samba user account and setting up a password
- Set up share permissions:
- Type in chmod -R 775 /directory and hit Enter to give users access to the shared directory
- Enter chgrp -R groupname /directory for changing ownership of the shared directory
- Navigate to /etc/samba and type in the following lines in smb.conf:
- [share_name]: Replace share_name with the name you want to use for the share
- path = /directory: Replace directory with the full path of the directory you created containing your QB company files
- comment = samba share for company files
- valid users = user1 user2 user3: Replace user with the usernames you listed in the previous steps
- public = no
- writable = yes
- printable = no
- create mask = 0765
- Type in service smb restart to restart the Samba daemon
Save Your Messages in the qbmonitord.log
You will have to restart the syslog daemon after you install it to save messages. To restart the syslog daemon, follow the steps given below:
- Open a terminal window
- Type in /etc/init.d/syslog restart
- Hit Enter
Now, the syslog daemon will save messages to the qbmonitord.log file from qbmonitord. Now, let us take a look at some of the error messages you can see while using the Linux Database Server Manager.
Error Messages Associated with the Linux Database Server Manager
All the qbmonitord error log messages are saved to the /var/log/qbmonitord.log file. If you want to see more than the last 10 lines of the message, you can enter tail -n 100 -f /var/log/qbmonitord.log in the terminal. Now, let us list the error messages:
Linux Server Error Messages
| Error Message | Its Description |
| “Config file could not be read” | This means that the qbmonitord.conf file wasn’t found in the /opt/qbes7/util directory. |
| “Unable to open FAM connection” | Ensure that FAM and portmapper are running. |
| “Error creating meta file” | This means that the qbdir.dat file could not be created by the qbmonitord daemon. |
| “An unexpected error occurred” | A more detailed error message usually follows this error. |
| “No directories found in the config file” | This means that the shared directories are missing from the qbmonitord.conf file. |
| “The interrupt handler cannot be initialized” | This means that the interrupt handler could not be initialized. |
| “A parameter was specified with the qbmonitord command” | The qbmonitord daemon does not use parameters. |
Windows Client Error Messages
| Error Message | Its Description |
| “An error occurred when QuickBooks tried to access the company file. Please try again. If the problem persists, contact Intuit Technical Support and provide the following error code. (-6000, -82)” | This means there’s a problem with the user permission setup. |
| “An error occurred when QuickBooks tried to access the company file. Please try again. If the problem persists, contact Intuit Technical Support and provide the following error code. (-6000, -83)” | This means that the QuickBooks Database Server Manager doesn’t have access to the QBDT Enterprise company file. |
| “You are trying to work with a company file that is located on another computer, but that computer needs additional installation and setup” | This means that the QuickBooks Database Server Manager is not running on the Linux server. |
QuickBooks Database Server Manager – A Quick View Table
Given in the table below is a concise summary of this blog on the topic of the QB Database Server Manager:
| Description | The QB Database Server Manager is a tool through which you can host your company file over a shared network or server for other people to access and work on it. This helps in making your accounting and bookkeeping tasks much easier. |
| Steps to install it | Open the QB setup file, follow the instructions on your screen, select Custom and Network options as the installation type, choose whether you only want QBDSM or both QBDT and QB Database Server Manager on the PC, and press Install. |
| Steps to set it up | Scan your company file folders, monitor the drives, and manage the Database Server Manager. |
| Step to set it up on Linux | Update your qbmonitord.conf file, create a Samba share, and save Your Messages in the qbmonitord.log. |
| Troubleshooting common issues | Restart the QB Database Server Manager, use QBDSM from the QuickBooks Tool Hub, and use the QuickBooks File Doctor. |
Conclusion
In this blog, we talked about the QuickBooks Database Server Manager, along with the steps to download it, install it, and set it up. Additionally, we also discussed the in-depth guided step-by-step troubleshooting methods so you can fix common problems with the QBDSM yourself. If you are still dealing with the same issue and are unable to host your company file over a shared network or server, feel free to contact our experts at 1-855-888-3080 today to resolve your problem in no time!
FAQs
How can I download the QB Database Server Manager?
You don’t need to download the QB Database Server Manager, as it comes pre-installed with QuickBooks. All you need to do is install the QB Desktop app again with Custom and Network options.
How to update QuickBooks Database Server Manager?
To update the QuickBooks Database Server Manager, all you need to do is update your QuickBooks Desktop application.
How to use the QuickBooks Database Server Manager?
To utilize the QB Database Server Manager, here is what you need to do:
1. Install the QB Database Server Manager
2. Edit folder permissions for QBDSM
3. Configure QuickBooks DBSM
4. Make Firewall port exclusions for the QBDSM
5. Scan your company file folders
6. Monitor the drives
7. Manage the QB Database Server Manager
More blogs to read :
How to fix QBCFMonitorservice keeps stopping problem
How to fix the QuickBooks network connection error?
QuickBooks Couldn’t Connect to the Email Server (Resolved)
QuickBooks Payroll Not Responding! Do this to Fix it
How to Fix QuickBooks Error 12152 (Internet related Issue)

Erica Watson is writing about accounting and bookkeeping for over 7+ years, making even the difficult technical topics easy to understand. She is skilled at creating content about popular accounting and tax softwares such as QuickBooks, Sage, Xero, Quicken, etc. Erica’s knowledge of such softwares allows her to create articles and guides that are both informative and easy to follow. Her writing builds trust with readers, thanks to her ability to explain things clearly while showing a real understanding of the industry.