QuickBooks Desktop provides its users the QuickBooks 1099 wizard that helps them to prepare, review, and file their federal and state 1099-MISC forms. The Internal Revenue Service (IRS) mandates every employer to file 1099-MISC forms for any payments made to their employees. There are different processes to file these forms for Desktop and Online users. Through this article, we will explain to you the detailed procedure to prepare and file 1099 forms through QuickBooks Desktop.
“If you face any issues while trying to file 1099-MISC form using QuickBooks 1099 wizard and need help from an expert, then contact Pro Advisor Solutions’ Support Helpdesk at 1.855.888.3080”
You may also see: Import More than 90 Days of Bank Transactions in QuickBooks Online
Table of Contents
Why should you E-file 1099-misc?
The 1099 form is a series of documents which is referred to as ‘Information returns’ by the Internal Revenue Service (IRS). The employer is responsible to e-file 1099-MISC for different types of payments they make to vendors. The salaries paid are reported differently through W-2 forms. The employers should also send it to the vendors after filing it before January 31st. If a company pays more than $600 during a financial year to an independent contractor or a self-employed professional, then they need to E-file 1099 MISC for them. There are various other income sources for which you can receive form 1099. These have been mentioned below for you:
- The interest earned on stock investments and Mutual funds are reported through 1099-INT. You should note that it does not include the profits from selling the stock or dividends received from these stocks.
- The federal and state governments report the tax returns and unemployment compensation through the 1099-G form.
- The amount withdrawn from retirement accounts is taxable, and receivers are provided with a 1099-R form for that.
- If a creditor cancels an outstanding debt or a portion of it, your taxable income increases without receiving any actual income. You should receive the 1099-C form in that case.
These are the payment situations in which a 1099 form is generated. The person, company, or the agency that pays needs to e-file these forms and then send it to the person who has been paid. Next up, we will learn the detailed process to prepare and file the 1099 forms.
Preparing the Forms through 1099-misc e-file Service
QuickBooks Desktop provides a comprehensive 1099-MISC e-file service to prepare and e-file forms 1099 through QuickBooks 1099 wizard. Most of the US states support the Combined Federal and State Filing Program in which the IRS sends the MISC form to your state, and you can file these taxes directly to the tax authorities. Check the requirements to e-file 1099 in your state and then proceed with the steps mentioned below:
- Go to the ‘Vendors’ option and then click on the ‘Print/E-file 1099s’ option.
- Choose the 1099 Wizard from the options and then click on the ‘Get Started’ button.
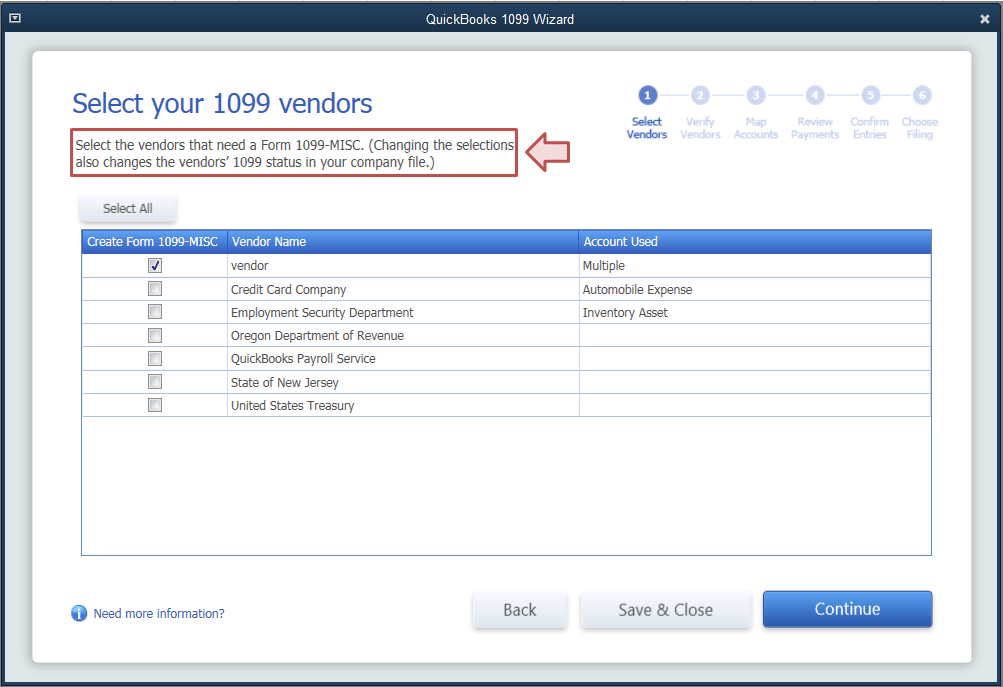
- Select the vendors from the list that need the form by marking them as checked.
- Click on the ‘Continue’ button after selecting all the required vendors.

- At this step, you need to verify that the vendor information is correct.
- Double-click on the incorrect information to Edit.
- Now, you need to set up QuickBooks where to show the amounts paid from each account on the form.
- Click on the ‘Choose from the Apply payments’ option for mapping accounts or omitting payments from the forms.
- Select ‘Report all payments’ in Box 7 checkbox in applicable cases.
You have now completely prepared the form 1099. Now, you need to review these entries before moving on to e-file them.
Review Exclusion Payment in 1099 e-file Service
As per IRS rules, you need to exclude the e-payments from the 1099-MISC forms. Payments through Credit card, Gift card, or PayPal payments need to be excluded. If you have made a payment to a vendor through these methods, then click on the ‘View Included Payments’ button in the Payment exclusion window. Edit the check number field to include an appropriate notation to exclude these payments from the 1099-MISC form. To verify the payments excluded from the form, click on the ‘View Excluded Payments’ button.
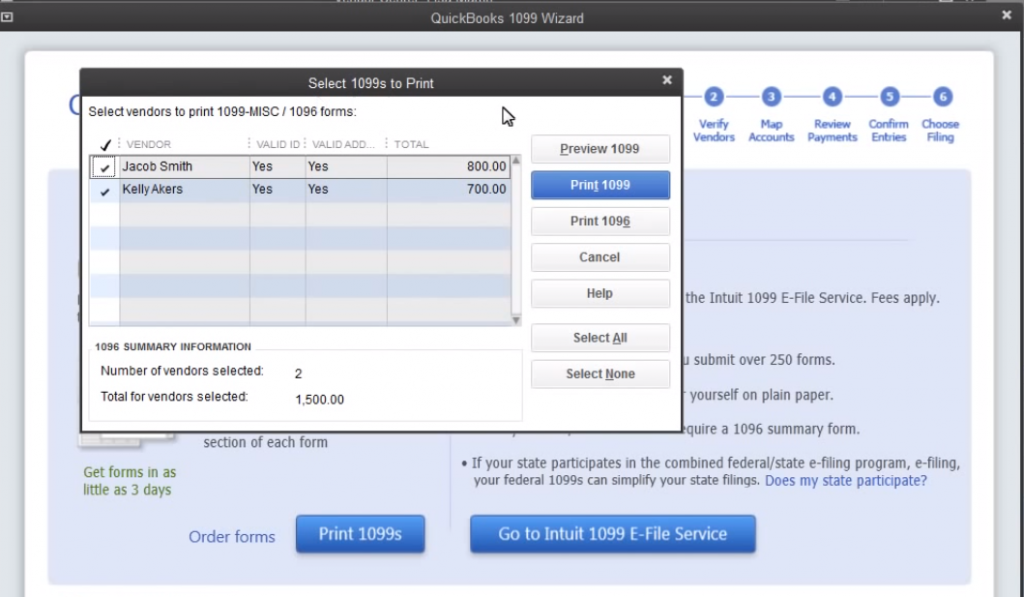
After excluding electronic payments, you need to confirm your entries. A table will appear on the QuickBooks 1099 wizard screen to review the vendor’s summary. You can confirm the entries and the amount being reported for the calendar year. You can review the details by double-clicking the amount. You will get two options after this step either to ‘Print 1099s’ or ‘Go to Intuit 1099 E-file Service’. You can select the option to print the 1099s and then send it manually to IRS for filing. You would also need to send the filed 1099s to the vendors that you have filed for.

How to use Intuit Online 1099 Filing Services
Intuit provides its users with a platform to file their 1099s through its Online 1099 filing services. Intuit’s 1099 E-file service is an approved IRS e-file provider. It will transmit the forms securely and electronically to IRS for you. Users can avail these services at a price of $14.99 for up to three 1099 forms. Every additional form would be charged at $3.99 each. If you file more than 20 forms, then they are not charged. Now that you have prepared and verified your forms, let’s see the steps to e-file:
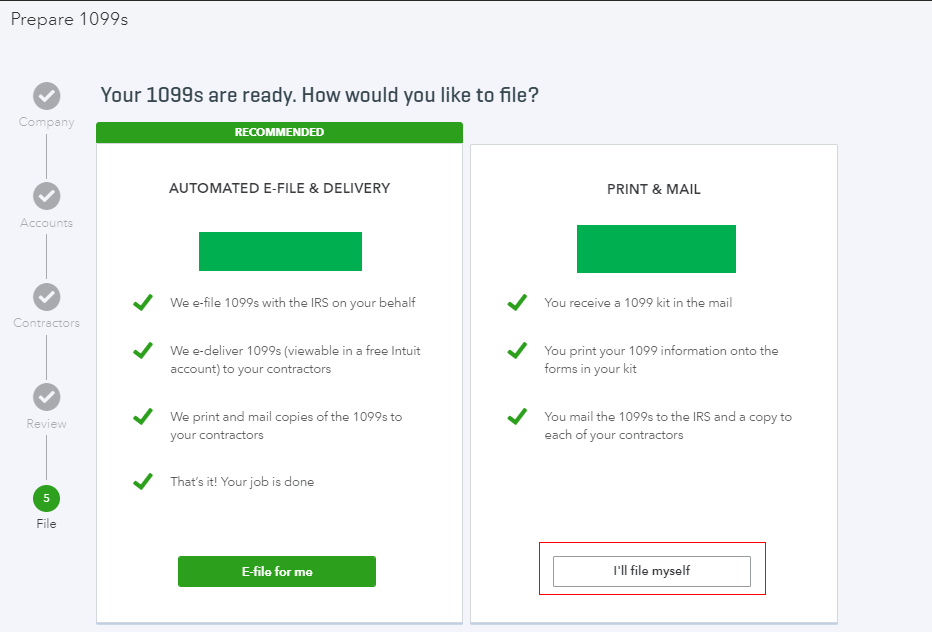
- Click on the ‘E-file for me’ option.

- Verify the forms and then press the ‘Continue’ button.
- Select the forms that you want to submit. If you want to submit all, then select all and then press the ‘Continue’ button.
- You need to enter your billing info at this step and then click ‘Approve’.
- Confirm the number of forms and the total amount and then click on the ‘Continue’ button again.
- Choose the delivery option for contractors if prompted.
- Verify or add the email addresses for your contractors.
- Click on the ‘Continue’ button.
- Click on the ‘Submit final forms’ button to submit the forms.
Intuit notifies you about the filing status through email, and you can also check the status through your E-file account.
How to Print QuickBooks 1099 e-file
The QuickBooks 1099 e-file service provided by Intuit creates PDF copies of all your forms. You can email them to the contractors or mail the printouts physically through post. For QuickBooks Online users, it will send the copies to contractors after you e-file. You get separate options to print the forms for your own record and for contractors. Follow the steps below to print your 1099s:
- After you prepare your 1099, click on the ‘Print and Mail’ option.
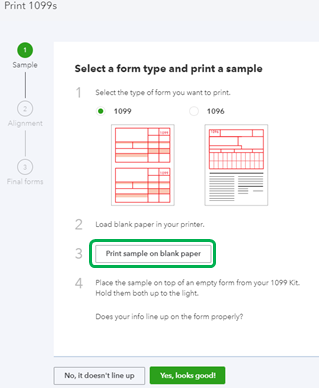
- Click on the ‘Print sample on blank paper’ to check if the forms are correctly aligned.

- If not aligned properly, then click on the option ‘No, it doesn’t line up’.
- Use the Horizontal and Vertical field to align the form.
- Click on the option saying ‘Print another sample on blank paper’.
- If it’s alright now, then click on the ‘Print’ command and then press ‘Print’ again.
- You will get the printout which you should mail to the contractors before the deadline.
You may also read: QuickBooks Desktop 2020
Through this article, we discussed the benefits and functioning of the QuickBooks 1099 Wizard. We explained to you the detailed process to prepare, print and e-file 1099 form through QuickBooks 1099 wizard. If you come across any issues while performing the processes of preparing and e-filing your 1099 forms and you need an expert to assist you through the filing process, then contact Pro Advisor Solutions’ Tax Professionals at 1.855.888.3080.

Erica Watson is writing about accounting and bookkeeping for over 7+ years, making even the difficult technical topics easy to understand. She is skilled at creating content about popular accounting and tax softwares such as QuickBooks, Sage, Xero, Quicken, etc. Erica’s knowledge of such softwares allows her to create articles and guides that are both informative and easy to follow. Her writing builds trust with readers, thanks to her ability to explain things clearly while showing a real understanding of the industry.

