Most applications, including QuickBooks, provide a trial version of their software which, as the name suggests, is for trial purposes. Users can download the software without any cost and use it for a limited period, usually a month. It lets the user understand the features and test the software for its efficiency and speed. Users will need to buy the product before the 30 day trial period expires to continue using the product. On purchasing the software, you receive valid purchase credentials, such as the Product number, license number, validation code, etc. You can register your QuickBooks product with Intuit using these credentials. There may arise a situation when you would need to reset QuickBooks registration. This article contains detailed steps to help you with the reset process and also discusses other related aspects of it.
“If you are trying to reset QuickBooks registration and you get stuck in the process, you should contact an expert to get you out of the issue. You can contact Proadvisor solutions Support at 1.855.888.3080 to talk to our certified and experienced Pro Advisors”
You may also see: QuickBooks Contact Sync tool
Table of Contents
What is the QuickBooks Registration File?
QuickBooks Registration File is saved in the program folder of the QuickBooks Desktop application as the QBregistration.dat file. It contains the license information which the application retrieves every time the application is started for validation. This file is crucial as it acts to support the authenticity of your product.
Important Points to Reset QuickBooks Registration Timer
There are some important points that you should keep in mind before you reset QuickBooks registration timer. If you intend to reset QuickBooks registration, follow these points to successfully perform the process:
- You should have your registration details, such as the Product code, License number, and the validation code, ready with you.
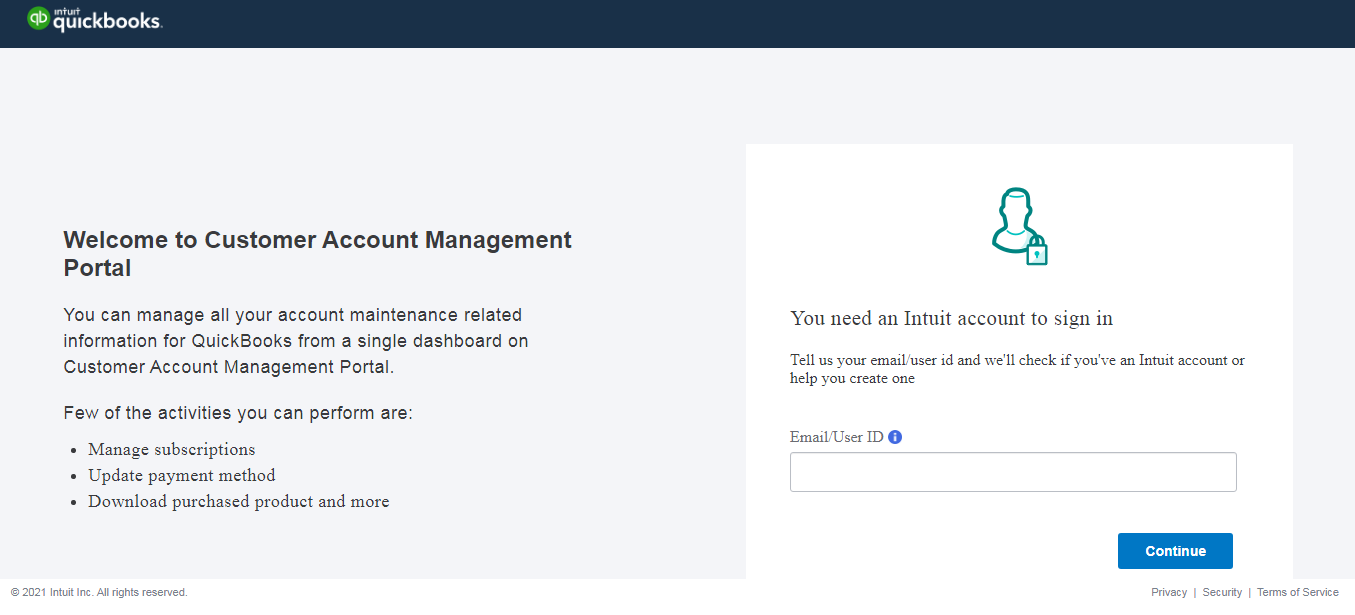
- You can get all the information related to your License and Registration through Intuit’s CAMPS portal. CAMPS stands for Customer Account Management Portal, developed by Intuit to provide valuable details to QuickBooks Desktop users.

- You should have an active internet connection to register your product with Intuit’s server.
- You should not worry about your company file while performing this process, as it is not affected in any way.
After ensuring that you fulfill all these criteria, you need to locate your license number. You can find your product details easily. The instructions are as follows:
- If you purchased the product online, you would have received a purchase
confirmation email. You can find the license number and concerned product
information in this email. - On buying a physical CD of the QuickBooks program, you can find a bright
sticker pasted on the original envelope. - Those, who have subscribed to the monthly or annual plans, receive a
fulfillment email that has the license and product information.
Now that you have the product information, move ahead to reset QuickBooks registration of your product. The detailed methods have been provided below for you.
Methods to Reset QuickBooks Desktop Registration
There are different methods through which you can reset QuickBooks Desktop registration on your system. You can rename the QBregistration.dat file so that the application can create a new file. You can also create a new file to reset the registration. The detailed steps for both the methods have been provided below for you:
How can you Create QBregistration.dat File?
An effective way to reset QuickBooks registration is to create QBregistration.dat File. This can be done in a few easy steps provided below:
- Shut down all the active windows of your QuickBooks application after exiting the Company file.
- Press the ‘Windows + E’ keys together on your keyboard to open the file explorer window.
- Go to your C drive, then move to the installation folder of your QuickBooks application. It normally is located inside ‘Program Data’ > ‘Common Files’ > ‘Intuit’ > ‘QuickBooks.’
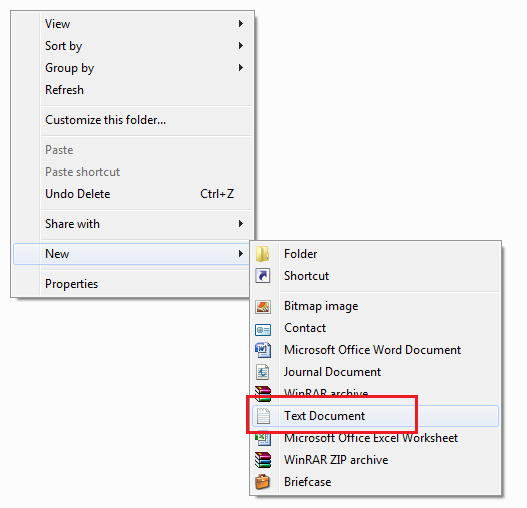
- Right-click on the empty screen when you are inside the folder and hover over the ‘New’ option.

- Select the ‘Text Document’ from the options provided.
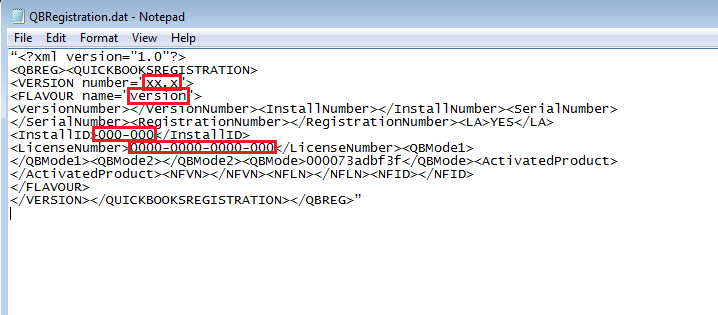
- You will need to copy the following in the Notepad window that opens up.
  “<?xml version="1.0"?>
 <QBREG><QUICKBOOKSREGISTRATION>
 <VERSION number="xx.x">
 <FLAVOUR name="version">
 <VersionNumber></VersionNumber><InstallNumber></InstallNumber><SerialNumber>
 </SerialNumber><RegistrationNumber></RegistrationNumber><LA>YES</LA>
 <InstallID>000-000</InstallID>
 <LicenseNumber>0000-0000-0000-000</LicenseNumber><QBMode1>
 </QBMode1><QBMode2></QBMode2><QBMode>000073adbf3f</QBMode><ActivatedProduct>
 </ActivatedProduct><NFVN></NFVN><NFLN></NFLN><NFID></NFID>
 </FLAVOUR>
 </VERSION></QUICKBOOKSREGISTRATION></QBREG>”
- Users who have QuickBooks Pro should replace ‘xx.x’ with ‘Pro.’
- You need to put 20.0, 29.0, 28.0 for QuickBooks Desktop 2020, 2019, & 2018 versions, respectively, instead of ‘xx.x.’
- Now, instead of the zeroes at the first six places of the second line, feed in the number provided to you as your Product ID.

- The next series of 15 zeroes will be replaced by your product license number.
- Do not interfere or remove with any other characters in the text, such as the dashes (–).
- Go to the ‘File’ menu of your notepad window and select the ‘Save as’ option.
- Put “qbregistration.dat” in the ‘Name’ column and ‘All Files’ in the ‘Save as type.’
- Hit the ‘Save’ button to save the new file.
Method 2: Renaming the Registration File to Recreate it
The user can also adopt the method to rename the original QBregistration.dat file making it obsolete. On renaming the file, QuickBooks will not be able to identify it and would ask you to register again. When you register, a new QBregistration.dat file is created automatically. The steps to perform the process are as follows:
- Close all the company files running and also exit your QuickBooks Desktop
application. - Click on the ‘Start’ button of your computer and search ‘Windows
Explorer.’ - Click on the search result to open the explorer window and reach your
system drive (C drive in most cases.) - Follow the path ‘C:\ProgramData\Common
Files\Intuit\QuickBooks’ to reach the installation
folder of QuickBooks. - Allow to view the hidden files and folders and then locate the ‘QBregistration.dat’ file.
- You can also search it through the ‘Search’ option.
- Right-click on the file when you find it and click on ‘Rename.’
- Add the (.old) extension at the end of the file name and hit the ‘Enter’ key.
Thus, the old file will become unidentifiable, and QuickBooks will ask you to register your QuickBooks application again.
You may also read: QuickBooks file extensions
Concluding
We discussed an effective way to reset QuickBooks registration through this article. We hope the method helped you perform the process effectively. If you face any issues during the process, you should take the help of an expert for resolution. You can reach Proadvisor solutions Support at Helpline Number 1.855.888.3080 and talk to our certified and experienced experts.

Erica Watson is writing about accounting and bookkeeping for over 7+ years, making even the difficult technical topics easy to understand. She is skilled at creating content about popular accounting and tax softwares such as QuickBooks, Sage, Xero, Quicken, etc. Erica’s knowledge of such softwares allows her to create articles and guides that are both informative and easy to follow. Her writing builds trust with readers, thanks to her ability to explain things clearly while showing a real understanding of the industry.


