When you start working with your team in the QB application, multi-user mode is the most useful feature. In this blog, we will walk through the QuickBooks multi-user mode setup for users. This enables multiple users to work simultaneously on a particular company file. This will help you increase productivity and collaborate more effectively with teams.
If you need any help with the multi-user mode in your QBDT application, feel free to get in touch with our experts.
Table of Contents
What is QuickBooks Multi-user Mode?
The multi-user mode in the QBDT app allows you to work together with members of your team and colleagues when they are able to access the company file. With this mode, you experience faster and more effective productivity in a teamwork environment. The number of people who are able to access the company file is determined by the QB version you are using. The QuickBooks Desktop Pro supports 2 users at a time.
The multi-user mode also allows users to log in to the company file simultaneously to manage different tasks. To work without errors, users must have a valid license number.
Minimum Requirements for QuickBooks Multi-user Mode Setup
When you are setting up the multi-user mode, there are several factors to be considered for seamless use of the tool.
- You have to ensure that you have a valid license number for your QuickBooks Desktop application on each computer in the workstation.
- You will need a reliable and stable internet connection.
- Enable user rights for the company files.
- Ensure the Windows OS and QBDT application are up to date.
- Verification and enabling of the QuickBooks Database Server Manager is also a crucial step.
Now, let’s proceed to the next section to understand how this mode can be beneficial for you.
What are the Benefits of Using QuickBooks Multi-user Mode?
There are several important benefits to using the feature available in the application.
- Multi-user mode allows simultaneous access to a single file by multiple users, enabling collaboration among different teams and individuals.
- The multi-user mode comes with enhanced security, which enables administrators to control who can access and what level of access each user has. It keeps the financial data safe and secure with limited access to users as per roles.
- Errors can be easily recognized when using multi-user mode since multiple users are working on the same file simultaneously. This enables users to fix errors in real time as they are detected.
- A multi-user mode is a cheap solution for businesses that can help multiple employees to access QBDT and work together. Businesses can buy a single license with multi-user mode access and let the team work together on a single license number.
The multi-user mode in QuickBooks Desktop is a helpful tool that will help businesses and users with enhanced collaboration, increased productivity, and enhanced security benefits.
Things to Ensure to Manage QuickBooks Multi-User Mode Effectively
When the multi-user feature in QuickBooks is configured correctly, the following are the important key pointers that must be considered to use the system in a smooth, secure, and efficient manner.
- Make sure to include creating a backup of the company file to prevent damage to data, as well as data loss. Maintain the schedule of backing up data automatically to ensure data integrity in case of errors.
- Assign the permission of the company file data according to the role of the user, as well as the position. Limit some of the data to authorized personnel only to secure the data.
- Keep monitoring the performance of the computer and user activity during peak usage times. Make sure that you have the latest update in terms of hardware and networking environments.
These are some key points to ensure and maintain when moving to multi-user mode.
What are the Steps for QuickBooks Multi-User Mode Setup?
In this section, we will briefly describe the procedure, which will help you set up the mode without facing any errors.
Step 1: Install QuickBooks Desktop
- From the official website of Intuit, download the latest version of QBDT.
- Now launch the exe file and go through the on-screen instructions.
- Choose the multi-user host installation process.
Step 2: Enable the Multi-user Host Access in QuickBooks
- Run the QuickBooks Desktop.
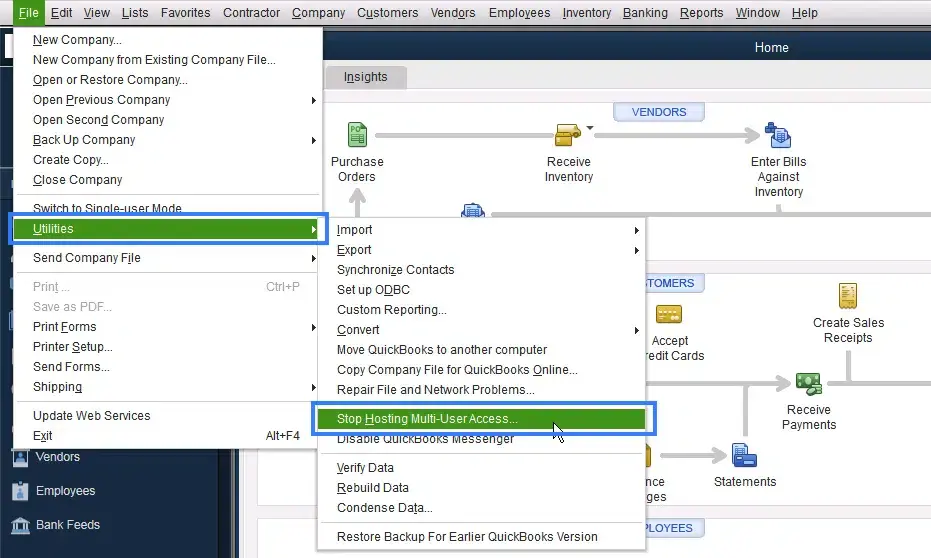
- Now, go to the File menu.
- Tap on the Utilities tab.
- Choose the Multi-host user access option.
- If you notice the Stop Hosting Multi-user access option, then the feature is already on in your system.

Step 3: Arrange the Company File for Multi-user Mode
- Add the selected users and access as per roles for the company file.
- Use a strong password to keep data secure and prevent unauthorized access.
Step 4: Log in to the Company File
- Ensure that the PC with the company file is turned on.
- Get in touch with the admin users to access the QuickBooks company file.
Now, let’s move on to the next section to learn about the QBDT server setup for this mode.
Step-by-Step Guide: QuickBooks Desktop Server for Multi-User Access
Enabling multi-user mode on the QBDT server allows users to set up network settings, hosting settings, and user access. Follow these steps to set it up without any problems.
Step 1: Download and Install QBDT
- Download the QBDT and save the installation file.
- Complete the installation by selecting your preferred network configuration options.
- Choose either to use the QBDT on the current PC or, if you want, the full versions for the server system.
Step 2: Firewall and Security Configuration
- Access the Start menu.
- Tap on the Firewall settings.
- Choose the Windows Firewall option.
- Then tap on Advanced Settings.
- Select the Inbound Rules.
- Click on New Rule.
- Then click on Port and proceed.
- Ensure that the TCP option is selected.
- Allow the connection in the specific local ports field.
- QuickBooks Desktop 2020 and later: 8019, XXXXX.
- QuickBooks Desktop 2019: 8019, XXXXX.
- QuickBooks Desktop 2018: 8019, 56728, 55378-55382.
- QuickBooks Desktop 2017: 8019, 56727, 55373-55377.
- Now, register the profiles and proceed to the next step.
- Assign the new name to the rule.
- Access the QuickBooks application in multi-user mode.
Step 3: Modify the Folder Permissions
- Locate the folder that contains the company file and right-click on it.
- Now, head to the Properties option.
- Choose the Security section.
- Tap on Edit.
- Now, select the QBDataServicesUserXX (XX is the version of QuickBooks).
- Choose the Full Control option.
- Click on Allow.
- Hit Apply and click on OK.
To set the folder permission in Windows 10, 8, or 7, follow the steps below:
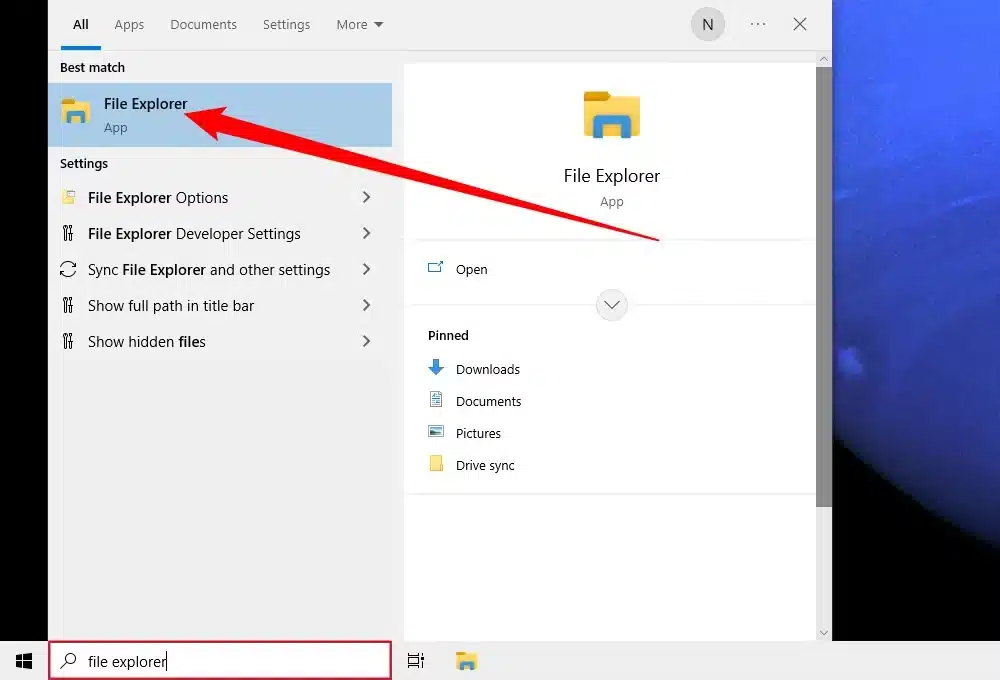
- Hit Windows + R on the keyboard.
- Access the file explorer.

- Find the company file in the folder.
- Now, right-click on the company file.
- Select Properties and Sharing options.
- Tap Share, then choose QBDataServiceUserXX.
Step 4: Utilize the Database Server Manager
- Locate the company file in your system.
- Tap on the Start button.
- Go to the Programs.
- Tap on the QuickBooks Database Server Manager option.
- Click on the Scan Folder menu to continue.
- Select the location where you wish to save the file.
- Now, click on OK.
Step 5: Switch to Multi-user Hosting
- Access the QuickBooks Desktop application.
- Update the company file to the latest version.
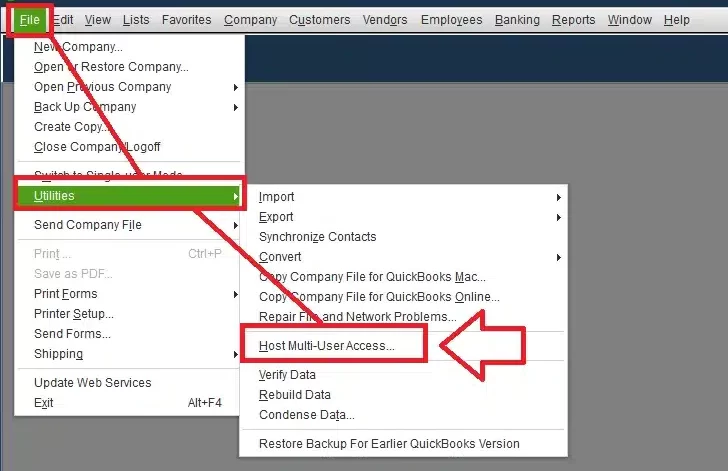
- Head to the File menu.
- Tap on the Utilities menu.
- Click on the Host multi-user access option.

The steps above help you to stepwise set up the multi-user mode for the Database server manager.
Conclusion
This blog was a guide for QuickBooks multi-user mode setup. Above, we have outlined the essential steps to follow during mode setup. We have also listed the benefits and key factors to consider during the transfer. If you need help during the transfer process from single-user mode to multi-user mode, feel free to get in touch with our experts
Frequently Asked Questions (FAQs)
Why is the QuickBooks database server manager important for multi-user mode?
The database server manager is the most crucial aspect of multi-user mode. This enables multiple users to access the same company file together and work on it simultaneously. It also ensures the users are protected from lockouts, sync errors, or performance issues.
How many users can work together in QuickBooks Desktop?
When using the QBDT Premier version, a total of 5 users can work together on the same company file. Whereas the QB Pro allows 3 users to work on the company file simultaneously.
What are the steps to switch from single-user mode to multi-user mode?
The steps to switch from single-user to multi-user mode are as follows:
1. Access the QuickBooks Desktop application.
2. Then go to the File menu.
3. Tap on the switch to multi-user mode option.

Erica Watson is writing about accounting and bookkeeping for over 7+ years, making even the difficult technical topics easy to understand. She is skilled at creating content about popular accounting and tax softwares such as QuickBooks, Sage, Xero, Quicken, etc. Erica’s knowledge of such softwares allows her to create articles and guides that are both informative and easy to follow. Her writing builds trust with readers, thanks to her ability to explain things clearly while showing a real understanding of the industry.