You may find the QuickBooks invoice template not printing correctly when the template is corrupted or the printer settings are incorrect, among other reasons. This issue prevents you from printing the invoices and must be resolved promptly. In this article, we will discuss different issues with templates, such as missing lines and borders, distorted text, missing text fields, and issues saving the customization. Also, you will find solutions to each such issue that you can face while working with templates in QuickBooks Desktop. So, keep reading this guide and resume your regular business operations using templates in QuickBooks.
The inability to print invoice templates in QB can disrupt the work environment. The solutions in this blog will help you fix these issues, but if you require faster resolution, you will need expert help. Call our Proadvisor solutions support team at 1.855.888.3080 for immediate assistance in fixing the issue.
Table of Contents
What are the Main Reasons for QuickBooks Template Printing Issues?
If you are unable to print the invoice templates in QuickBooks correctly, the following reasons might be responsible –
- The template you are using for your QB invoice might be corrupted.
- The printer settings might be incorrect, or you might be using an incorrect printer.
- Outdated printer drivers can also cause issues while trying to print invoice templates.
- The text in the template might be misaligned, or there are issues with the font.
- The default template settings might have changed.
- There are problems with the logo/image you are using in the template.
- There are alignment problems while printing, and the printer settings must be changed.
- You are not using the correct page layout, paper size, or setup.
- An essential program component might be damaged while printing the invoice.
- There are issues with your invoice, or the file you are trying to print might be damaged.
- A damaged QuickBooks Desktop installation can be another reason for this issue.
- Your QuickBooks Desktop version might be outdated and lacks the latest features and security fixes.
- Crucial files, like the QBPrint.QBP might be damaged or corrupted.
- The Adobe Reader software might be outdated or damaged.
These are the leading causes behind QB template printing issues. Now, let’s learn how to resolve different template printing issues using experts’ suggested solutions.
Different QuickBooks Template Printing Issues and Their Solutions
You might face issues with the invoice templates while printing, saving, or emailing them. These issues can appear in different forms, like misaligned text or templates being too big for the printer. In this section, we will discuss the troubleshooting solutions to fix each such issue –
Case 1: Invoice or Statements Print Without Lines or Borders Around Fields
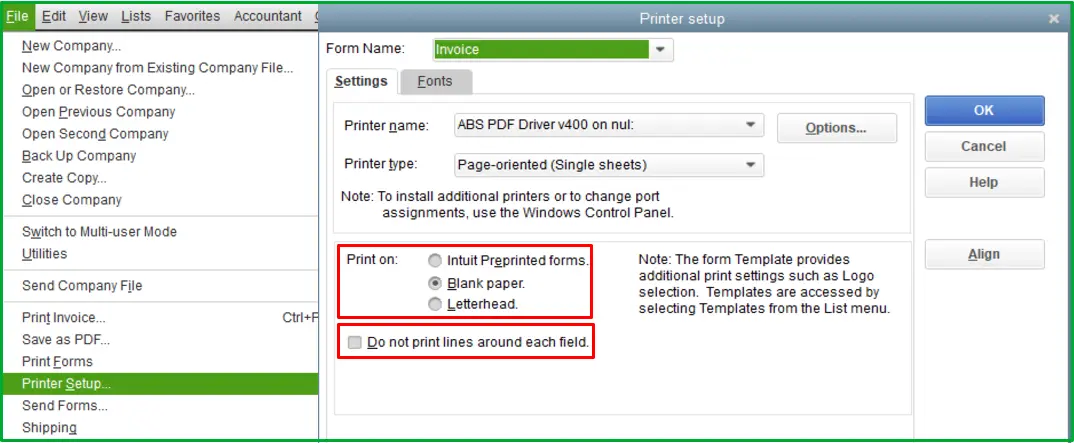
You need to modify the settings if some invoices or statements are printed without lines/borders while others are not. To change the printer settings in QuickBooks, implement the following steps –
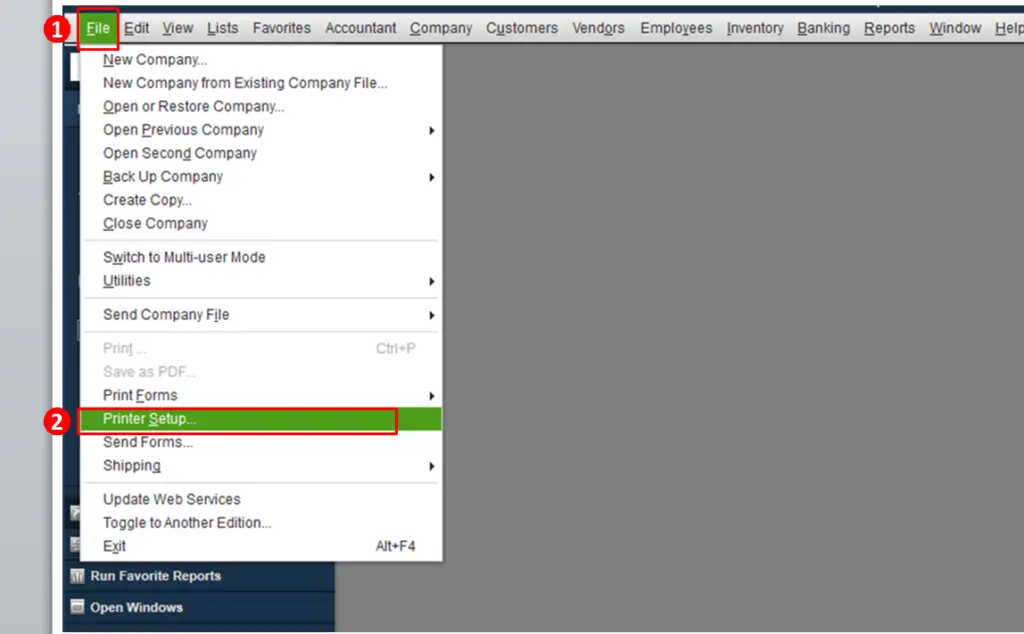
- Go to the QuickBooks File menu, select Printer Setup, then select the Form ▼ dropdown.
- Select the appropriate form, go to the Print On section, and select Blank Paper.

- Lastly, unmark the Do not print lines around each field checkbox and select OK to save the changes.
Once the changes are saved, try printing the invoices to check if the issue is resolved.
Case 2: Emailed Invoices Have Text Issues
Change the font if you find misaligned fields while emailing an invoice as a PDF. You can format the invoice and change its font to fix the misaligned template in QuickBooks using the instructions below –
- Open an invoice, then move to the Formatting tab and select Customize Data Layout.
- Select Layout Designer, then pick a field with bad text and select Properties.
- Further, select Font and change the font or adjust the size. Although the default font is Cambria, you can choose any font you prefer.
- Repeat this for all fields where the text looks strange in the PDF, then select OK to save the settings.
Once done, save an invoice as a PDF or email it to yourself to ensure the alignment issues are fixed.
Recommended to read : QuickBooks detected that a component required to create pdf is missing
Case 3: Long Text Field Only Shows on the Last Page of Sales Forms with Multiple Pages
The long text field might disappear on all but the last page while resizing the field with the Layout Designer. If invoice templates are not printing properly in QuickBooks due to missing long text fields, use a text box to enter the required info as follows –
- Open the invoice, select Formatting, then click Customize Data Layout.
- Further, select Layout Designer, click Add, then select Text Box.
- Add the details you need to show on all forms, then resize the field to show all the information entered.
- Select OK to apply the changes and click Print Preview to see how the text will appear on the form when printed.
- Lastly, close the Print Preview window and select OK to end the process.
Now, check if the long text field appears on all the pages and if the issue is fixed.
Case 4: Changes Don’t Save While Saving Your Customized Invoice Template from an Invoice
The default settings ensure when you use a template on an invoice and create another invoice, that regular template shows up. However, if you can save changes to the customized invoice template, the settings may have changed. In such a case, follow the steps given below to create a test invoice –
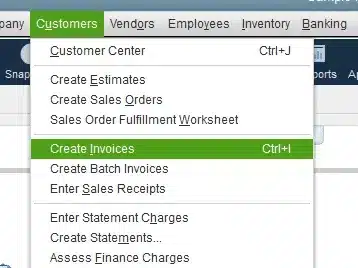
- Select Customers, click Create Invoices, then create a new test invoice with a standard template.

- Select the Template dropdown menu, pick one of the listed Intuit templates, and enter Customer and Item details on the Invoice.
- Lastly, click Save and Close, select Customers, then click Create Invoices to see if the Intuit template option is on the default selection.
If you have changed the template and the new template doesn’t show while creating another invoice, the template might be damaged. To fix the damage, you can either restore a backup of the customized template or recreate it (to recreate the template, see Case 6 below).
Case 5: Due to An Error, the Template was not exported
If the template was not exported due to a logo, remove the attached logo/image from the custom template being exported in the following manner –
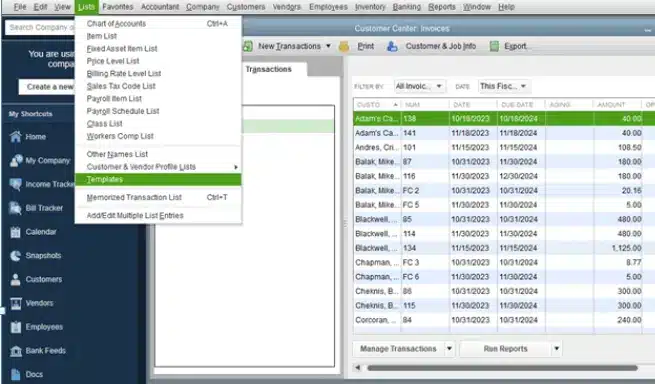
- Open the company file containing the template, go to the Lists menu, and select Templates.

- Next, pick the template you want to export and right-click the Edit Template option.
- Go to the Logo & Fonts section, unmark the Use Logo checkbox, and click OK to save the changes.
Once done, check if you can export the template without issues.
Case 6: Error C=291 When Importing a Form Template
You might encounter the C=291 error due to issues in the form template or a newer version of QuickBooks Desktop. If you created the template in the new QB version but need a copy from the older QB version, you need to recreate the template in the following manner –
- Choose the type of form you want to recreate the template for, and then, from the form, go to the Formatting tab.
- Click on Manage Templates, pick a template to preview, then select Copy to create a new template.
- Click OK to edit the template, then follow the steps listed in the basic customization window to:
- To add your logo:
Select the Use logo checkbox if you want your company logo to appear on your form. To change the logo, tap on Select Logo and select the image you want to use as your logo. - Change the fonts and colors:
You can customize the fonts and colors for details in the form, such as the company name, labels, data, etc. - Change company & transaction information:
Select the contact information that should appear on the invoice, then click Update Information to change the information.
- To add your logo:
- Further, select Additional Customization to add or remove the items from fields like the header, columns, or footer, then click Layout Designer.
- Use the Layout Designer to move or resize items on the form, then click OK when you are done.
- Click Print Preview and preview your form, and once you are satisfied, click Close and hit OK.
After the template is recreated and customized, check if the C=291 error is resolved.
Also Read : How do I fix QuickBooks Is Not Showing Network Drives?
Case 7: Insufficient Data for an Image
You might face a QuickBooks template printing error due to insufficient data for an image. This issue can also arise while emailing or saving the form as a PDF. To fix this, convert the image format with an image editing program in the following manner –
- Go to the List menu, select Templates, then double-click the template with the issue.
- Select Layout Designer, then remove the image, and select OK.
- Now, select OK again, and open the image using photo editing software (we recommend MS Paint).
- Save the image as a different image type (for instance, change it to .JPG if the original image is .BMP), then open the template in QuickBooks.
- Lastly, re-add the image using Layout Designer and customize and resize it as needed.
Once done, try to email, save, or print the template to check if the issue is resolved.
Case 8: QuickBooks Template Too Big for Printer
If the templates are not printing correctly in QuickBooks Desktop, they might be too big for the printer. This scenario can arise after updating QuickBooks and the computer. To fix this template printing issue, implement the following solutions –
Solution 1 – Check the Printer Setup and Modify the Alignment
You can edit the printer setup and modify the alignment to fix the issue in the following manner –
- Go to the File menu, select Printer Setup, then open the Form Name dropdown menu.
- Select the Transaction Type, then move to the Settings tab and confirm the printer name.
- Click Align and choose the template for your invoice, then click OK.
- Lastly, click the Printer Sample button to set the Vertical and Horizontal alignment.
Once done, open the invoice you want to print and check if it prints correctly. However, if the QuickBooks invoice template is not printing correctly, follow the next solution.
Solution 2 – Use the Correct Page Layout, Paper Size, and Setup
Firstly, ensure the system requirements for the new QuickBooks Desktop version are met. Then modify the advanced printer setup in the following manner –
- Go to the File menu, select Printer Setup, and click Options.

- Now, select Advanced, choose the Paper Size you use for the actual printing, and hit OK to save.
Once done, open an invoice and select the correct template. Then, try printing it to check if the template issues are fixed.
Case 9: Misaligned or Distorted Logo While Printing Invoices
If your QuickBooks is printing distorted templates or the text overlaps, an essential program component might be damaged. To fix the issue, you can run the QuickBooks Print & PDF Repair Tool in the following manner –
Step 1: Download & Install the QuickBooks Tool Hub
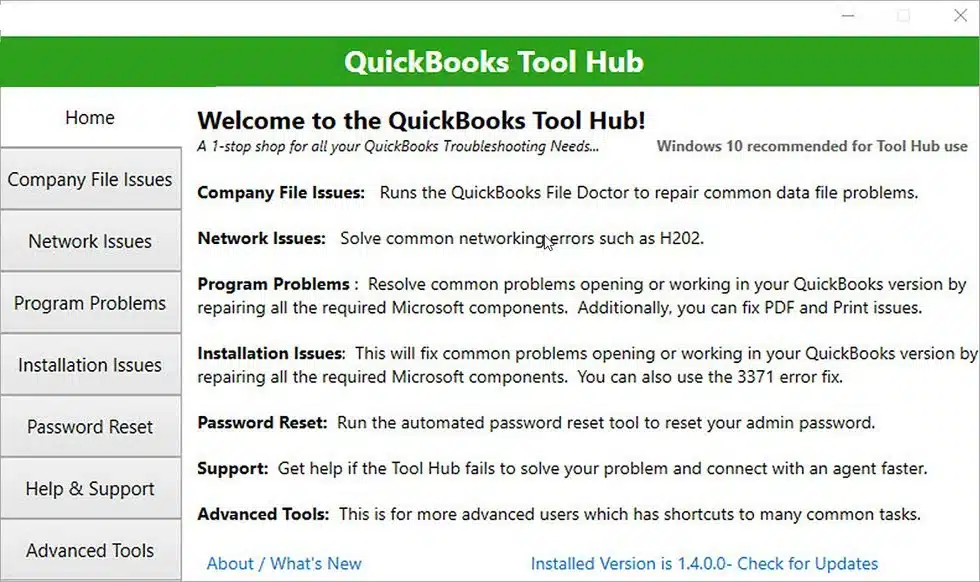
The QuickBooks Tool Hub contains essential tools and features, like the Print & PDF Repair tool, that help fix common QB issues. You must download and install the latest QuickBooks Tool Hub on your PC to access this tool.
After Tool Hub is installed, launch it and move to the next step.
Step 2 – Use the QB Print & PDF Repair Tool
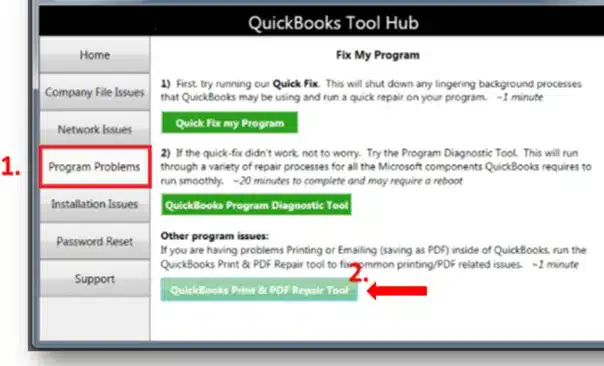
The QuickBooks Print & PDF Repair tool helps resolve common issues while printing and emailing invoices. To fix the issues, run this tool by implementing the following steps –
- In the QuickBooks Tool Hub, go to the Program Problems menu and select the QuickBooks Print & PDF Repair tool.
- Let the tool run, which can take around a minute, then rerun QuickBooks Desktop and try to print, save, or email the PDF.
Check if the QuickBooks invoice template overlapping issue is resolved after implementing this solution.
Case 10: Customized Invoice Prints with Jumbled Up Characters or Unrecognized Font
If your invoices print with unrecognized font or jumbled-up characters, the font in the template might be corrupted. To fix this issue, you can change the font by customizing the template in the following manner –
- Navigate to the Lists menu, select Templates, find the template, and double-click on it. Alternatively, open any invoice and check to ensure the correct template is chosen. To do so, open the Template drop-down menu at the top right corner.
- Further, click Customize, and once the basic customization window appears, navigate to the Change Font For section.
- Select the appropriate Field where you are facing a problem with font and click Change Font.
- Lastly, select the appropriate font from the list and change the font in all the fields where you found the printing to be corrupt.
Once done, print the invoice again to check if the QuickBooks invoice template printing error is fixed.
You may also read : Fix Windows firewall blocking QuickBooks Issue
Case 11: Issues While Printing Invoices Created from Sales Orders
Sometimes, Sales Orders might display correctly on the screen but change to a single page or don’t include “Job Names” while printing or converting them to PDF. If you encounter these issues while printing invoices from Sales Orders, follow these solutions –
Solution 1 – Change the Alignment of the Template
You can realign the template facing issues by using the following steps –
- Open QuickBooks Desktop, select an invoice you want to print, open it, and tap the Print drop-down.
- Choose Invoice, go to the Align tab, and then pick a template that you would like to use for alignment.
- Now, select OK and enter the amount to move the text vertically and horizontally on the alignment window.
- Finally, select Print Sample and verify if the alignment you need is correct.
After the alignment is set, try to print the invoices again. However, if the QuickBooks invoice template is not printing correctly, follow solution 2.
Solution 2 – Use QuickBooks Print & PDF Repair Utility
Another way to fix problems when printing invoices from Sales Orders is to use the QuickBooks Print & PDF Repair tool. Follow ‘Solution 2: Use the QB PDF & Print Repair Tool’ of ‘Case 9: Misaligned or Distorted Logo While Printing Invoices’ above.
After running this tool, print the invoices again to check if the issues are resolved.
Case 12: Custom Invoice Template Not Applying When Printing and Previewing and Sending to Customers
If the customer invoice template is not applied in QuickBooks Desktop while printing, previewing, and sending to customers, you can perform the following solutions –
Solution 1 – Update QuickBooks Desktop
Firstly, ensure you have the latest QBDT version on your PC; otherwise, download and install Quickbooks Desktop updates. After updating QuickBooks, try printing the invoice again and checking if the custom templates are applying correctly. If the template issues persist while printing the invoice, move to the next solution.
Solution 2 – Open a Sample Company File
You can access a sample file to check if the issues while applying the invoice template occur only in the current file. To open a sample file in QuickBooks Desktop, follow the steps mentioned below –
- Firstly, open QuickBooks and go to the No Company Open window.
- Select the drop-down arrow beside Open a Sample File, then choose Sample Product-based Business.
If the template is applied correctly in the sample file, the original file might be corrupted. Run the Verify/Rebuild Data tool in Solution 3 below to fix the file. On the other hand, if the template is not applied correctly in the sample file, the QuickBooks installation might be damaged (follow Solution 4 to fix it).
Solution 3 – Use the Verify/Rebuild Data Tool

The Verify Data tool identified data integrity issues in your file, and the Rebuild Data tool rebuilt the damaged data. You can use Verify and Rebuild Data in QuickBooks to fix the file damage effectively.

After running the tool, print the invoices again and check if the custom template applies correctly.
Solution 4 – Repair QB Desktop
If the template doesn’t apply in the sample file, repair QuickBooks Desktop in the following manner –
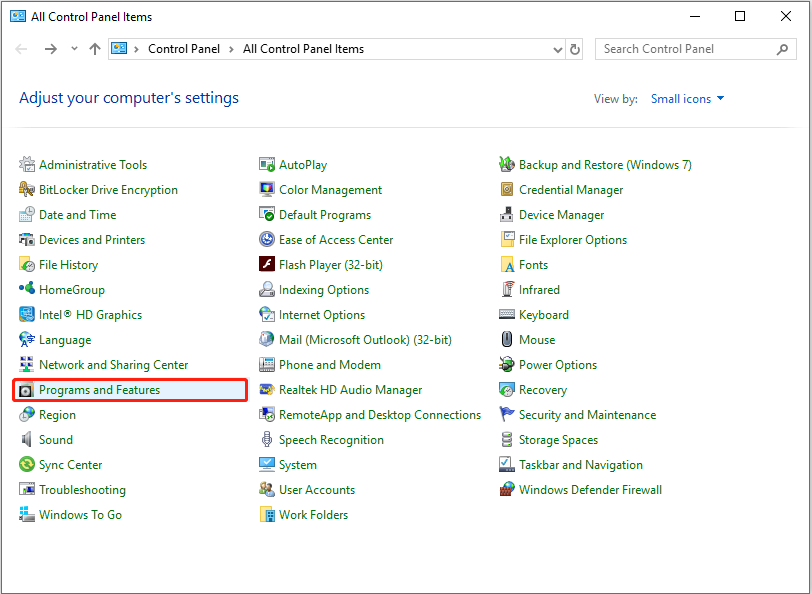
- First, create a backup version of your company file, reboot the PC, and go to the Windows Start menu.
- Find the Control Panel using the search, select it, and then click Programs and Features.

Note: If you don’t see Programs and Features, click Programs instead, and then select Program and Features. - Select Uninstall a Program, select QuickBooks from the program list, and click Uninstall/Change.
- Click Continue or Next, then select Repair and click Next again.
- Wait for the tool to start the diagnosis and tap Finish when done.
Alternatively, you can repair QuickBooks using the QuickBooks Tool Hub tools, namely Quick Fix My Program and QuickBooks Install Diagnostic tool. After QuickBooks Desktop is repaired, check if you can apply the custom invoice template, and the issues are resolved.
Case 13: QuickBooks Templates Get Corrupted
If the invoice template is corrupted, you might face issues while printing it in QuickBooks. To fix this issue, you can recreate and customize the template (see Case 6 above).
However, if you are facing other printing issues and none of the above cases apply, follow the general solutions in the next section.
General Solutions to Fix QuickBooks Invoice Template Printing Issues
Apart from the abovementioned cases, you might face other template printing issues. To fix these issues while printing the invoice template in QuickBooks, follow the solutions given below –
Solution 1 – Update the Printer Driver
An outdated printer driver can be the reason why the QuickBooks invoice template is not printing correctly. Thus, you need to update the printer driver in the following manner –
- Open the Windows Start menu, enter “Device Manager” in the search bar, and click on Device Manager.
- Next, open the Printers category, right-click the printer for which you want to update the driver, and select Update Driver.
- Now, choose Search automatically for updated driver software. If Windows finds updates, follow the on-screen instructions to complete the installation.
- On the contrary, if Windows can’t find updates, go to the printer manufacturer’s website to see whether the printer driver is updated.
Once the driver is updated, try printing the templates again. However, if you are still facing issues while printing QuickBooks invoice templates, move to the next solution.
Solution 2 – Print from Another Program
Try to print from another program to check if the issues lie with your printing program or within QuickBooks. To print from another program, implement the following steps –
- Search Notepad in the Windows search, launch it, and then enter some text.
- Next, go to the File menu, select Print, and pick the correct printer.
- Lastly, click the Print option again and check if it works.
If you can print, there are problems within QuickBooks or the company file. See ‘Solution 2: Open a Sample Company File’ of ‘Case 12: Custom Invoice Template Not Applying When Printing and Preview and Sending to Customers’ above to check whether the issue is with the file or QuickBooks and proceed accordingly.
However, if you cannot print from the other program, your printer may have issues. Move to the next solution to check the printer settings.
Solution 3 – Test the Printer Setup
You need to review the printer settings to ensure they are set correctly and you are using the correct printer. To test the setup, implement the step-by-step process given below –
Step 1 – Ensure the Printer is Correctly Set
To check if the printer is set up correctly, go through the following steps –
- Turn off the printer, restart your PC, then turn the printer back on, and ensure you load the printer paper correctly.
- From the Windows Start menu, open the Control Panel and double-click the Printers and Faxes option.
- Further, if the printer shows Offline, right-click on it and select Use Printer Online.
- Double-click the printer, and if you see any print jobs in the queue, select Printer and click Cancel All Documents.
- Exit the window, right-click the printer, and select Properties.
- Lastly, select Print Test Page and see if the page prints.
If the page doesn’t print and you use a network printer, network issues might be responsible. After checking the printer setup, move to step 2 below.
Step 2 – Make Sure You Are Using the Correct Printer
Follow the steps given below to ensure you are using the correct printer –
- Open QuickBooks Desktop, go to the File menu, then select Printer Setup.
- Now, select the form you want to print and ensure the printer name matches the exact name of the printer you wish to use.
- If not, correct the setup within your computer’s Printer Setup first, and then select Help in this area for more help with these settings.
Once the correct printer is chosen, move to the next step.
Step 3 – Try Printing to a Different Printer
The last step is to try printing to a different printer in the following manner –
- Open the QuickBooks File menu, select Printer Setup, and select the form you want to print.
- Select a different printer, like the Microsoft XP Printer, then click Help for more help with these settings.
After verifying the printer setup, try printing the invoice template in QuickBooks. However, if the QuickBooks template printing error persists, follow the next solution.
Recommended to read : How to restore QuickBooks Missing Data after update
Solution 4 – Manually Rename the QBPrint.QBP File
If none of the above solutions work, the QBPrint.QBP file might be damaged. In this case, manually rename the file by using the steps below –
- Firstly, find the QBPrint.QBP file in the following file paths as per your Windows version –
Windows 10 and newer: C:\ProgramData\Intuit\QuickBooks 20xx(20xx represents the version of your QuickBooks.)
Server 2012 and newer: C:\Program Data\Intuit\QuickBooks YEAR and C:\Users\**remote user**\AppData\Roaming\Intuit\ YEAR VERSION\TSPrinterSettings - After finding the file, right-click on it, click Rename, add .OLD to the file name, and hit Enter.
- Open the File tab in QuickBooks, select Printer Setup, choose a transaction from the Form Name list, and click OK to create a new QBPrint.QBP file.
- Do this for every transaction in the Form Name list, then try printing the invoice again.
If you still encounter the QuickBooks template not printing issue, go to the next troubleshooting solution.
Solution 5 – Repair the Adobe Reader
If your QuickBooks invoices are printing incorrectly, like not printing lines on invoices, there might be problems with the Adobe Reader app. To fix the damage in Adobe Reader, repair it in the following manner –
Note: Before repairing, ensure you have the updated Adobe Reader version by checking out the most recent version on the official website.
- Exit all open web browser windows, then go to the Windows Start menu.
- Type “Control Panel” in the search bar, open Control Panel, and select Programs and Features.
- Now, click Adobe or Adobe Reader, select Uninstall/Change, and click Next in the Setup dialog box.
- Lastly, select Repair, hit Next, click Install, then click Finish when the repair is complete.
After repairing the Adobe Reader, try printing the invoice templates again to check if the issue is resolved.
Conclusion
This detailed guide explains how to fix QuickBooks invoice template not printing issues. However, if the solutions above don’t help and the QuickBooks invoice template is not printing correctly, you can contact our team of experts at 1.855.888.3080 for immediate help.
FAQs
How can I edit QuickBooks templates?
To edit the existing templates in QuickBooks Desktop, select Settings, choose Custom Form Styles, and locate the customer or standard template. Click Edit on the Action column, make the required changes, and select OK.
What are some important considerations before printing invoices in QuickBooks?
Before printing the template invoices in QuickBooks, ensure your QBDT is updated to the latest version. Additionally, ensure that the printer is properly connected to your PC and that the printer drivers are updated.
How do you resolve printing issues while running QuickBooks on a Mac?
You need to update the printer software to resolve printing issues while using QuickBooks on Mac. Once you have done this, add the printer to your PC and choose one of these options: use AirPrint, use the printer installed on the PC, or use a printer from a file on Mac.
More useful articles to read :
How to fix QuickBooks Payroll Error 2002?
How Do I Fix QuickBooks Sales Tax Center Not Working
What is QuickBooks Conversion Tool?
QuickBooks Desktop Utility Application Keeps Pop Up Issue
How to troubleshoot QuickBooks Delivery Server Down Error

Erica Watson is writing about accounting and bookkeeping for over 7+ years, making even the difficult technical topics easy to understand. She is skilled at creating content about popular accounting and tax softwares such as QuickBooks, Sage, Xero, Quicken, etc. Erica’s knowledge of such softwares allows her to create articles and guides that are both informative and easy to follow. Her writing builds trust with readers, thanks to her ability to explain things clearly while showing a real understanding of the industry.