Have you ever heard of using the QuickBooks Clean Install Tool? Some of the QuickBooks errors are easily fixed with a simple reinstallation. While there are other errors that need more fixing, and to assist you in addressing such errors, there is the Intuit clean installation tool. You may reinstall QuickBooks Desktop for Windows using the clean install utility. It is an excellent tool created to delete leftover files and folders when uninstalling and reinstalling software. It also cleanses your system and makes for an easy installation.
Are you unable to use the QuickBooks Clean Install Tool? You can speak to our dedicated experts by dialling our toll-free number 1.855.542.9309. ProAdvisors Solutions Experts are all well-trained to understand your concerns and help you fix the software update issues instantly.
You may also see: How to Resolve the QuickBooks Error 3140
Table of Contents
What is QuickBooks Clean Install Tool?
The QuickBooks Clean Install Tool comes into play to restore corrupted QuickBooks Desktop features, where reinstalling QuickBooks is unable to resolve the problem. To fix the problem with the clean install tool, you will need to rename the desktop to QuickBooks Desktop for Windows and the installation file, and reinstall the software. The process is referred to as a clean install or clean uninstall of QuickBooks, which normally clears the cache memory, taking up space. Generally, a clean install assists in resolving problems that hinder you from opening the company file, display and template issues, and a whole lot of other installation problems.
Remember that a clean install tool cannot damage your accounting files, such as your company file or any other information you possess. Also, keep in mind that, prior to executing the uninstall process, we recommend that you have a QuickBooks desktop download file or installation CD with the license number. Moreover, a precautionary step is to back up the data file. Also, you will need to log in as a Windows admin to execute the steps and ensure that the systems that you are using are ready for a restart.
Use of the Clean Install Tool in QuickBooks Desktop
You now understand what the QuickBooks clean install tool is, but one question that remains unanswered is when to use the QuickBooks clean install tool. Well, there are some situations when you can use this tool to clean install QuickBooks Desktop and effectively fix the problem. Let us explore various situations when you can use the QuickBooks clean install tool to reinstall QuickBooks for Windows.
- While installing QuickBooks or while installing updates of the same, you may land in a corrupted installation, which causes crashes or other problems. That is when you have to use the QuickBooks clean install tool and eliminate the corrupted files.
- Sometimes, when there are conflicts with other software and drivers on compatibility grounds, you can run the clean install utility and attempt to resolve the conflicts.
- Some performance problems in QuickBooks, such as slow processing of the software, can be solved by installing the software cleanly using the clean install tool because it deletes unnecessary configurations and files.
- Some data file problems can also be fixed using the clean install tool. But it is advisable to restore a backup of the company file to preserve data integrity.
These are some common instances when you can use the Clean Install Tool in QuickBooks Desktop. Well, there can be more unidentified errors that can be resolved using this tool.
Things to Keep in Mind Before Using QuickBooks Clean Install Tool
There are certain things that you need to keep in mind before using the Clean Install Tool in QuickBooks. These things will help you avoid data loss in QuickBooks. The things that you need to keep in mind are:
- Backing Up Your Company File
- Keep License and Product Information Ready
Let’s now discuss these steps in detail. It will make you ready to install the Clean Install Tool in QuickBooks.
Step 1: Backing Up Your Company File
Your company file contains the most important information. So, any damage to the company file can be troublesome for you. Therefore, we suggest that you make a backup of your company file before executing the steps for a clean installation. The procedure to back up your company file is as follows:
- Begin with the process by inserting the flash drive into your system for the purpose of backup.
- Launch QuickBooks and proceed to the file menu.
- Click on the backup company option to make a local backup.
- Select an option between local backup and online backup, based on your preference.
- It is safe, though, to save files on a flash drive because it is an easy way to get files back.
- Then click on the next tab and follow onscreen prompts to finish the backup process.
These are the steps that you need to follow to make a backup of the company file. Now, you are ready to follow the second step.
Step 2: Keep License and Product Information Ready
Once QuickBooks is uninstalled from the system, you must have the product and license number in hand to access the software. You can press the F2 key or Ctrl + 1 to open the product information window.
How to Install the Clean Install Tool in QuickBooks Desktop
Now, we know about the Clean Install Tool and the scenarios where we can use the tool. Now, we will have a look at the steps to install the tool. Here are the steps that you need to follow to install the Clean Install Tool on your computer:
- Uninstalling the QuickBooks Data
- Using the Clean Install Tool for Windows
- Reinstalling QuickBooks on Your PC
- Renaming QuickBooks Desktop Installation Manually
These are the four steps to download and install the QuickBooks Clean Install Tool. Let’s now look at these steps in detail.
Step 1: Uninstalling the QuickBooks Data
The initial process of downloading the Clean Install Tool in QuickBooks is to uninstall the QuickBooks Data on your computer. The procedure to uninstall QuickBooks is as follows:
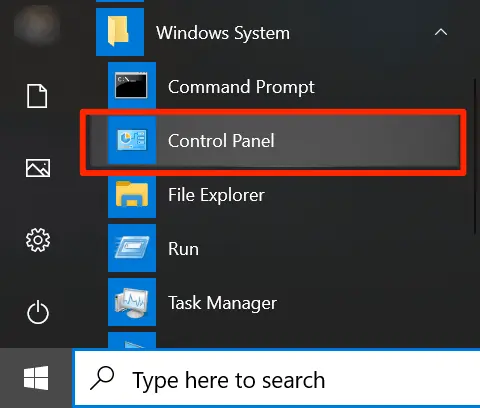
- First, go to the Start menu.
- Then search for the Control Panel.

- The Control Panel window opens when you press the Enter key.
- Now click on the Programs and then on the Programs again.
- You can now view the list of Programs.
- Select the QuickBooks Desktop program.
- Then, when you right-click on it, you will see an option Uninstall or Change.
- Choose the Uninstall or Change option.
- Now the Uninstall Wizard is displayed.
- Follow the steps in it.
- At last, the uninstallation is done successfully.
These are the steps to uninstall QuickBooks from your computer. Now, you can proceed to the next solution for resolution.
Step 2: Using the Clean Install Tool for Windows
Here is the second step, and in this, you will have to employ the Windows Clean Install tool. Let us now see how we can download and utilize the Clean Install tool to clean install QuickBooks Desktop for Windows.
- First, download the QuickBooks tool hub from the Intuit official website.
- Next, proceed to the directory where you saved it and double click on the same to trigger the installation process.
- Having done that, now you must install the software by following the onscreen instructions.
- Here, you need to accept the terms and conditions..
- You now have to click on the clean install tool, having chosen the installation issues tab.
- Moving ahead, go for the QuickBooks Desktop version previously installed and click on the continue tab.
- You will then be shown a warning message on the screen reading ‘Please install your copy of QuickBooks’ to default location.
- Click on the OK tab now to finish the step.
- In case you cannot access QuickBooks while renaming the folders, follow the steps below:
- Launch the Windows taskbar and proceed to the task manager.
- You now have to select the processes tab and click on the image name column header.
- Once you are done with that, go for exe, qbdbmgrn.exe, qbw32.exe. QBCFmonitorservice.exe and also click on End.
- Further, click on Yes when you get a warning message displayed on the screen.
Now, you have completed the second step. You can move to the third step.
Step 3: Reinstalling QuickBooks on Your Personal Computer
This step asks you to reinstall QuickBooks Desktop for Windows with the clean install utility. And also, note down the license and product details. Now, you have to proceed with the steps below to finish the reinstall process:
- First, insert the CD of QuickBooks and follow the onscreen steps.
- Additionally, it will prompt you to enter the product and license number.
- You now need to provide the credentials exactly as they were stated in the system before.
- Perform the onscreen instructions to finish the process.
- After that, click on the next tab.
- And again, go to the type of installation and click on the next tab along with that select the install tab.
At the end, you will be able to operate QuickBooks. Now, you are ready to move to the next solution.
Step 4: Renaming QuickBooks Desktop Installation Manually
It should be noted that the QuickBooks clean install tool is not supported with QuickBooks 2020. You, therefore, have to proceed with the following manual steps to finish the process in QuickBooks 2020:
- Initially, open the start menu, look for the file explorer, and open it.
- You now have to search for and open the folder containing the company file.
- C:\ProgramData\Intuit\QuickBooks (year)
- C:\Users\current user\AppData\Local\Intuit\QuickBooks (year)
- C:\Program Files\Intuit\QuickBooks (year) 64-bit version
- C:\Program Files (x86)\Intuit\QuickBooks
- You now have to find the folder and right-click on it.
- Followed by suffixing old at the end of the folder name.
- This will keep you away from accessing this folder during reinstallation.
- Reinstall QuickBooks later on.
- In case you fall into an error saying “access denied while renaming the folder“, the following steps must be done:
- First, click on the Ctrl + Shift + Esc keys to open the task manager.
- You can also search for the task manager in the Start menu.
- Once done with that, click on the processes tab.
- You are also required to choose the name column header to order the list.
- And further, look for the following QuickBooks-related process in the processes tab: Qbw32.exe, QBDBMgrn.exe, QBDBMgr.exe, QBCFMonitorService.exe.
- After choosing each of these processes, you must click on the end process tab.
- If you receive a warning message that says “Terminating a process can cause undesired results“, select Yes tab.
These steps will help you rename the QuickBooks Installation manually in the QuickBooks 2020 version. By following all the above steps, you have installed the Clean Install Tool in QuickBooks.
Memory Table for QuickBooks Clean Install Tool
Now that we have reached the end of this blog post. We have seen too many things to remember, right? Well, we have created a memory table for you. This table will contain all the necessary information summed up. The table is mentioned below.
| Section | Details |
| Description of the Tool | The Clean Install Tool helps resolve corrupted QuickBooks features that can’t be fixed by reinstallation. It clears the cache and helps with issues like opening company files, display issues, and installation errors. |
| When to Use the Tool | Corrupted installation or updates Software conflicts with other programs Performance issues (e.g., slow processing) Data file problems (ensure backup is made). |
| Things to Keep in Mind | Back up the company file: Prevent data loss. Keep license/product info: You’ll need it after uninstalling QuickBooks. |
| How to Install the Tool | Uninstalling the QuickBooks Data Using the Clean Install Tool for Windows Reinstalling QuickBooks on Your PC Renaming QuickBooks Desktop Installation Manually |
| Key Notes for QuickBooks 2020 | Clean Install Tool is not supported for QuickBooks 2020, so renaming folders manually is required. |
| Precautionary Steps | Back up the company file Have the installation CD or download the link Be prepared to restart the system |
This table will sum up all the information you need to know. You can keep a note of this table for future reference.
Summing It Up!
The QuickBooks Clean Install Tool resolves issues that are caused by damaged installations, including company file opening issues, software crashes, or sluggish performance. It resolves these by cleaning the cache and reinstalling QuickBooks without impacting company data. Prior to using the tool, back up your company file and have your license and product details at hand. The process is to uninstall QuickBooks, reinstall it through the Clean Install Tool, and manually rename QuickBooks folders if one is using QuickBooks 2020.
FAQs
What is the QuickBooks Clean Install Tool?
QuickBooks Clean Install is a tool to eliminate specific problems in the QuickBooks Desktop application created due to problems deep within the QuickBooks installation. It resolves issues with QuickBooks operations and many errors you experience while running QB.
How do I wipe QuickBooks clean and start over?
In case the QBO account is newer than 60 days, you can clean it out. It is achieved by modifying the address URL to https://app.qbo.intuit.com/app/purgecompany when logged into QBO. You have to log in as an admin to make this change.
Can I uninstall QuickBooks and reinstall it without losing my data?
Yes, you can uninstall and reinstall QuickBooks without losing any of your data. Reinstalling QuickBooks over a previous installation does not impact your company files. You can use your company files with the reinstalled version of QuickBooks just like you would have been able to with the old version. It is still, however, advisable to have a backup of the company files.
What is the purpose of a clean install?
A clean install is a computer technique that includes wiping out all the data and installing the operating system from scratch. It’s an intense way to give your system a fresh start, remove clutter, and fix performance problems.
Also View These Articles :-
Is QuickBooks open but not showing? Here are the fixes!
How to Resolve QuickBooks Fatal Error (Verified Methods)
How to fix QuickBooks Abort Error (Trusted Guide)
How to Fix QuickBooks Error 1327 (The drive is not valid)
QuickBooks Error 1402 – How to fix this installation issue?

Erica Watson is writing about accounting and bookkeeping for over 7+ years, making even the difficult technical topics easy to understand. She is skilled at creating content about popular accounting and tax softwares such as QuickBooks, Sage, Xero, Quicken, etc. Erica’s knowledge of such softwares allows her to create articles and guides that are both informative and easy to follow. Her writing builds trust with readers, thanks to her ability to explain things clearly while showing a real understanding of the industry.