QuickBooks is known worldwide for its robust features and user-friendly interface. It is the most popular accounting application among small and medium-sized businesses. Even though it is primarily an accounting application, it is not limited to bookkeeping. It provides the feature of sales and inventory management, payroll issues, and other such business management processes. QuickBooks is a reservoir of all your crucial business data, and if you use the QuickBooks Desktop application, all this data is stored on your local storage. While the backup feature works smoothly most of the time, you may receive QuickBooks automatic backup not working issue at times. To protect your crucial company data, QuickBooks provides the automatic backup option. You can schedule the time for backup or frequency of use to initiate the backup. This helps keep your data safe from accidental loss or deletion. This article discusses in detail the reasons behind the issues with QuickBooks automatic backup not working issue and the methods that can be applied to troubleshoot it.
“If you come across QuickBooks Automatic Backup not working issues for your company file, you may struggle to resolve the error yourself. If you seek an expert’s assistance, reach Proadvisor Solutions Error Support at 1.855.888.3080 and talk to our certified and experienced experts for troubleshooting help and guidance”
You may also see: Scheduling a Local Backup in QuickBooks
Table of Contents
Reasons why QuickBooks Automatic Backup not Working Issue Occurs?
The easiest approach to ensure your QuickBooks data safety is to schedule automatic backup. After thoroughly analyzing the error we found that there is a wide range of reasons that cause the QuickBooks Automatic Backup not working issue. Check out the reasons mentioned below and see if one of these is contributing to the occurrence of the error:
- For files with names larger than 65 characters, automatic backup issues can appear.
- Check out for white spaces at the end of the file name as it can block automatic backup.
- You may get the QuickBooks automatic backup not working error due to compatibility issues between your operating system and QuickBooks. Using recent QuickBooks versions on Windows Vista, or older QuickBooks versions like 2012 on Windows 10 can cause issues.
- If the scheduled backups are not properly set up, issues may occur automatically backing up the QuickBooks data file.
- Using outdated QuickBooks application or not updating the application regularly can cause issues in the automatic backup.
- If you set a file larger than 3 Gigabytes for automatic backup, it might not work properly.
- Another possible reason for automatic backup not working is improper drive or access rights. If the QuickBooks Database server does not have full access rights, the backup process will get affected.
- Automatic or scheduled backups may fail if you have a preference setting conflict. If you use the ‘keep QuickBooks running for quick startups’ feature, the application starts the backup but cannot finish it. This keeps on creating .tmp files in the QuickBooks directory.
- QuickBooks company file damage can also cause issues in the automatic backup.
Understanding these reasons helps you choose the best troubleshooting methods to apply as you can easily narrow down the reasons. Keep reading the article to know about the stepwise methods to fix the error.
Workaround for QuickBooks Scheduled Backup Error
There are a few workarounds to keep your data safe if you have encountered the QuickBooks schedule backup error. Some suggestions have been listed below for you. You can follow these suggestions to keep your data safe till the issue is resolved.
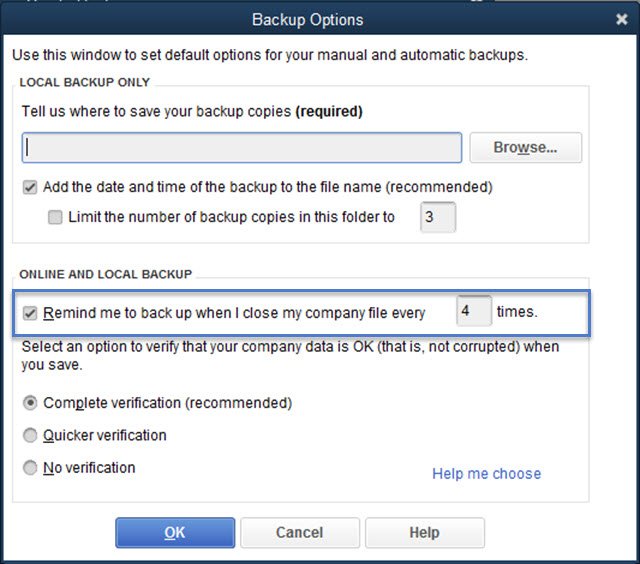
- Use the Reminders for the backup option and create manual backups from time to time.

- You can copy the company file after all the users log out and paste it into some other folder on your computer.
- Check the size of your company file name and white spaces at the end. Limit the file name to 65 characters and remove any white spaces from the end of the name. This can also resolve the automatic backup issue.
These workarounds are not a permanent solution to the QuickBooks automatic backup not working error. Refer to the next section of the article to learn about the troubleshooting methods.
How to Fix the QuickBooks not Backing up Automatically Issue?
Method 1: Running the QuickBooks application in Compatibility Mode
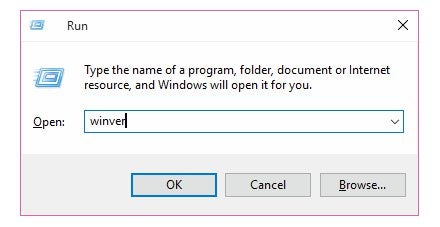
- Press the ‘Windows + R’ key together, type ‘winver,’ and hit the ‘OK’ button.

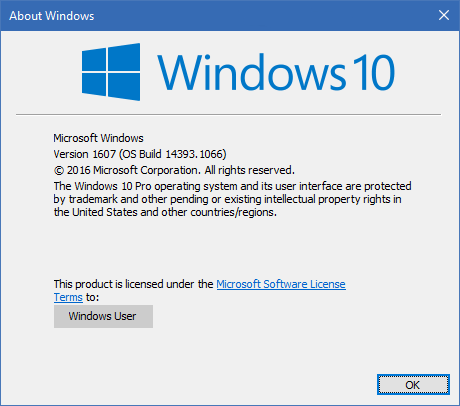
Check your Windows version in the ‘About’ windows.
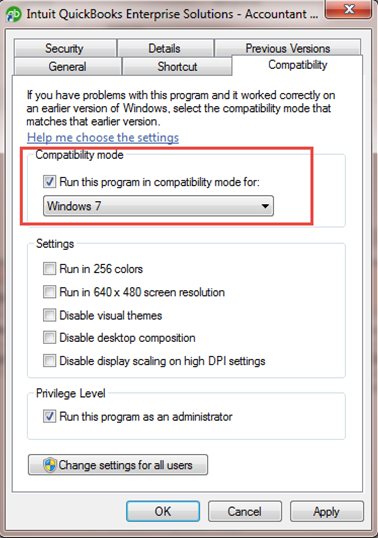
- Right-click on the QuickBooks Desktop icon and select the ‘Properties’ option.
- Reach the ‘Compatibility’ tab and mark the box saying ‘Run this program in compatibility mode for’ as checked.

- Go to the drop-down menu and choose your Windows version.
- Press the ‘Apply’ button and then click on the ‘OK’ button.
Check if the issue is resolved now; if you are still struggling, you should first run the Verify and Rebuild data utility and then update your QuickBooks application. Check out the detailed steps in the following section.
Method 2: Updating your QuickBooks Desktop Application
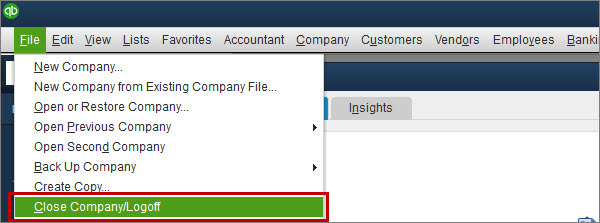
- Open your application and go to the ‘File’ menu to log off your company file.

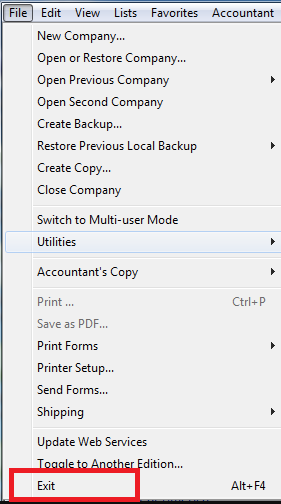
- Go to the ‘File’ menu now and click on ‘Exit.’

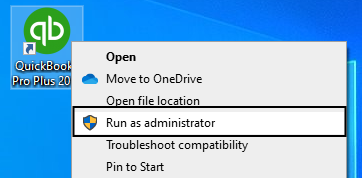
- Go to the ‘Start’ menu of your computer and Right-click on the ‘QuickBooks’ icon.
- Select the ‘Run as Administrator’ option.

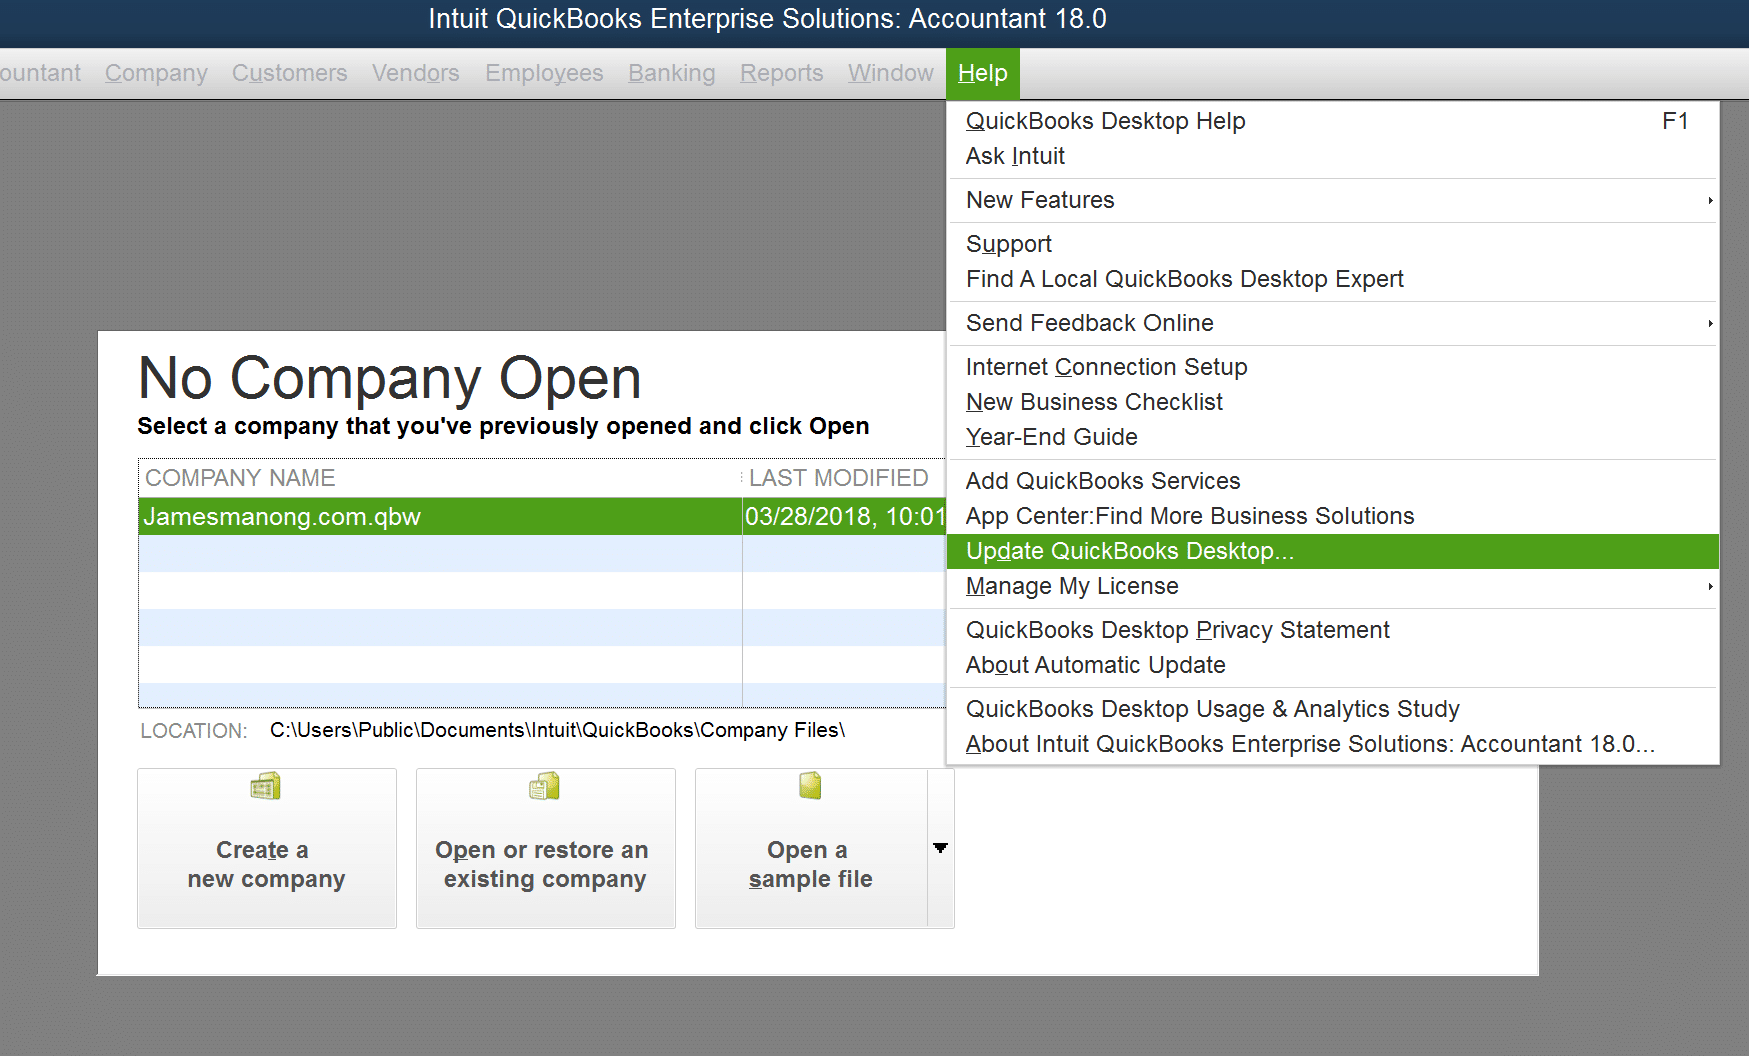
- Go to the ‘Help’ menu and click on ‘Update QuickBooks.’

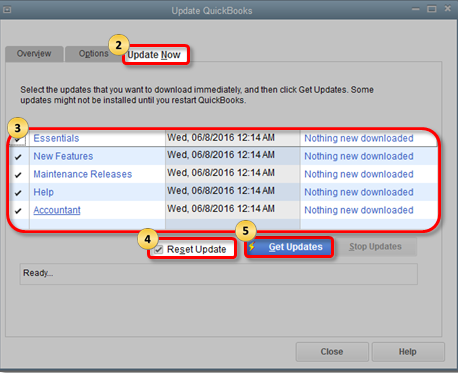
- Go to ‘Options,’ click on ‘Mark All’ and press the ‘Save’ button.
- Click on the ‘Reset Update’ checkbox from the ‘Update Now’ menu.

- Click on the ‘Get Updates’ button and shut down the application after the ‘Update Complete’ error message.
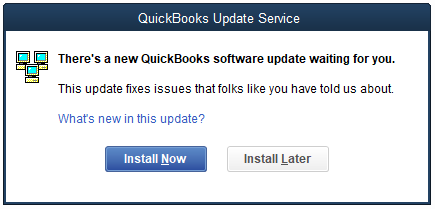
- Open your QuickBooks Desktop application again and click on the ‘Yes’ button when the ‘Install Updates’ pop-up appears.

- When the updates are installed, restart your computer.
Method 3: Running the Verify and Rebuild Data Utility
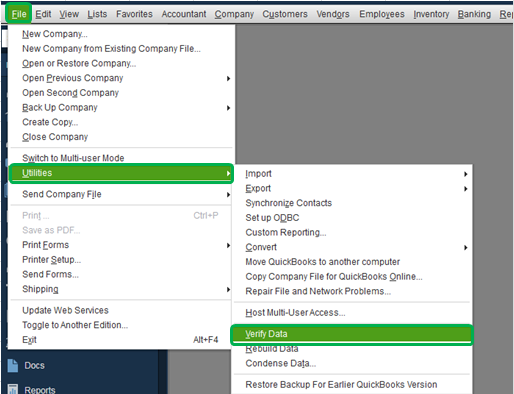
- Go to the ‘File’ menu after starting your QuickBooks application.
- Click on the ‘Utilities’ section and then click on ‘Verify Data.’

- The tool will scan your application for any issues and data corruption and show you a message.
- If the message says ‘Your Data has Lost Integrity,’ close the message.
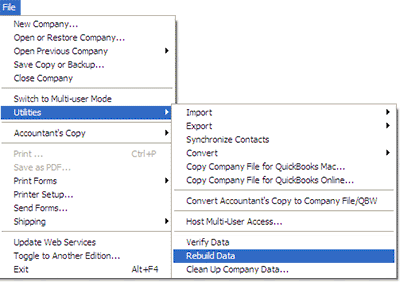
- Go to the ‘File’ menu again and click on the ‘Rebuild Data’ utility from the ‘Utilities’ section.

- You will be asked to approve the backup option.
- The tool will start repairing your file for any damage after you approve.
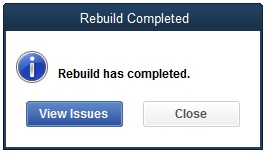
- When you receive the message ‘Rebuild has completed,’ press the ‘OK’ button.

- You should run the ‘Verify’ tool once more to ensure that no file corruption is left.
You may also read: QuickBooks Memorized Transactions Not Automatically Entering
The process removes any file corruption and repairs data damage, helping you get rid of the issue. Following these methods should help you resolve the QuickBooks automatic backup not working error easily. If you face issues while trying to fix the error and need an expert to assist you through the process, contact Proadvisor Solutions Support Team at 1.855.888.3080. Our experienced and certified experts will be happy to help you resolve the issue.

Erica Watson is writing about accounting and bookkeeping for over 7+ years, making even the difficult technical topics easy to understand. She is skilled at creating content about popular accounting and tax softwares such as QuickBooks, Sage, Xero, Quicken, etc. Erica’s knowledge of such softwares allows her to create articles and guides that are both informative and easy to follow. Her writing builds trust with readers, thanks to her ability to explain things clearly while showing a real understanding of the industry.


