Users can perform account reconciliations to validate financial accuracy, yet they may encounter beginning balance issues within their QuickBooks platform. Voided/deleted transactions and a switch from another QB Desktop version are some of the triggers for this issue. Beginning balance issues in QuickBooks can arise when the balance shows as zero or the amount is incorrect, which impacts the user’s accounting and financial operations. If you encounter this, follow the solutions below and fix beginning balance issues in QuickBooks Desktop.
The solutions below will help you resolve the beginning balance issues in QuickBooks app. However, if you don’t want to self-resolve the issue and need expert assistance, you can contact our Proadvisor solutions experts at 1.855.888.3080 to get immediate help in fixing the opening balance.
Table of Contents
What Reasons Lead to Beginning Balance Issues in QuickBooks?
Beginning balance issues in QB can arise due to many common reasons, which are mentioned in the list below –
- The account is not set up correctly, or the balance amount is missing or incorrect.
- Previously reconciled transactions might have been removed, voided, deleted, or edited.
- You have converted the file from another QuickBooks version, which can cause problems with the opening balance.
- A possible data damage or corruption in QB can be why the beginning balance shows as zero or is incorrect.
- Your web browser’s cache and cookies can cause problems while operating QB and impact the opening balance.
Learn Detailed Steps to Address Beginning Balance Issues in QuickBooks Desktop
In this section, we will learn the essential steps to fix the beginning balance issues when the amount is zero or incorrect –
Case 1 – The Beginning Balance is Zero
If the beginning balance shows zero, you must create a new journal entry and reconcile the balance using the steps below –
- From the Company menu in QBDT, select Make General Journal Entries, and edit the date to the correct beginning balance statement date.
- Next, move to the Account drop-down, select the correct account, and enter the opening balance in the Debit column.
- Further, select Opening Balance Equity, click Save, and once done, proceed with the reconciliation.
- To reconcile the beginning balance entry, move to the Banking menu, select Reconcile, and select the account.
- Enter the statement date, use the ending balance as per the journal entry, and click Continue.
- Go to the Deposits and Other Credits section, select Journal Entry, and select Reconcile Now; the difference amount should be displayed as zero.
Case 2 – The Beginning Balance is Incorrect
If a beginning balance is displayed but the amount is incorrect, follow the step-by-step process given below –
Step 1 – Find the Edited, Deleted, or Cleared Transactions
The first step is to find the transaction that is giving you problems by running the following reports –
Reconcile Discrepancy Report
- Go to the Reports menu, select Banking, then click Reconciliation Discrepancy and select Account.
- Click OK, go through the list of transactions that have changed since your last reconciliation, and use this report to identify the transaction causing QuickBooks beginning balance issue.
- Further, if you find a discrepancy, note the transaction date and the Entered/Last Modified date to determine when the change happened.
Audit Trail Report
- Select Banking from the Reports menu, select Previous Reconciliation, then pick the account you want to reconcile and select the most recent statement date.
- Choose Transactions cleared at the time of reconciliation (PDF file), then click Display and note the statement and the reconciliation creation date.
- Further, return to Reports, select Accountant & Taxes, then hit Audit Trail and set the Account filter to the account you want to reconcile.
- Select Customize Report, click Filters, choose Account, and select the account in the Account dropdown.
- Click Display, set the Date filter, keep the From field blank, and set the To date to the statement date.
- Next, hit OK and set the Entered/Modified filter with the From date set to the previous reconciliation creation date from the PDF file.
- Finally, set the To field as today’s date and see if any of the transactions in the report can account for the discrepancy in the beginning balance.
Previous Reconciliation Report
Note: Remember, if you use QuickBooks Pro, you can only access the last reconciliation report; for other reports, save a PDF copy on your hard drive.
- Go to the Reports menu in QBDT, select Banking, click Previous Reconciliation, and pick the account.
- Select the Statement Ending Date, click Display, and compare this report to past statements from your financial institution.
Step 2 – Correct the Discrepancy
Once the discrepancy is found, you might need to edit or re-enter the transaction to correct it.
Redo the Reconciliation
- Begin by taking the latest backup of your QuickBooks company file, then go to the Banking tab and select Reconcile.
- Select Undo Last Reconciliation, and when prompted, click Continue and OK to proceed.
- Once done, close out of the reconciliation and reopen it to reconcile the transaction again.
Enter an Offsetting Adjustment
Another way to handle the discrepancy is to ignore it and let QB enter an offsetting amount by selecting Enter Adjustment. Remember, QuickBooks will automatically create a Journal Entry under a special account called Reconciliation Discrepancies, and you can edit it from your Chart of Accounts.
If you need to locate the Journal Entry, you can either use the Find feature or view the last reconciliation report as follows –
Find feature
- Go to Edit, select Find, then click Advanced and choose Memo.
- Type Balance Adjustment, select Find, and all the balance adjustments will show on the next screen.
Previous Reconciliation report
- From the QBDT Reports menu, select Banking and click Previous Reconciliation.
- If a balance adjustment to offset the amount is made, a General Journal Entry will be displayed in the Cleared Transactions section.
Essential Steps to Fix Beginning Balance Issues in QuickBooks Online
If you are facing issues with the beginning balance in QBO, you must follow the resolution steps below to address it –
Solution 1: Remove the “R” Status of Your Transactions
If there are reconciled transactions, you will see a beginning balance in the system. However, if you have edited the reconciled entries, it will affect the beginning balance, which can lead to an incorrect amount. You can fix this beginning balance issue by undoing the reconciliation, going to the bank register, and removing the R status of the transaction as follows –
- Go to the Accounting menu in QBO, select Chart of Accounts, then find the account holding the transaction and select View Register.
- Further, select the transaction you want to unreconcile to expand the view, review the check column, and if the transaction is reconciled, an “R” will be displayed.
- Select the checkbox to change the letter in the box, keep selecting it until the box is blank to remove the transaction from the reconciliation, then click Save and exit the account register.
After the process ends, you can get assistance from your accountant to ensure the best course of action while fixing the opening balance.
Solution 2: Review the Bank Statement and Recreate the Journal Entry
If you see no opening balance entry, you must review your bank statements to ensure the opening balance is correct. However, if the beginning balance is incorrect, note down the date and amount of the oldest transaction and create a journal entry as follows –
- Go to the New button, select Journal entry from the Other tab, and enter a date that comes before the oldest transaction, which will be the opening balance date.
- Further, from the Account drop-down menu, select the account in which you want to enter the opening balance and a note in the Description field so you know what the journal entry is for.
- On the second line in the Account drop-down menu, select Opening Balance Equity, use your bank statements to enter the opening balance, and enter the balance of your real-life account pertaining to the date you picked for the beginning balance.
- Finally, enter the debits and credits based on the account type you entered on the first line (see Step 2) and complete the process.
Afterward, go back to the Chart of Accounts tab to reconcile the journal entry as shown in Solution 1 above.
However, if QuickBooks’ beginning balance issues persist, you must implement the steps in the next troubleshooting solution.
Solution 3: Run QBO in Incognito Mode and Remove the Cache
If recreating and reconciling the journal entry doesn’t help, there is a chance the cache and cookies in your web browser are stopping QBO from functioning correctly. To check if the issue lies with the browser cache, firstly, run QuickBooks Online in Incognito Mode using the shortcut keys below –
- Users of the Google Chrome browser should launch the browser in incognito mode by pressing the Ctrl + Shift + N keys together.
- Press Ctrl + Shift + P to run Mozilla Firefox and the Microsoft Edge browsers in a private browser (incognito) window.
- The Command + Shift + N keys will help you run the Safari browser in an incognito window.
After running QBO in the private mode, check if the QuickBooks beginning balance issues are resolved. If yes, then delete the browser cache and rerun QBO in the normal browser mode, as shown in the steps below –
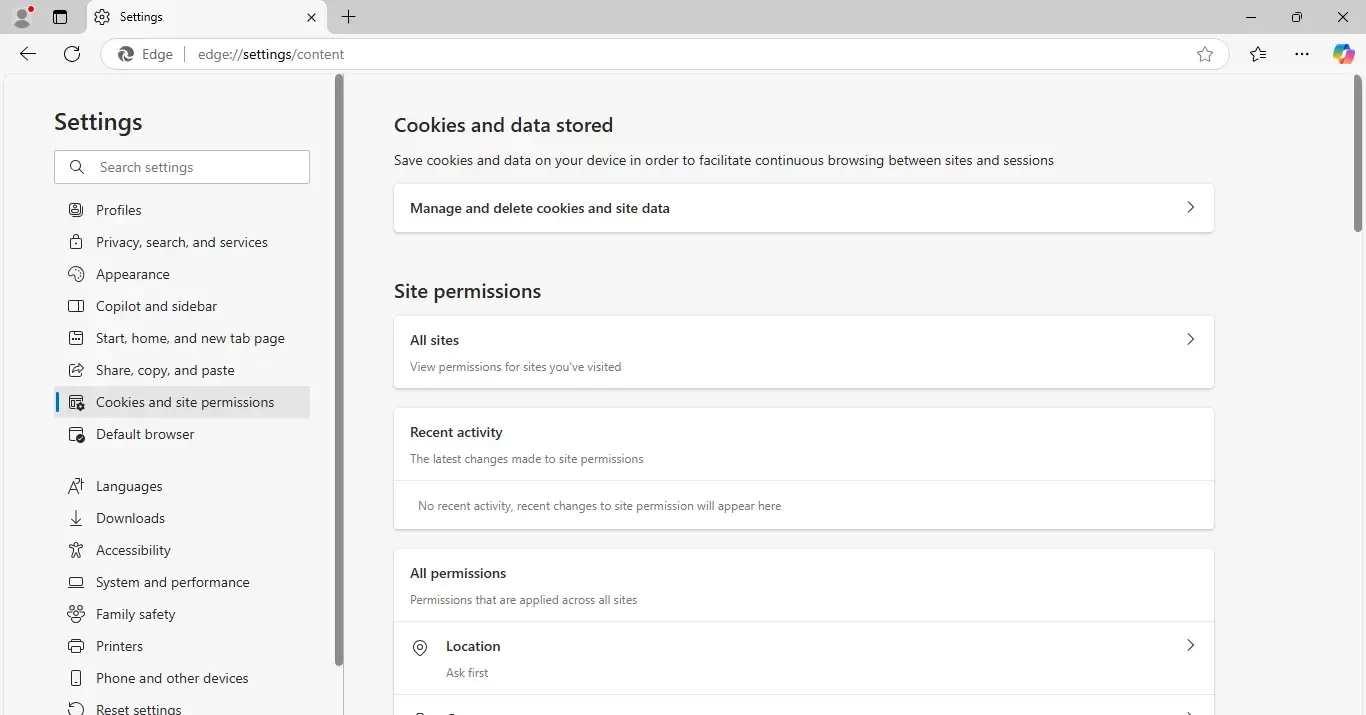
Microsoft Edge
- Start your Microsoft Edge browser, click the three dots from the top-right corner of the homepage, and move to the Settings tab.
- Further, click Cookies and Site Permissions from the left panel, navigate to the Manage and Delete Cookies and Site Data section, and select See all Cookies and Site Data.

- Finally, when the new dialog box emerges, choose Remove All to clear the Microsoft Edge browser cache and cookies, and restart the browser.
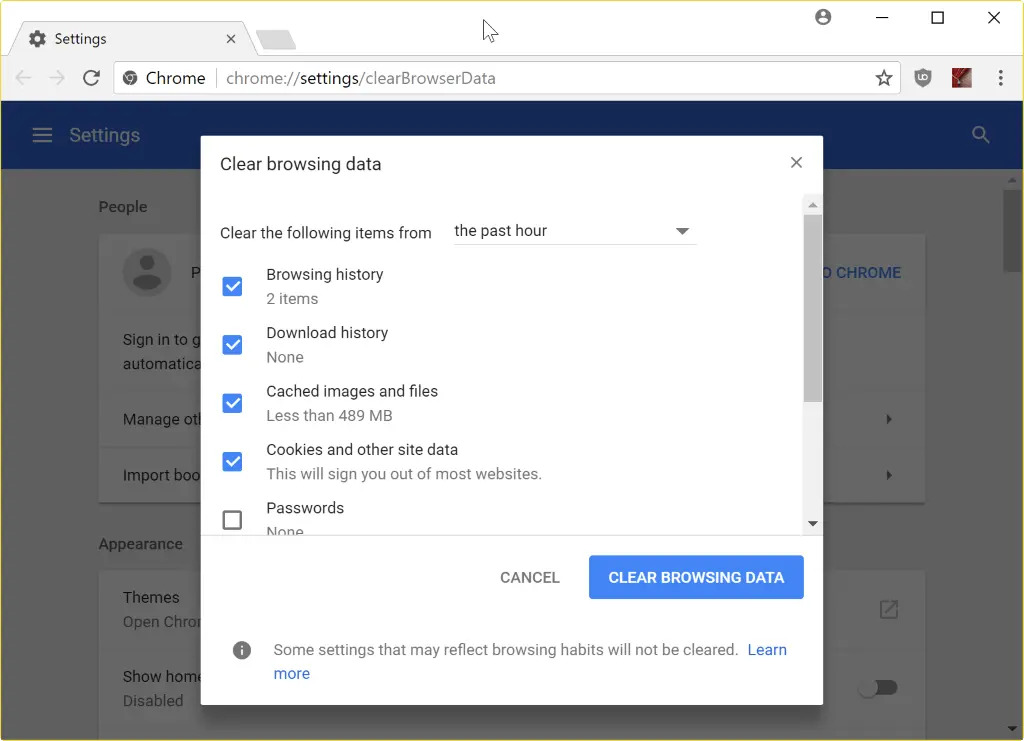
Google Chrome
- Go to the top-right corner of the Google Chrome page to access the three dots and proceed to the Tools section.
- Further, click History, click Clear Browsing Data, then go to the Clear Browsing Data box and select Cookies and Site Data and Cached Images and Files checkbox.
- Once done, choose the time range (like All Time or a single hour) and hit the Clear Browsing Data button to proceed with the browser cache removal.

Once the browser cache and cookies are removed, check the status of QuickBooks Online beginning balance issues to ensure they are successfully fixed.
The solutions and instructions given in this detailed blog will help you fix beginning balance issues in QuickBooks Desktop and Online. However, if these issues continue even after troubleshooting, you can contact our expert assistants at 1.855.888.3080 to get direct help in fixing the opening balance.
Can switching from other QuickBooks versions lead to problems with the reconciliation and opening balance amounts?
Yes, there are certain limitations when you switch from one QuickBooks variant to another that impact the reconciliation. QuickBooks Desktop for Mac and QuickBooks Online has different reconciliation processes; thus, some transactions might be unreconciled while switching the versions, which impacts your opening balance.
What are the key steps to resolve beginning balance issues in QuickBooks?
You can eliminate the incorrect beginning balance problem by reviewing the Chart of Accounts and locating the accounts facing discrepancies. Then, you must view the account register, identify the opening balance entry, and edit the amount to reflect the correct balance.
What factors might lead to beginning balance discrepancies in QuickBooks Desktop and Online versions?
If your beginning balance is incorrect, the discrepancy can arise if a previously reconciled transaction has been deleted or edited. Moreover, the balance discrepancy can occur if the user has manually reconciled the transaction, so it doesn’t reflect in the next reconciliation statement.

Erica Watson is writing about accounting and bookkeeping for over 7+ years, making even the difficult technical topics easy to understand. She is skilled at creating content about popular accounting and tax softwares such as QuickBooks, Sage, Xero, Quicken, etc. Erica’s knowledge of such softwares allows her to create articles and guides that are both informative and easy to follow. Her writing builds trust with readers, thanks to her ability to explain things clearly while showing a real understanding of the industry.